
How can we help you?
Transfers
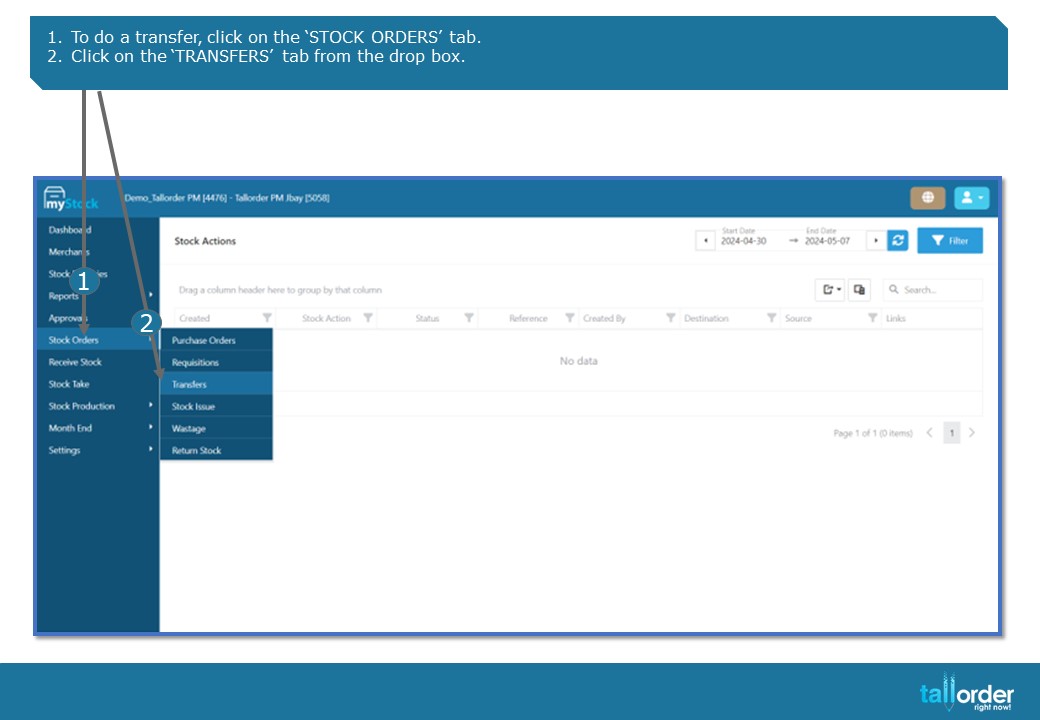
1.To do a transfer, click on the ‘STOCK ORDERS’ tab.
2.Click on the ‘TRANSFERS’ tab from the drop box.

3. Click on the ‘ADD STOCK TRANSFER’ button.

- Enter the name of the transfer, under the ‘NAME’ field.

- Click on the drop box next to the ‘RECEIVING LOCATION’ field, to select the appropriate supplier.
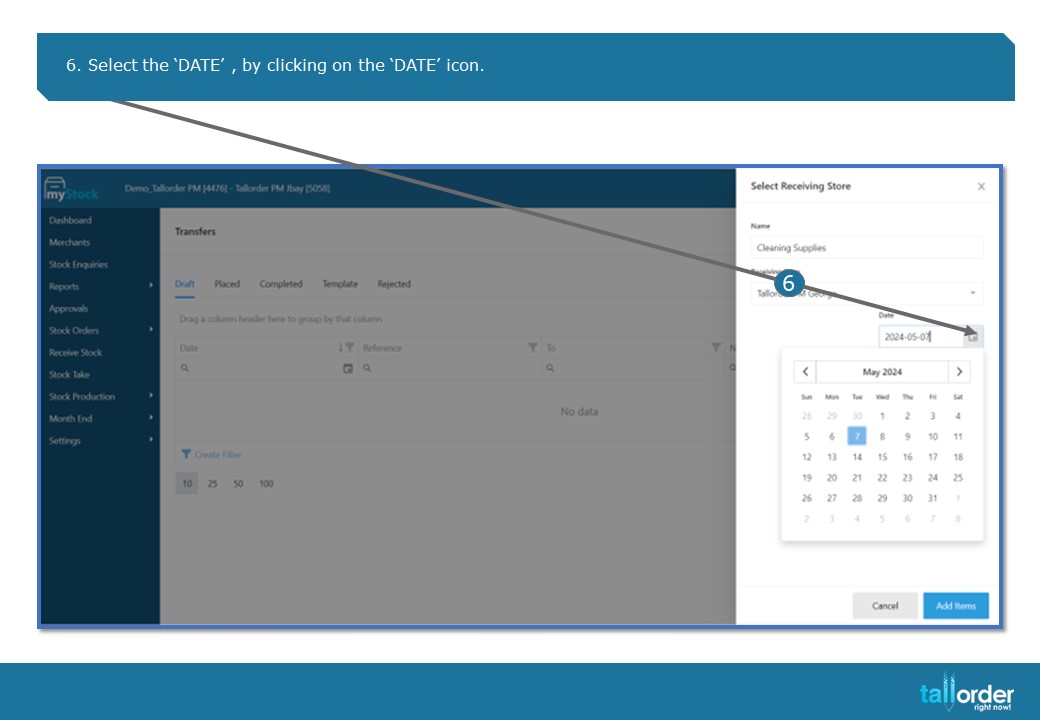
6. Select the ‘DATE’ , by clicking on the ‘DATE’ icon.

- Select the ‘EXPECTED DATE’, by clicking on the ‘DATE’ icon below.
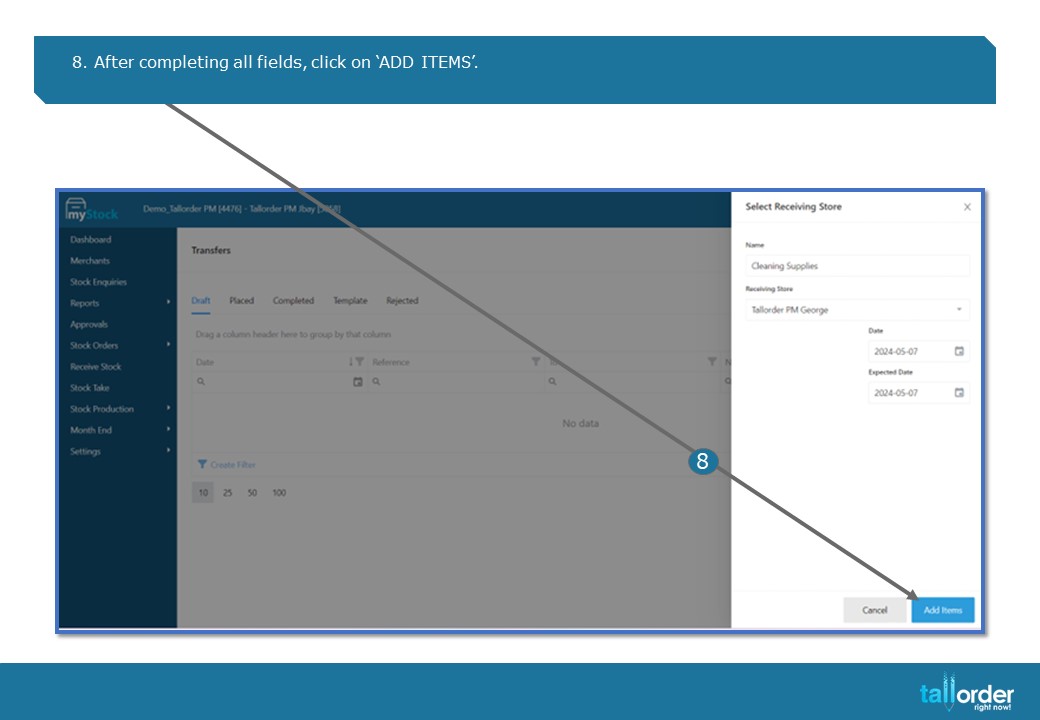
- After completing all fields, click on ‘ADD ITEMS’.
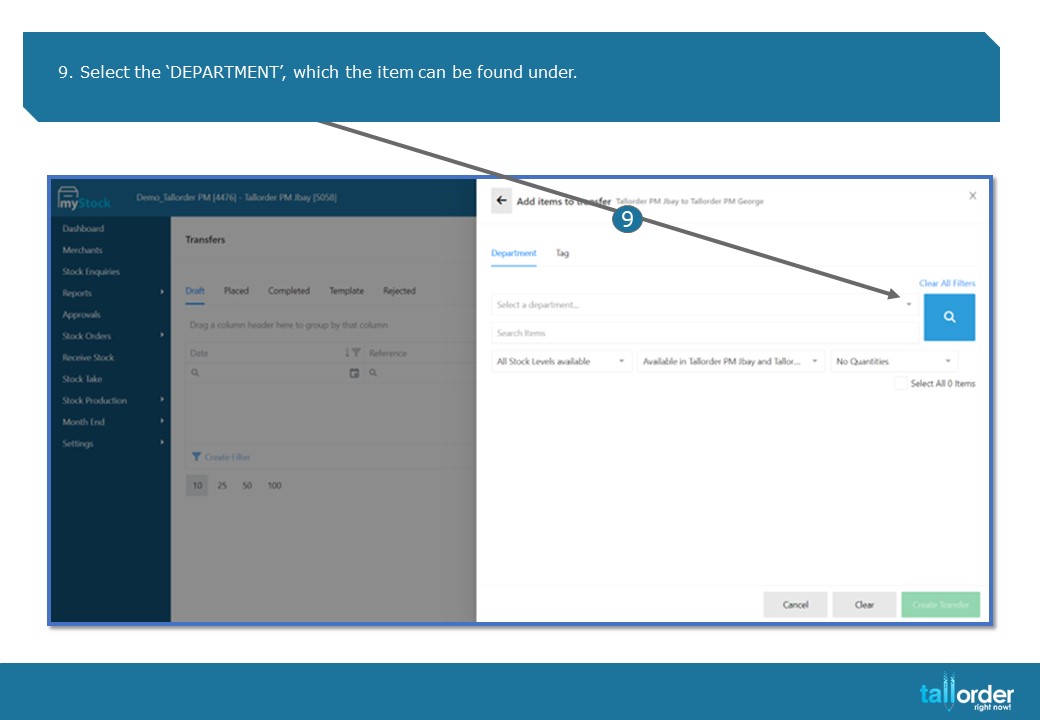
9. Select the ‘DEPARTMENT’, which the item can be found under.

- Select the department by clicking on the tick box next to the departments listed below.

- Type in the items name, in the ‘SEARCH ITEMS’ field.
- Click on the ‘SEARCH’ icon.

- Select the quantity of the item that you wish to transfer, in the below field.
- Click on the ‘CREATE TRANSFER’ button.
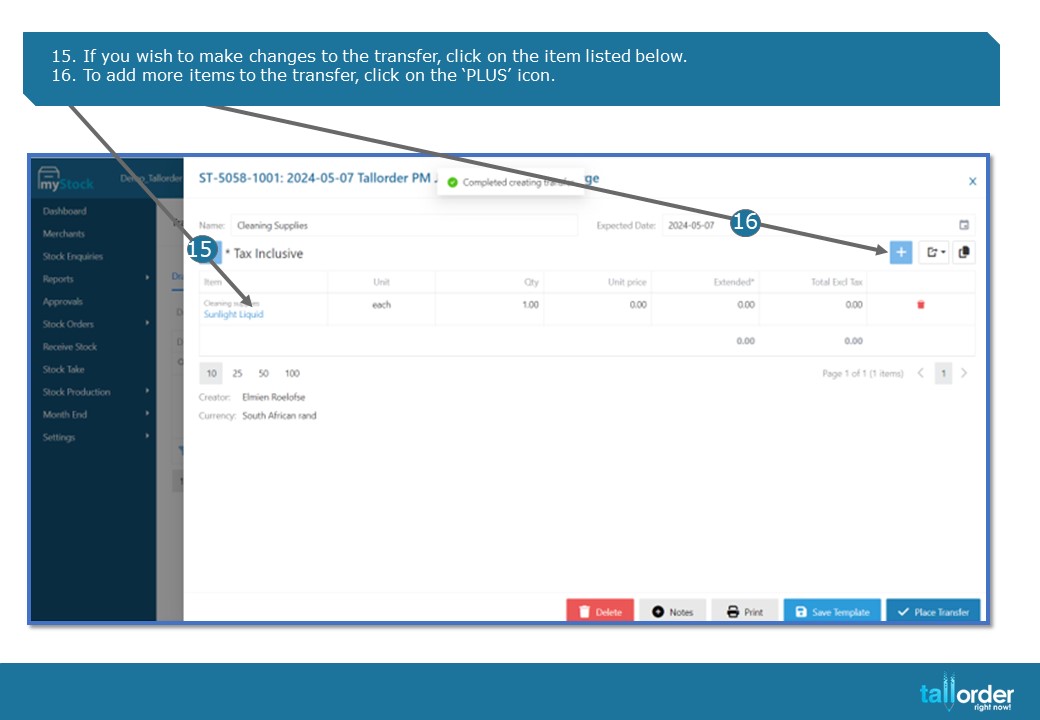
- If you wish to make changes to the transfer, click on the item listed below.
- To add more items to the transfer, click on the ‘PLUS’ icon.
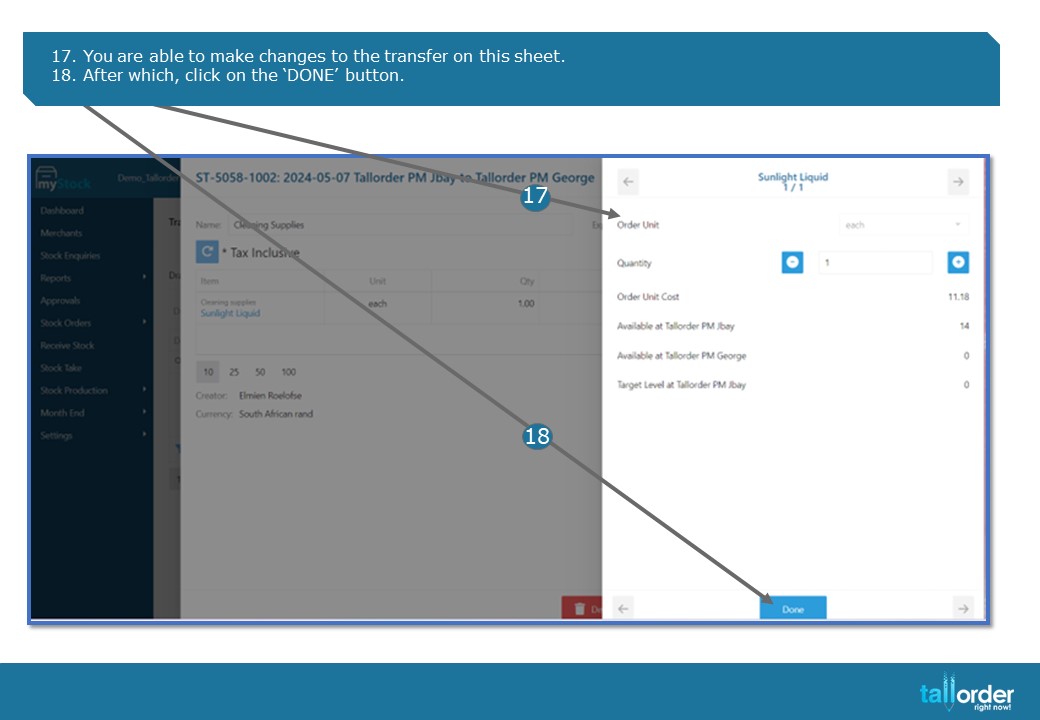
- You are able to make changes to the transfer on this sheet.
- After which, click on the ‘DONE’ button.
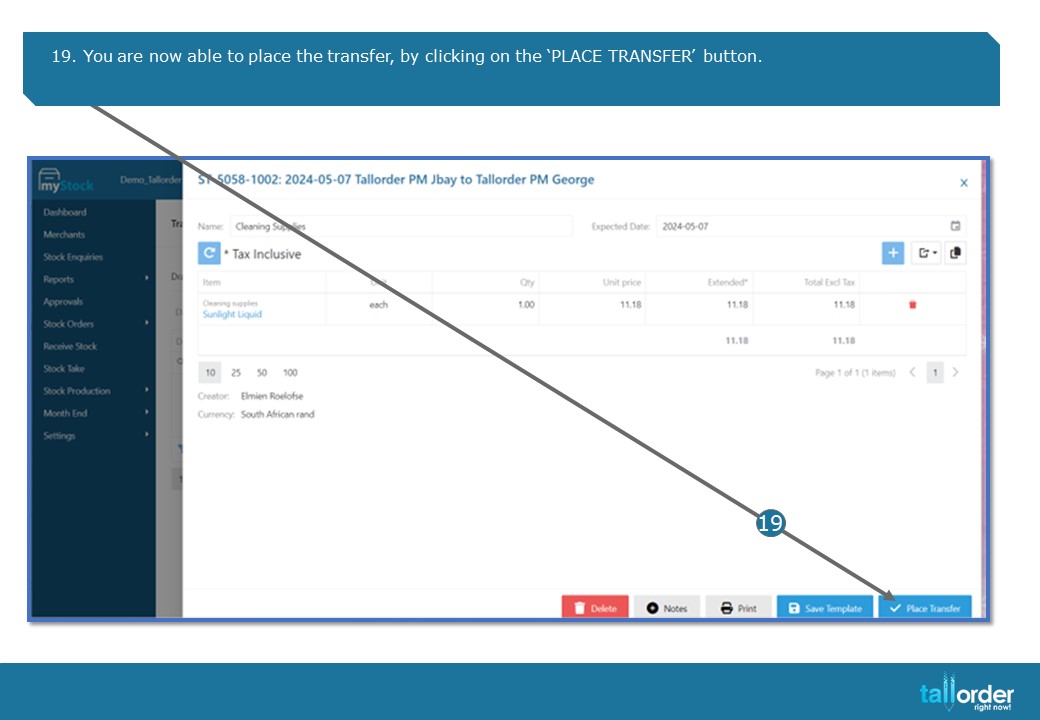
- You are now able to place the transfer, by clicking on the ‘PLACE TRANSFER’ button.

- The transfer is now placed and can also be printed by clicking on the ‘PRINT’ button.
STEP-BY-STEP BREAKDOWN
- To do a transfer, click on the ‘STOCK ORDERS’ tab.
- Click on the ‘TRANSFERS’ tab from the drop box.
- Click on the ‘ADD STOCK TRANSFER’ button.
- Enter the name of the transfer, under the ‘NAME’ field.
- Click on the drop box next to the ‘RECEIVING LOCATION’ field, to select the appropriate supplier.
- Select the ‘DATE’ , by clicking on the ‘DATE’ icon.
- Select the ‘EXPECTED DATE’, by clicking on the ‘DATE’ icon below.
- After completing all fields, click on ‘ADD ITEMS’.
- Select the ‘DEPARTMENT’, which the item can be found under.
- Select the department by clicking on the tick box next to the departments listed below.
- Type in the items name, in the ‘SEARCH ITEMS’ field.
- Click on the ‘SEARCH’ icon.
- Select the quantity of the item that you wish to transfer, in the below field.
- Click on the ‘CREATE TRANSFER’ button.
- If you wish to make changes to the transfer, click on the item listed below.
- To add more items to the transfer, click on the ‘PLUS’ icon.
- You are able to make changes to the transfer on this sheet.
- After which, click on the ‘DONE’ button.
- You are now able to place the transfer, by clicking on the ‘PLACE TRANSFER’ button.
- The transfer is now placed and can also be printed by clicking on the ‘PRINT’ button.