
How can we help you?
Purchase order from Pending Purchase order
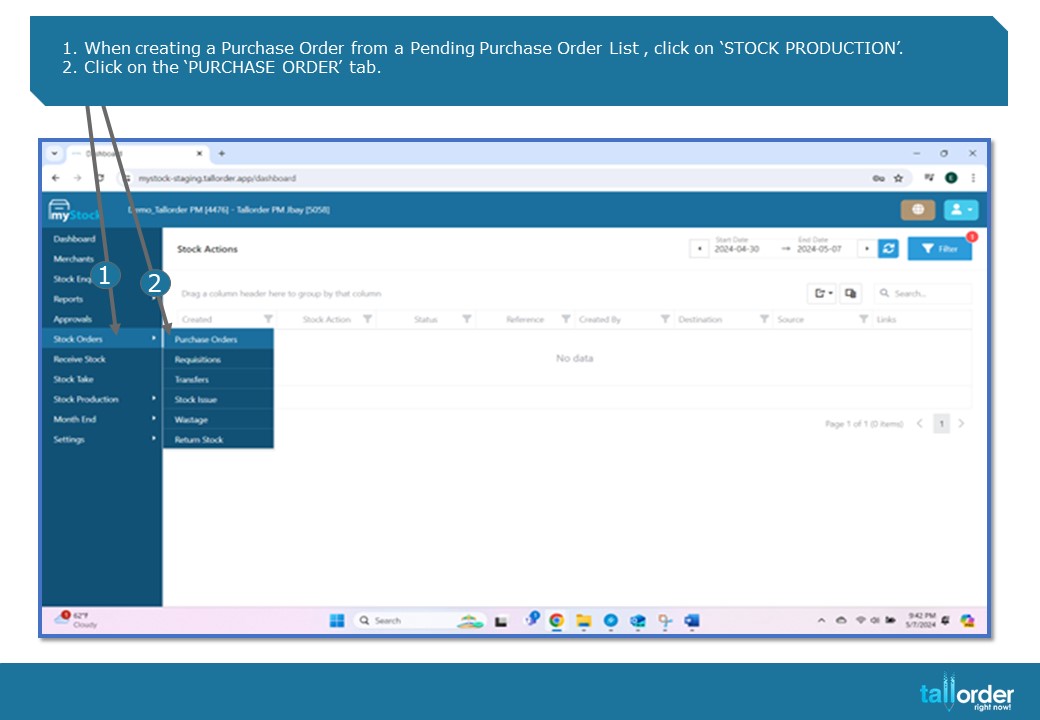
- When creating a Purchase Order from a Pending Purchase Order List , click on ‘STOCK PRODUCTION’.
- Click on the ‘PURCHASE ORDER’ tab.

- Click on the ‘PO FROM PENDING PO LIST’.

- The pending purchase orders will be listed below.
- Click on the drop box next to the ‘ALL STORES’ field to view the list by Stock Location.

- Click on the tick box next to the item to select the item, alternatively tick the box in the highlighted bar to ‘SELECT ALL’.
- Click on the ‘ADD SELECTED’ button below.
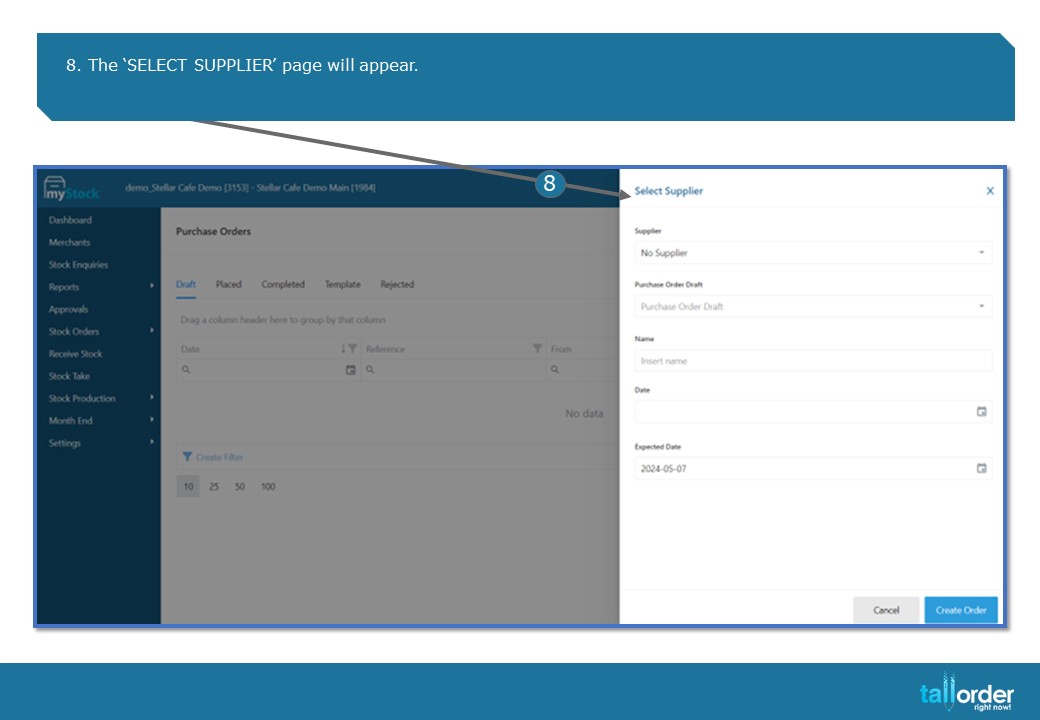
8. The ‘SELECT SUPPLIER’ page will appear.
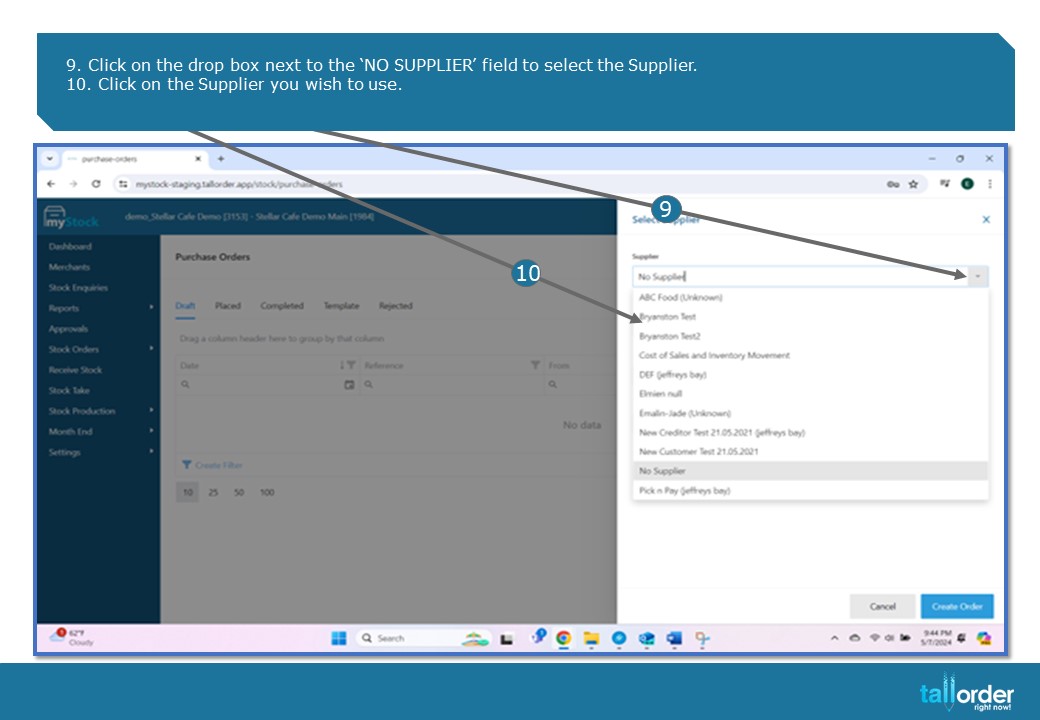
- Click on the drop box next to the ‘NO SUPPLIER’ field to select the Supplier.
- Click on the Supplier you wish to use.

- Select the ‘DATE’ by clicking on the ‘DATE’ icon.

- Now select the ‘EXPECTED DATE’ by clicking on the ‘DATE’ icon below.

- After which, click on the ‘CREATE ORDER’ button below.
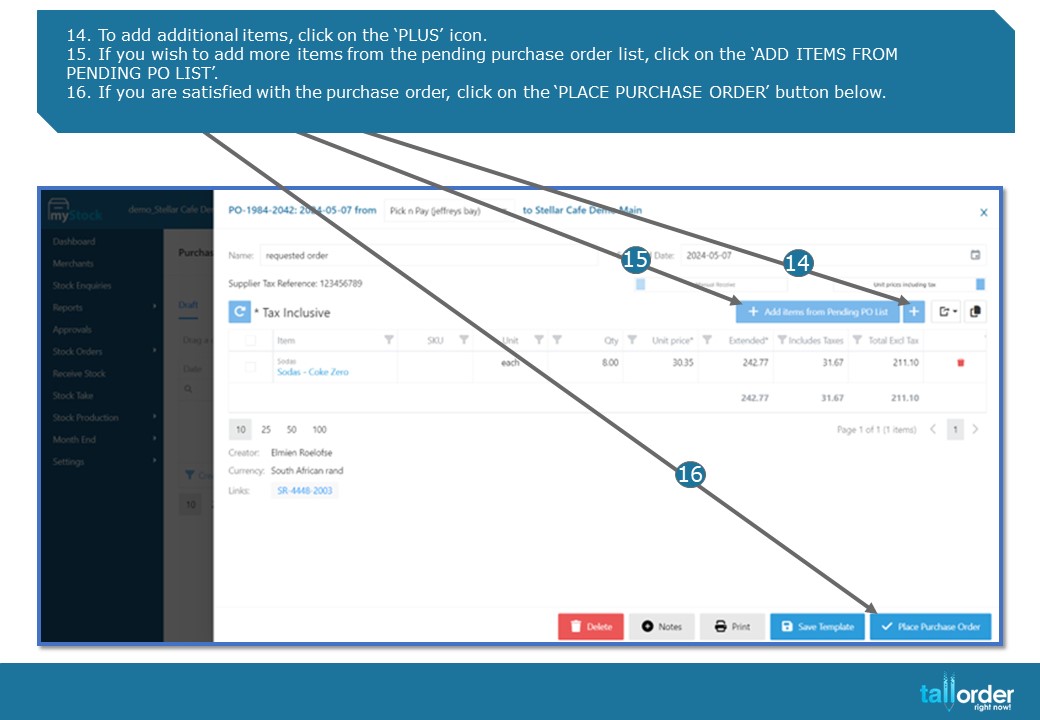
- To add additional items, click on the ‘PLUS’ icon.
- If you wish to add more items from the pending purchase order list, click on the ‘ADD ITEMS FROM PENDING PO LIST’.
- If you are satisfied with the purchase order, click on the ‘PLACE PURCHASE ORDER’ button below.

- Click on the ‘PRINT’ button below to now print the created purchase order.
- To place the purchase order, click on the ‘PLACE PURCHASE ORDER’ button below.

- Enter the ‘INVOICE NUMBER’ in the invoice field.
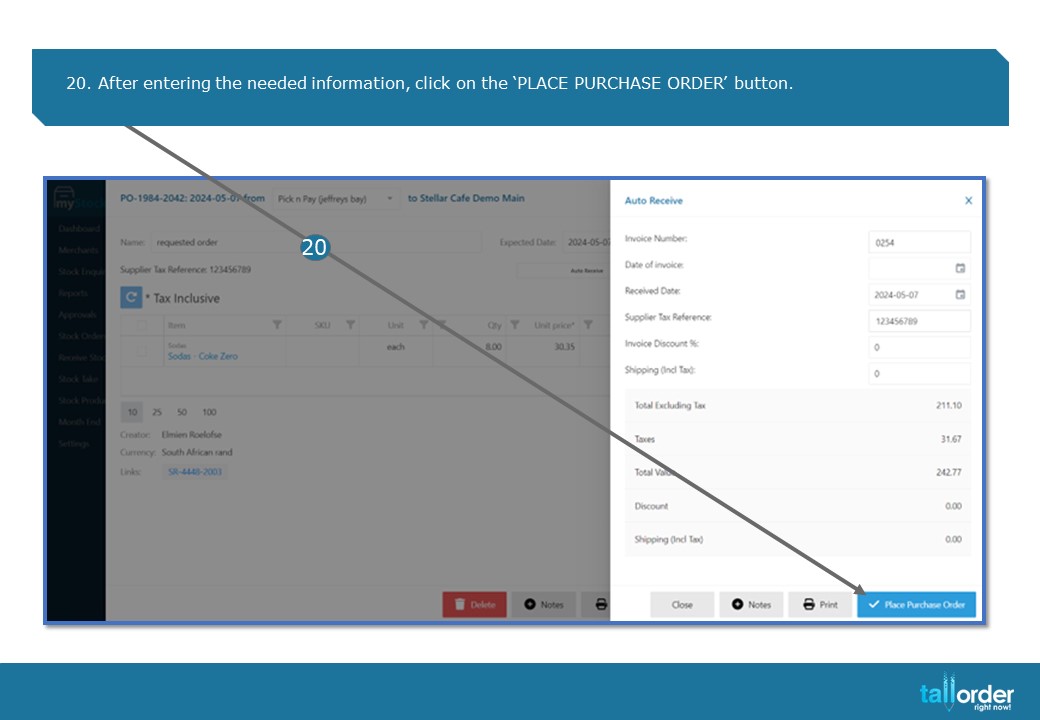
20. After entering the needed information, click on the ‘PLACE PURCHASE ORDER’ button.
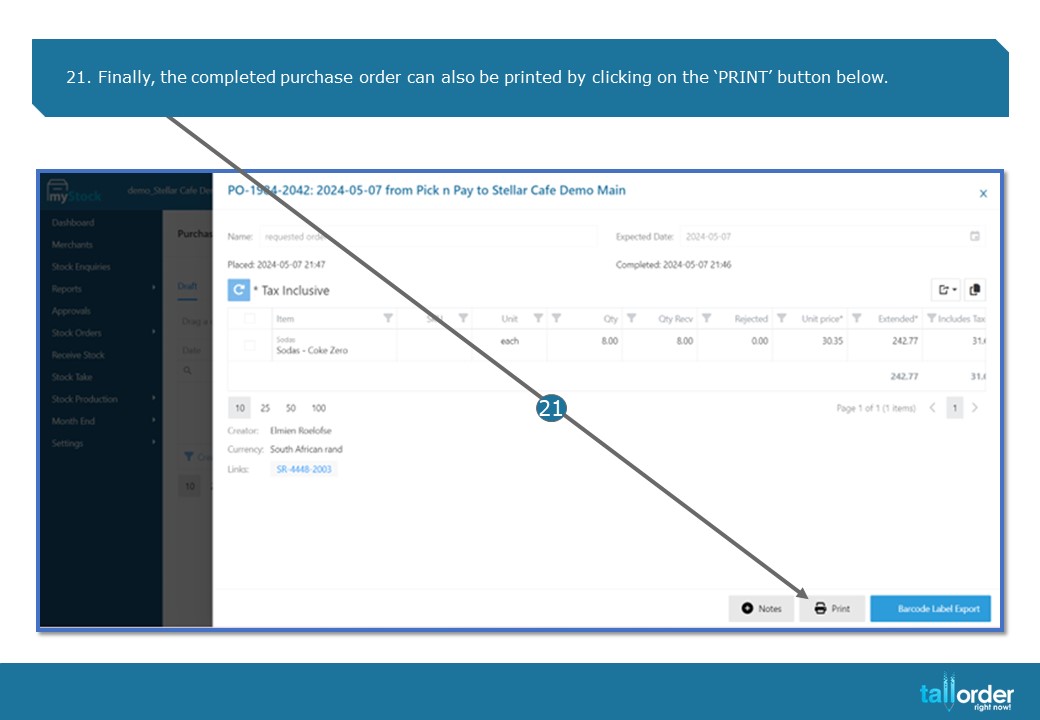
21. Finally, the completed purchase order can also be printed by clicking on the ‘PRINT’ button below.
STEP-BY-STEP BREAKDOWN
- When creating a Purchase Order from a Pending Purchase Order List , click on ‘STOCK PRODUCTION’.
- Click on the ‘PURCHASE ORDER’ tab.
- Click on the ‘PO FROM PENDING PO LIST’
- The pending purchase orders will be listed below.
- Click on the drop box next to the ‘ALL STORES’ field to view the list by Stock Location.
- Click on the tick box next to the item to select the item, alternatively tick the box in the highlighted bar to ‘SELECT ALL’.
- Click on the ‘ADD SELECTED’ button below.
- The ‘SELECT SUPPLIER’ page will appear.
- Click on the drop box next to the ‘NO SUPPLIER’ field to select the Supplier.
- Click on the Supplier you wish to use.
- Select the ‘DATE’ by clicking on the ‘DATE’ icon.
- Now select the ‘EXPECTED DATE’ by clicking on the ‘DATE’ icon below.
- After which, click on the ‘CREATE ORDER’ button below.
- To add additional items, click on the ‘PLUS’ icon.
- If you wish to add more items from the pending purchase order list, click on the ‘ADD ITEMS FROM PENDING PO LIST’.
- If you are satisfied with the purchase order, click on the ‘PLACE PURCHASE ORDER’ button below.
- Click on the ‘PRINT’ button below to now print the created purchase order.
- To place the purchase order, click on the ‘PLACE PURCHASE ORDER’ button below.
- Enter the ‘INVOICE NUMBER’ in the invoice field.
- After entering the needed information, click on the ‘PLACE PURCHASE ORDER’ button.
- Finally, the completed purchase order can also be printed by clicking on the ‘PRINT’ button below.