
How can we help you?
How to do a stock take

- When starting a Stock Take, click on the ‘STOCK TAKE’ tab.
- The different types of Stock Take Types are listed below.
- Click on the Stock Take Type you wish to issue.
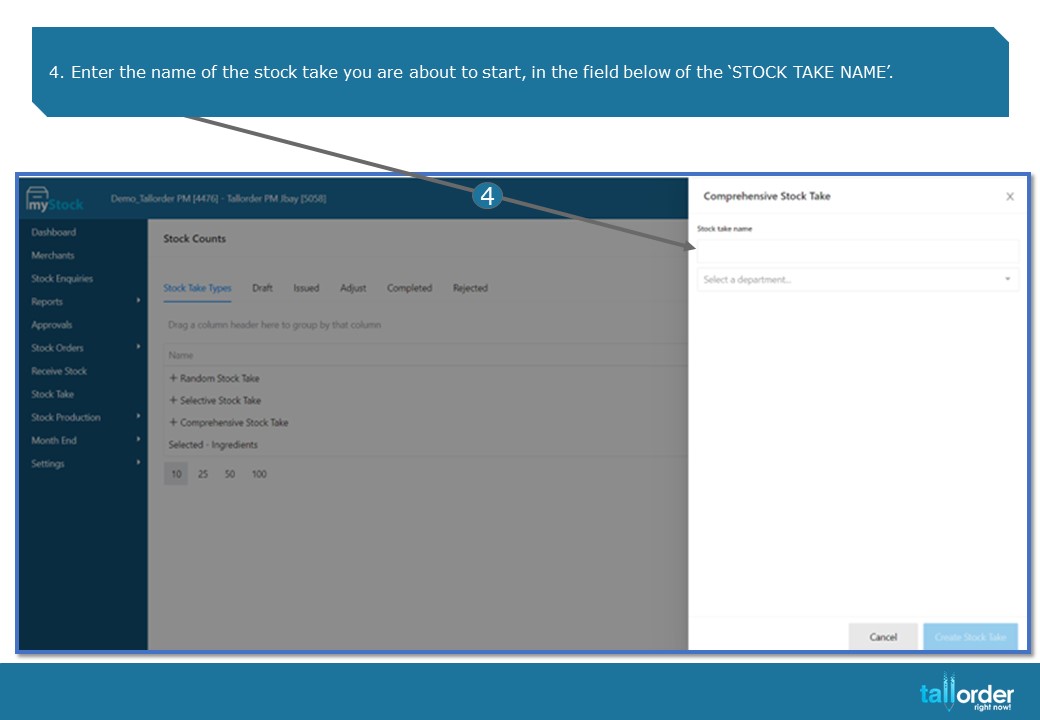
- Enter the name of the stock take you are about to start, in the field below of the ‘STOCK TAKE NAME’.

- Click on the drop box next to the ‘SELECT A DEPARTMENT’ field.
- Click on the department / departments you wish to do a Stock Take on, by selecting the tick box next to the department.

- You can select more than one department.

- After which, click on the ‘CREATE STOCK TAKE’ button.

- The departments and items you have selected will be listed below.
- You can discard the template by clicking on the ‘DISCARD TEMPLATE’ button.
- If you wish to save the stock take as a template, click on the ‘SAVE TEMPLATE’ button.
- If you are satisfied with the stock take, click on the ‘CREATE DRAFT’ button.

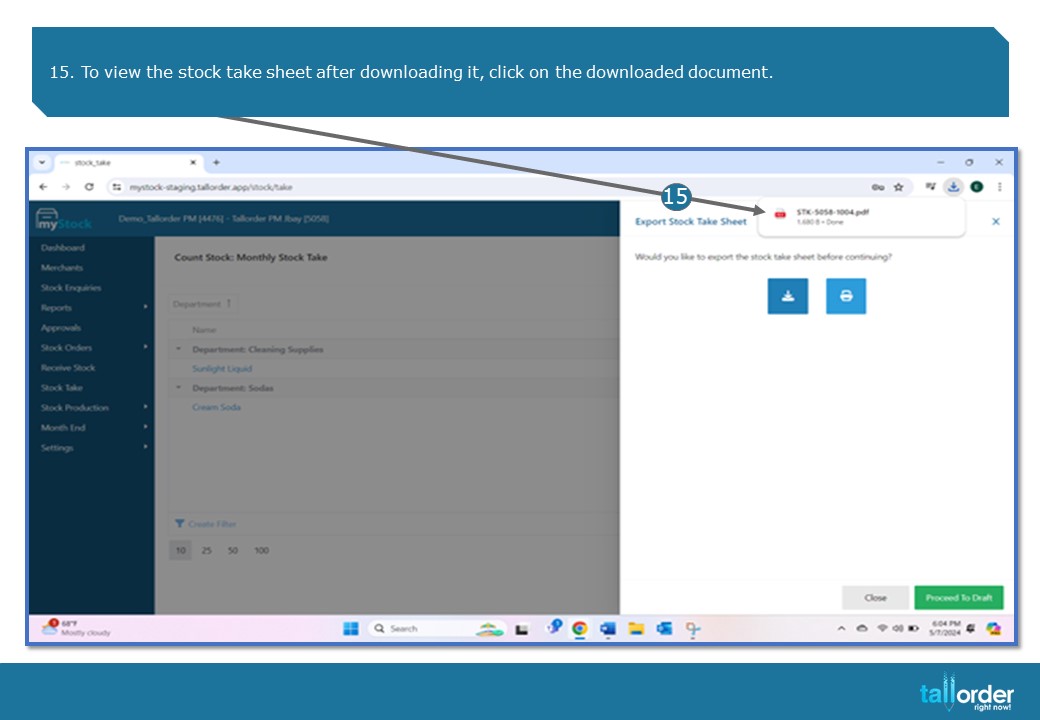
- You can now print the stock take sheet, by clicking on the ‘PRINT’ icon.
- You are also able to download the stock take sheet by clicking on the ‘DOWNLOAD’ icon.

- To view the stock take sheet after downloading it, click on the downloaded document.
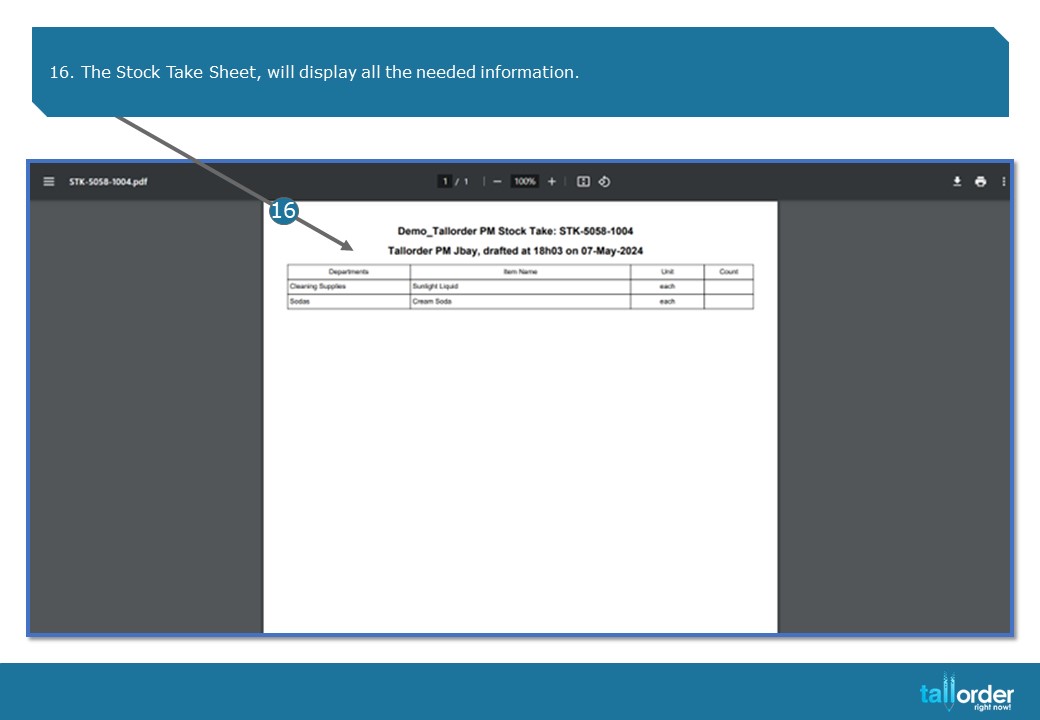
- The Stock Take Sheet, will display all the needed information.
- The Stock Take will automatically be moved to the ‘DRAFT’ tab.
- Click on the Stock Take Sheet below.

- The Stock Take will automatically be moved to the ‘DRAFT’ tab.
- Click on the Stock Take Sheet below.
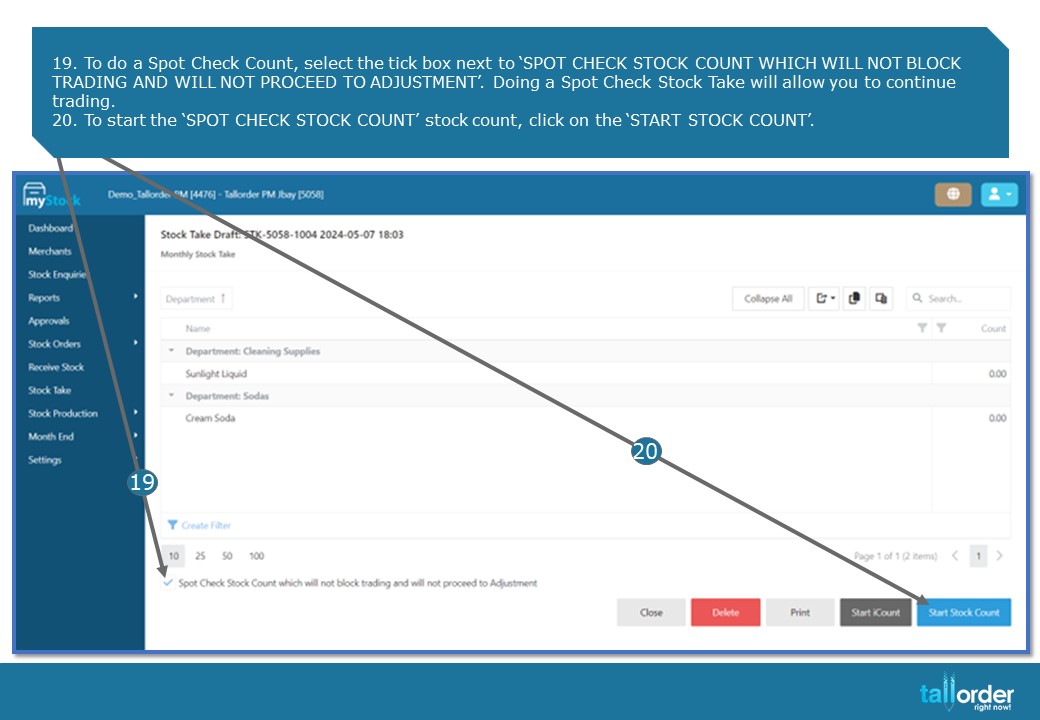
- To do a Spot Check Count, select the tick box next to ‘SPOT CHECK STOCK COUNT WHICH WILL NOT BLOCK TRADING AND WILL NOT PROCEED TO ADJUSTMENT’. Doing a Spot Check Stock Take will allow you to continue trading.
- To start the ‘SPOT CHECK STOCK COUNT’ stock count, click on the ‘START STOCK COUNT’.
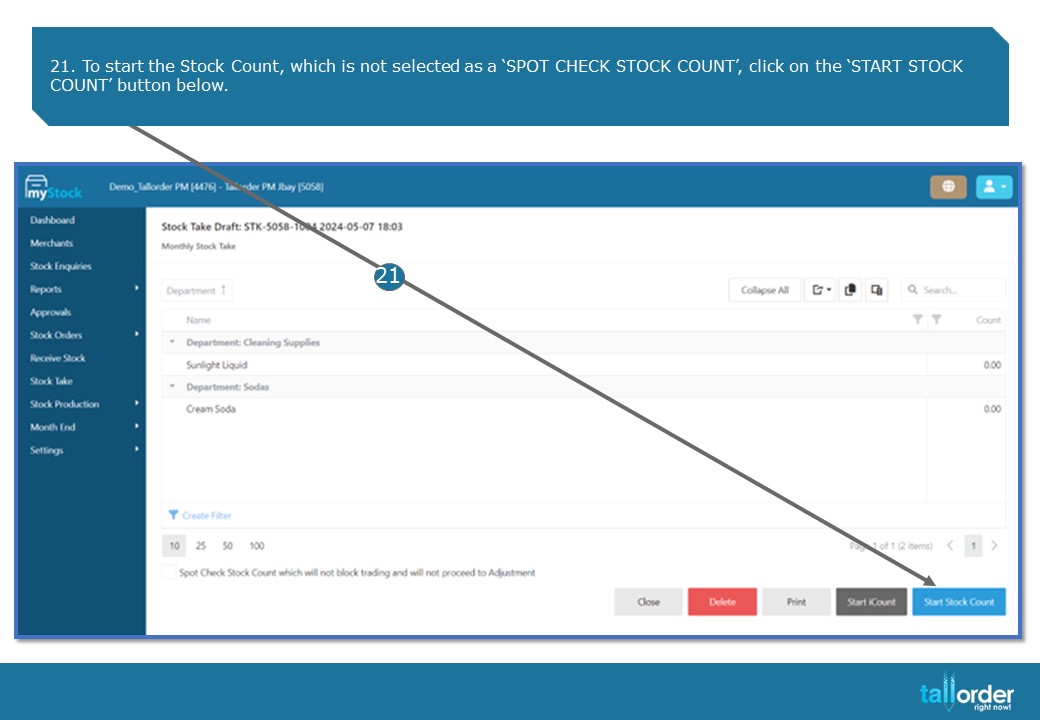
- To start the Stock Count, which is not selected as a ‘SPOT CHECK STOCK COUNT’, click on the ‘START STOCK COUNT’ button below.
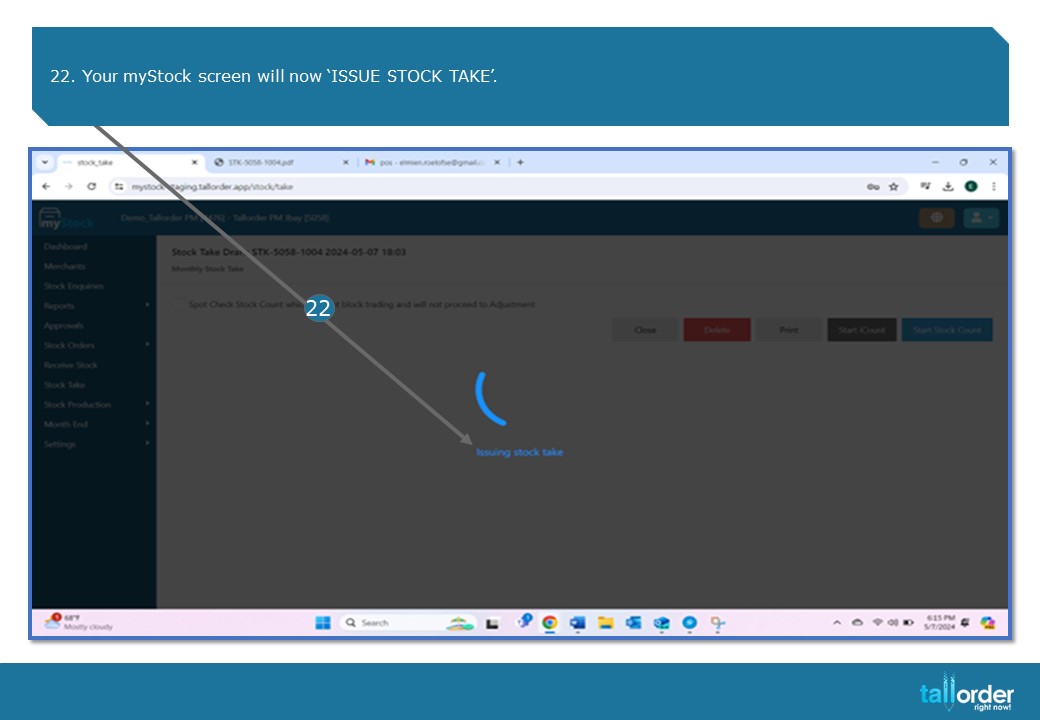
- Your myStock screen will now ‘ISSUE STOCK TAKE’.

- The ‘EXPORT STOCK TAKE SHEET’ allows you to print the Stock Take Sheet, by clicking on the ‘PRINT’ icon.
- You are also able to download the Stock Take Sheet by clicking on the ‘DOWNLOAD’ icon.
- After which click on the ‘PROCEED TO COUNT STOCK’ button.
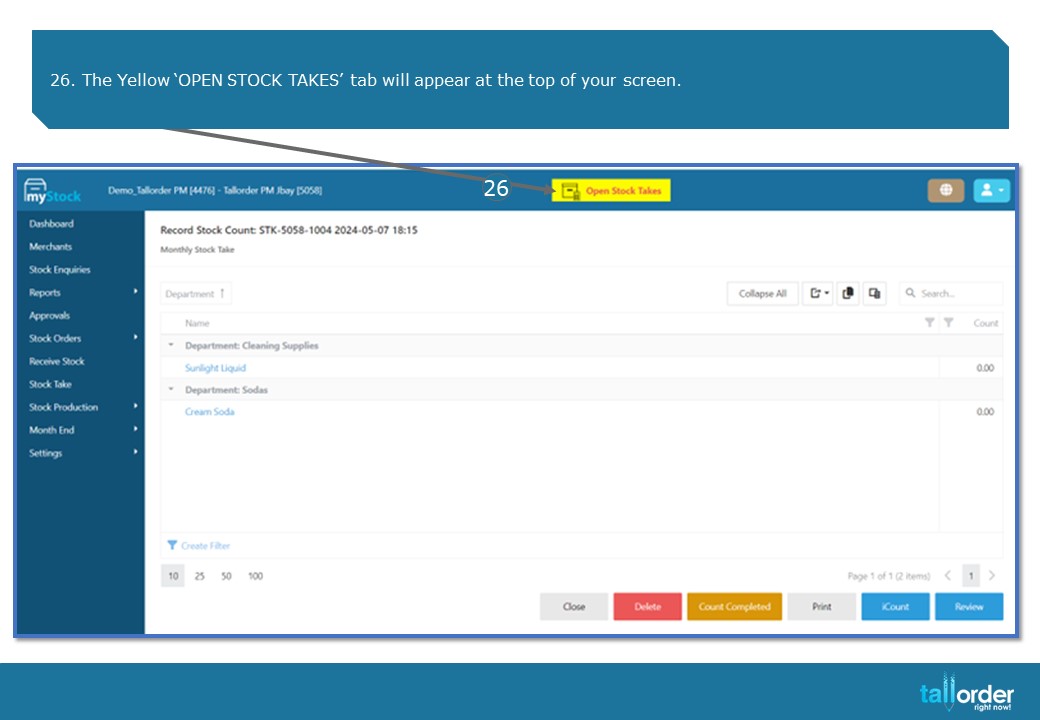
- The Yellow ‘OPEN STOCK TAKES’ tab will appear at the top of your screen.

- You will now see the below message on your ‘TALLORDER POS SYSTEM’, as you will not be able to trade during the stock take, unlike with a ‘SPOT CHECK STOCK TAKE’ which doesn’t affect trading.

- As soon as the stock count is complete, click on the ‘COUNT COMPLETE’ button.
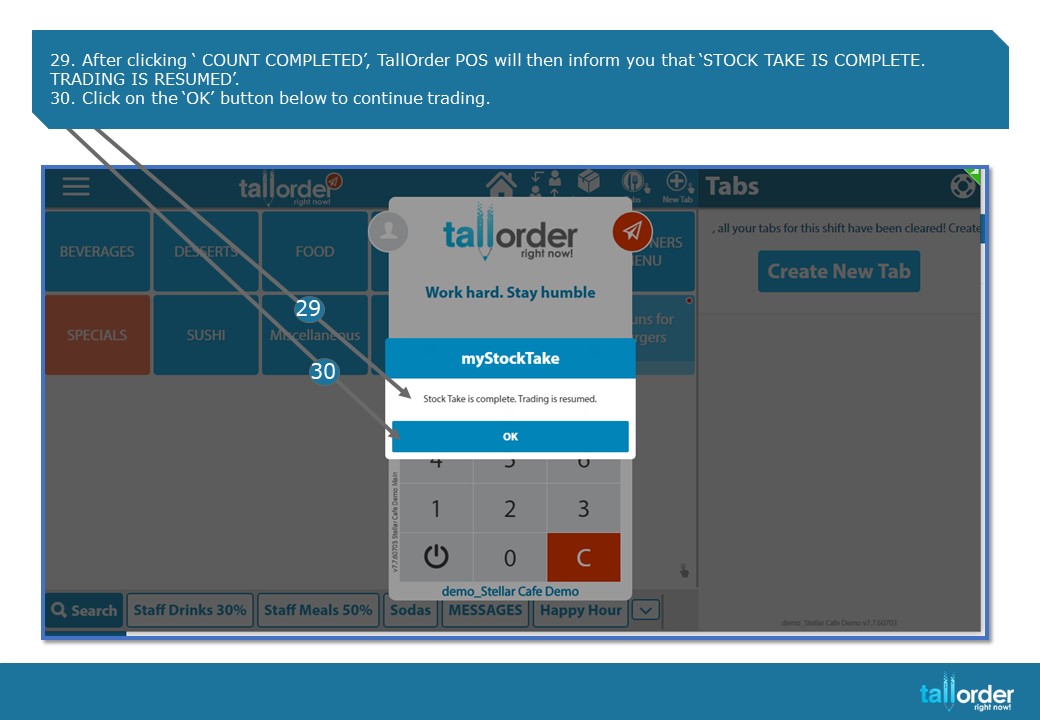
- After clicking ‘ COUNT COMPLETED’, TallOrder POS will then inform you that ‘STOCK TAKE IS COMPLETE. TRADING IS RESUMED’.
- Click on the ‘OK’ button below to continue trading.

- The Stock Items, listed on the Stock Take Count Sheet will be shown, allowing you to enter the amount counted for the above listed item.
- Enter the amount counted in the field next to the ‘COUNT’ field.
- To move to the next stock item, click on the ‘ARROW’.

- You are able to see which stock item you are working on is indicated above, as seen here.
- When you have entered in all the counted amounts of the stock items, click on the ‘UPDATE’.
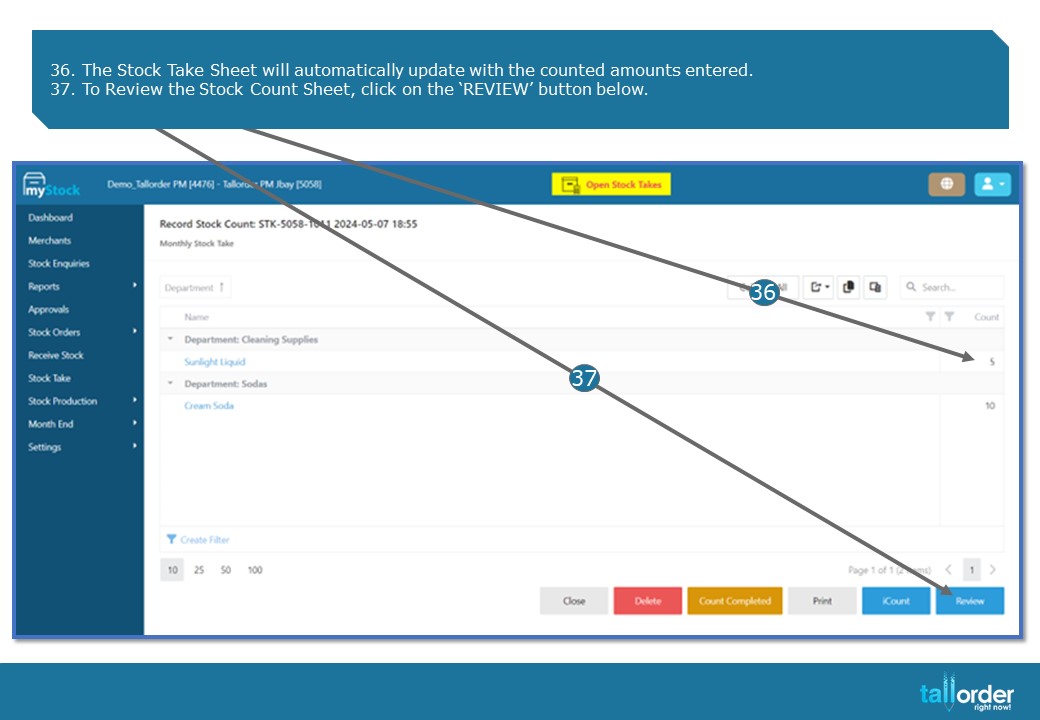
- The Stock Take Sheet will automatically update with the counted amounts entered.
- To Review the Stock Count Sheet, click on the ‘REVIEW’ button below.

- The Stock Count Review, will show you the info as seen below.
- You are able to print the Stock Count Review by clicking on the ‘PRINT’ button.

- If the Variants for a specific item doesn’t match and you would like to request a recount of the specific item, select the tick box next to the item in question.
- Now click on the ‘RECOUNT’ button below.

- The Recount Confirmation page will appear, confirming that you would like to start the Recount.
- To confirm the Recount, click on the ‘CONFIRM’ button.

- If you are satisfied with the Stock Count Review, click the ‘COMPLETE’ button.

- After clicking ‘COMPLETE’, TallOrder POS will then inform you that ‘STOCK TAKE IS COMPLETE. TRADING IS RESUMED’.
- Click on the ‘OK’ button below to continue trading.
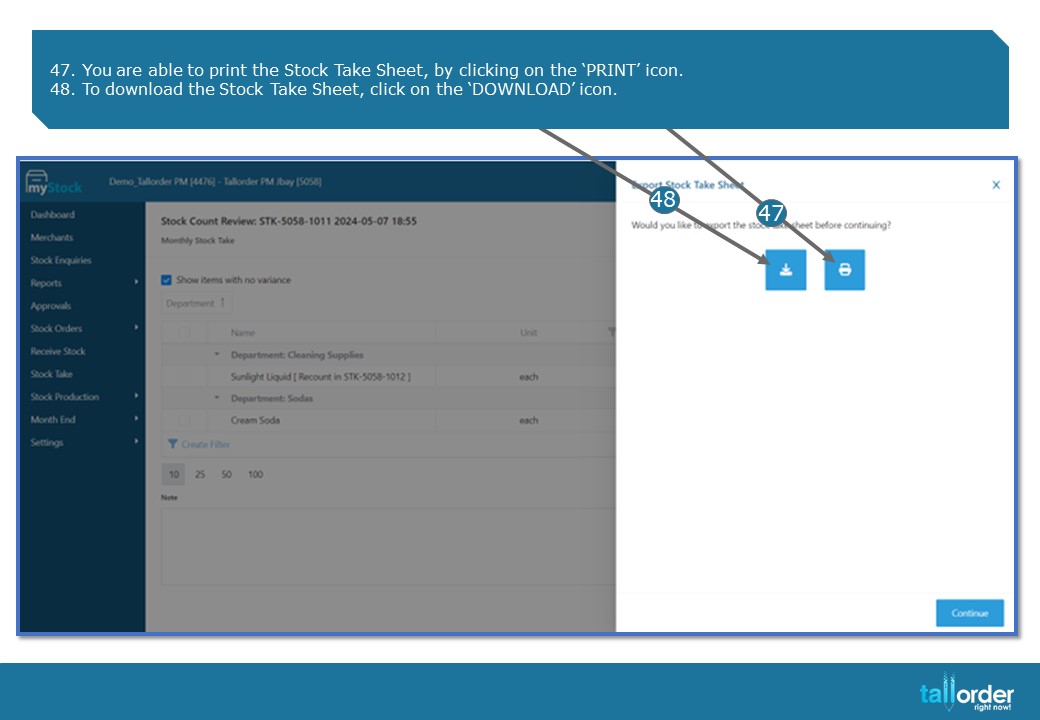
- You are able to print the Stock Take Sheet, by clicking on the ‘PRINT’ icon.
- To download the Stock Take Sheet, click on the ‘DOWNLOAD’ icon.
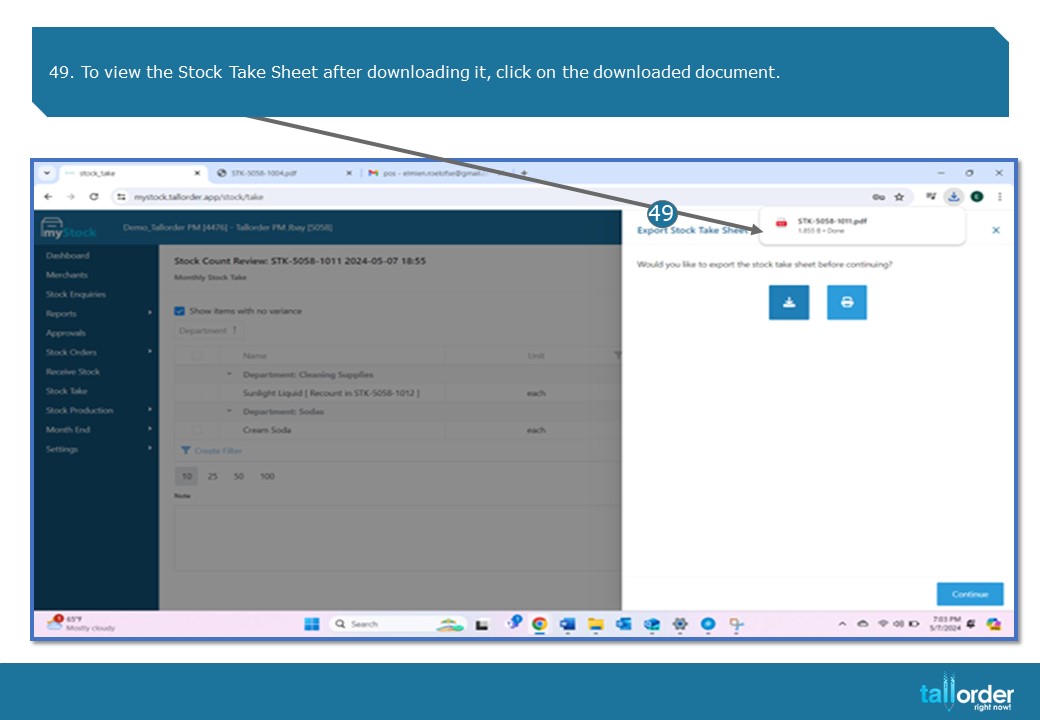
- To view the Stock Take Sheet after downloading it, click on the downloaded document

- The Stock Take Sheet will now be updated and show all the different variants.

- After which click on the ‘CONTINUE’ button below.

- Click on the ‘PROCEED TO ADJUST STOCK’.

- The ‘ADJUST STOCK’ sheet will appear.
- To complete the Stock Take, click on the ‘COMPLETE’ button below.

- Once again you are able to ‘PRINT’ or ‘DOWNLOAD’ the Stock Take Sheet by clicking on the appropriate icon.
- Click the ‘CONTINUE’ button.

- The Stock Take will be listed under the ‘DRAFT’ tab below.
- The Stock Take will also display the ‘RECOUNT’ you have issued.

- To count stock using iCount, click on the ‘START ICOUNT’ button below.

- The Stock Take Sheet can now be ‘PRINTED’ or ‘DOWNLOADED’ by clicking on the appropriate icon.
- To proceed, click on the ‘PROCEED TO COUNT STOCK’.

- The Yellow ‘OPEN STOCK TAKES’ tab will appear on the top of your screen.
- Click the ‘ICOUNT’ button below.

- You are able to now send the iCount Stock Count via ‘EMAIL’ by click on the ‘EMAIL’ icon.
- To send it via ‘WHATTSAPP’, click on the ‘WHATTSAPP’ icon.
- The iCount Stock Count can also be printed or downloaded by clicking on the ‘PRINT’ icon or the ‘DOWNLOAD’ icon.
- Click on the ‘QR CODE’ to start the counting process from your device.

- Enter the ‘NAME’ of the person doing the count in the field below.

- Click on the ‘START COUNTING’ button below.

- To count by using the items ‘BARCODE’, click on the ‘BARCODE’ icon.
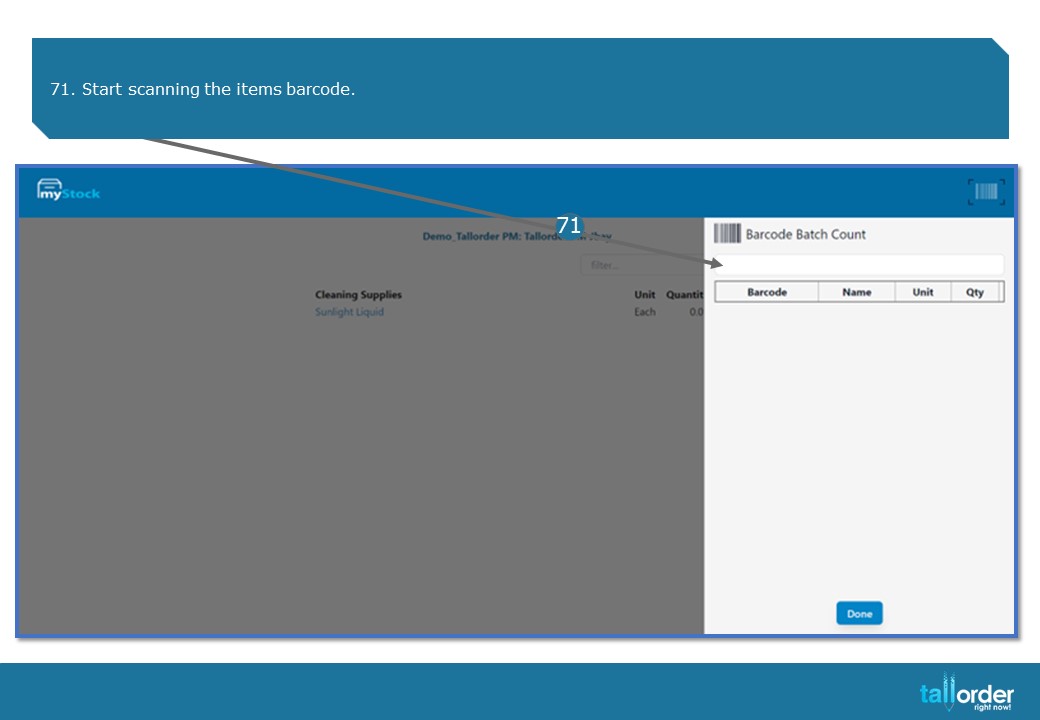
- Start scanning the items barcode.

- The item allocated to the barcode will be displayed here.
- Every time the item is scanned it will automatically update the ‘QTY’ count below.

- When you have completed your count, click on the ‘DONE’ button below.

- Alternatively, you can enter the item barcode into the ‘FILTER’ field below.

- Click on the item you are wanting to count.

- You can now click on the ‘PLUS’ button to add to the quantity.
- To minus from the quantity, click on the ‘MINUS’ icon.
- When you have completed counting, click on the ‘DONE’ button below.
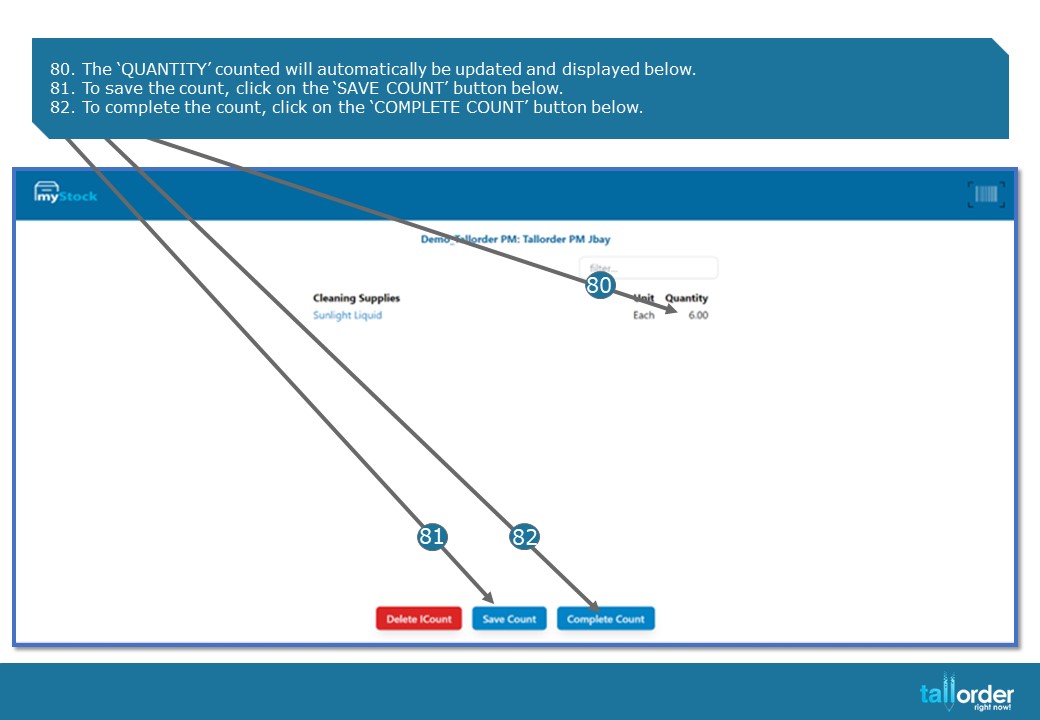
- The ‘QUANTITY’ counted will automatically be updated and displayed below.
- To save the count, click on the ‘SAVE COUNT’ button below.
- To complete the count, click on the ‘COMPLETE COUNT’ button below.

- You would now have completed iCount counting.
- Close the web browser tab and continue to myStock.
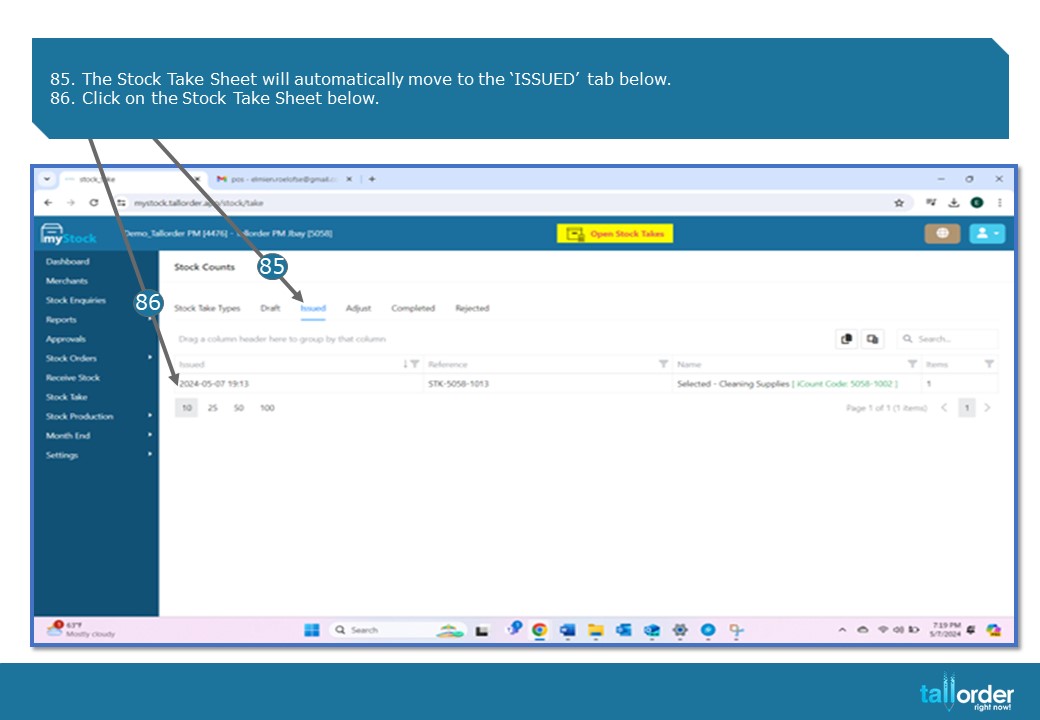
- The Stock Take Sheet will automatically move to the ‘ISSUED’ tab below.
- Click on the Stock Take Sheet below.
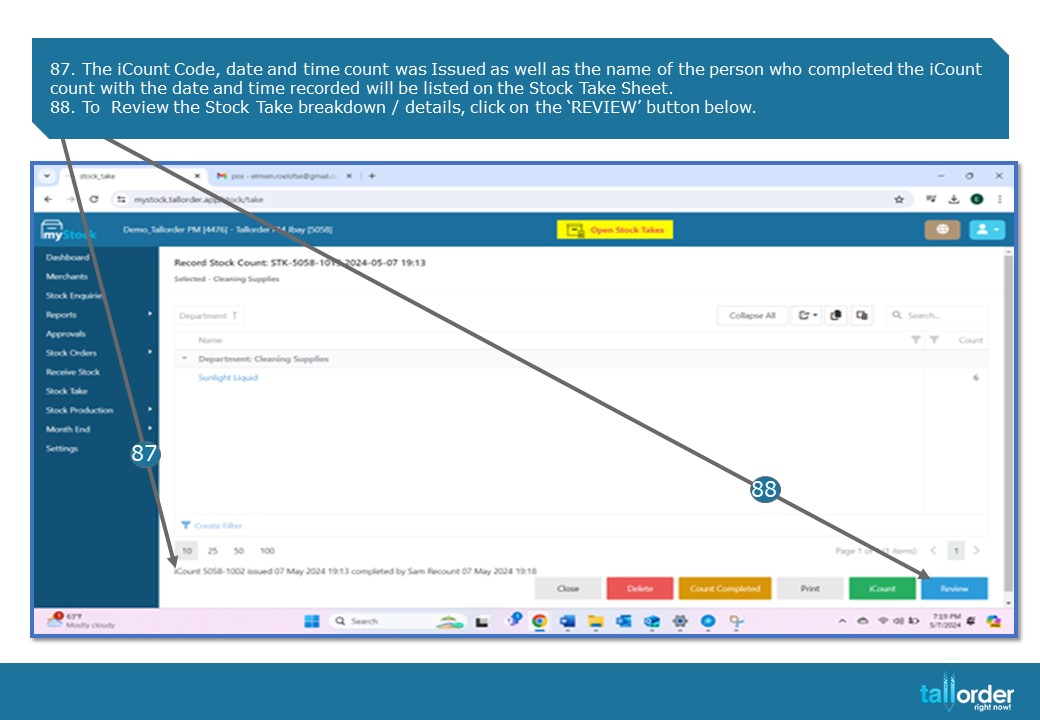
- The iCount Code, date and time count was Issued as well as the name of the person who completed the iCount count with the date and time recorded will be listed on the Stock Take Sheet.
- To Review the Stock Take breakdown / details, click on the ‘REVIEW’ button below.

- To print the Review, click on the ‘PRINT’ button below.
- If you are not satisfied with the variants on the Review, you are able to Reject the Stock Count, by clicking on the ‘REJECT’ button below and follow the ‘RECOUNT’ process again.
- If you are satisfied with the Review, click on the ‘COMPLETE’ button below.

- To print or download the Stock Take Sheet, click on the ‘PRINT’ or ‘DOWNLOAD’ icon.
- Click on the ‘CONTINUE’ button and proceed to complete the Stock Take as explained.
STEP-BY-STEP BREAKDOWN
- When starting a Stock Take, click on the ‘STOCK TAKE’ tab.
- The different types of Stock Take Types are listed below.
- Click on the Stock Take Type you wish to issue.
- Enter the name of the stock take you are about to start, in the field below of the ‘STOCK TAKE NAME’.
- Click on the drop box next to the ‘SELECT A DEPARTMENT’ field.
- Click on the department / departments you wish to do a Stock Take on, by selecting the tick box next to the department.
- You can select more than one department.
- After which, click on the ‘CREATE STOCK TAKE’ button.
- The departments and items you have selected will be listed below.
- You can discard the template by clicking on the ‘DISCARD TEMPLATE’ button.
- If you wish to save the stock take as a template, click on the ‘SAVE TEMPLATE’ button.
- If you are satisfied with the stock take, click on the ‘CREATE DRAFT’ button.
- You can now print the stock take sheet, by clicking on the ‘PRINT’ icon.
- You are also able to download the stock take sheet by clicking on the ‘DOWNLOAD’ icon.
- To view the stock take sheet after downloading it, click on the downloaded document.
- The Stock Take Sheet, will display all the needed information.
- The Stock Take will automatically be moved to the ‘DRAFT’ tab.
- Click on the Stock Take Sheet below.
- To do a Spot Check Count, select the tick box next to ‘SPOT CHECK STOCK COUNT WHICH WILL NOT BLOCK TRADING AND WILL NOT PROCEED TO ADJUSTMENT’. Doing a Spot Check Stock Take will allow you to continue trading.
- To start the ‘SPOT CHECK STOCK COUNT’ stock count, click on the ‘START STOCK COUNT’.
- To start the Stock Count, which is not selected as a ‘SPOT CHECK STOCK COUNT’, click on the ‘START STOCK COUNT’ button below.
- Your myStock screen will now ‘ISSUE STOCK TAKE’.
- The ‘EXPORT STOCK TAKE SHEET’ allows you to print the Stock Take Sheet, by clicking on the ‘PRINT’ icon.
- You are also able to download the Stock Take Sheet by clicking on the ‘DOWNLOAD’ icon.
- After which click on the ‘PROCEED TO COUNT STOCK’ button.
- The Yellow ‘OPEN STOCK TAKES’ tab will appear at the top of your screen.
- You will now see the below message on your ‘TALLORDER POS SYSTEM’, as you will not be able to trade during the stock take, unlike with a ‘SPOT CHECK STOCK TAKE’ which doesn’t affect trading.
- As soon as the stock count is complete, click on the ‘COUNT COMPLETE’ button.
- After clicking ‘ COUNT COMPLETED’, TallOrder POS will then inform you that ‘STOCK TAKE IS COMPLETE. TRADING IS RESUMED’.
- Click on the ‘OK’ button below to continue trading.
- The Stock Items, listed on the Stock Take Count Sheet will be shown, allowing you to enter the amount counted for the above listed item.
- Enter the amount counted in the field next to the ‘COUNT’ field.
- To move to the next stock item, click on the ‘ARROW’.
- You are able to see which stock item you are working on is indicated above, as seen here.
- When you have entered in all the counted amounts of the stock items, click on the ‘UPDATE’.
- The Stock Take Sheet will automatically update with the counted amounts entered.
- To Review the Stock Count Sheet, click on the ‘REVIEW’ button below.
- The Stock Count Review, will show you the info as seen below.
- You are able to print the Stock Count Review by clicking on the ‘PRINT’ button.
- If the Variants for a specific item doesn’t match and you would like to request a recount of the specific item, select the tick box next to the item in question.
- Now click on the ‘RECOUNT’ button below.
- The Recount Confirmation page will appear, confirming that you would like to start the Recount.
- To confirm the Recount, click on the ‘CONFIRM’ button.
- If you are satisfied with the Stock Count Review, click the ‘COMPLETE’ button.
- After clicking ‘COMPLETE’, TallOrder POS will then inform you that ‘STOCK TAKE IS COMPLETE. TRADING IS RESUMED’.
- Click on the ‘OK’ button below to continue trading.
- You are able to print the Stock Take Sheet, by clicking on the ‘PRINT’ icon.
- To download the Stock Take Sheet, click on the ‘DOWNLOAD’ icon.
- To view the Stock Take Sheet after downloading it, click on the downloaded document.
- The Stock Take Sheet will now be updated and show all the different variants.
- After which click on the ‘CONTINUE’ button below.
- Click on the ‘PROCEED TO ADJUST STOCK’.
- The ‘ADJUST STOCK’ sheet will appear.
- To complete the Stock Take, click on the ‘COMPLETE’ button below.
- Once again you are able to ‘PRINT’ or ‘DOWNLOAD’ the Stock Take Sheet by clicking on the appropriate icon.
- Click the ‘CONTINUE’ button.
- The Stock Take will be listed under the ‘DRAFT’ tab below.
- The Stock Take will also display the ‘RECOUNT’ you have issued.
- To count stock using iCount, click on the ‘START ICOUNT’ button below.
- The Stock Take Sheet can now be ‘PRINTED’ or ‘DOWNLOADED’ by clicking on the appropriate icon.
- To proceed, click on the ‘PROCEED TO COUNT STOCK’.
- The Yellow ‘OPEN STOCK TAKES’ tab will appear on the top of your screen.
- Click the ‘ICOUNT’ button below.
- You are able to now send the iCount Stock Count via ‘EMAIL’ by click on the ‘EMAIL’ icon.
- To send it via ‘WHATTSAPP’, click on the ‘WHATTSAPP’ icon.
- The iCount Stock Count can also be printed or downloaded by clicking on the ‘PRINT’ icon or the ‘DOWNLOAD’ icon.
- Click on the ‘QR CODE’ to start the counting process from your device.
- Enter the ‘NAME’ of the person doing the count in the field below.
- Click on the ‘START COUNTING’ button below.
- To count by using the items ‘BARCODE’, click on the ‘BARCODE’ icon.
- Start scanning the items barcode.
- The item allocated to the barcode will be displayed here.
- Every time the item is scanned it will automatically update the ‘QTY’ count below.
- When you have completed your count, click on the ‘DONE’ button below.
- Alternatively, you can enter the item barcode into the ‘FILTER’ field below.
- Click on the item you are wanting to count.
- You can now click on the ‘PLUS’ button to add to the quantity.
- To minus from the quantity, click on the ‘MINUS’ icon.
- When you have completed counting, click on the ‘DONE’ button below. 80. The ‘QUANTITY’ counted will automatically be updated and displayed below.
- To save the count, click on the ‘SAVE COUNT’ button below.
- To complete the count, click on the ‘COMPLETE COUNT’ button below.
- You would now have completed iCount counting.
- Close the web browser tab and continue to myStock.
- The Stock Take Sheet will automatically move to the ‘ISSUED’ tab below.
- Click on the Stock Take Sheet below.
- The iCount Code, date and time count was Issued as well as the name of the person who completed the iCount count with the date and time recorded will be listed on the Stock Take Sheet.
- To Review the Stock Take breakdown / details, click on the ‘REVIEW’ button below.
- To print the Review, click on the ‘PRINT’ button below.
- If you are not satisfied with the variants on the Review, you are able to Reject the Stock Count, by clicking on the ‘REJECT’ button below and follow the ‘RECOUNT’ process again.
- If you are satisfied with the Review, click on the ‘COMPLETE’ button below.
- To print or download the Stock Take Sheet, click on the ‘PRINT’ or ‘DOWNLOAD’ icon.
- Click on the ‘CONTINUE’ button and proceed to complete the Stock Take as explained.