
How can we help you?
How to navigate myStock
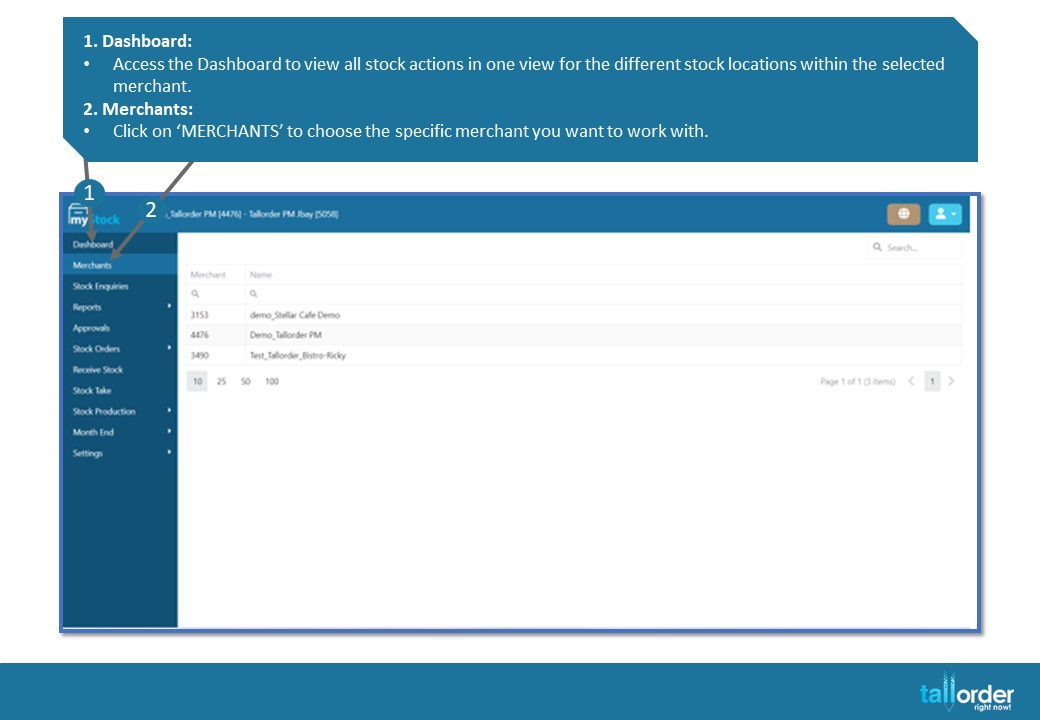
- Dashboard:
- Access the Dashboard to view all stock actions in one view for the different stock locations within the selected merchant.
- Merchants:
- Click on ‘MERCHANTS’ to choose the specific merchant you want to work with.

- Stock Enquiries:
- Within the selected merchant, navigate to ‘STOCK ENQUIRIES’ to add new products or search for existing ones. Use ‘BY DEPARTMENT’, ‘BY SUPPLIER’, or ‘BY TAGS’ to narrow down your focus within stock enquiries.
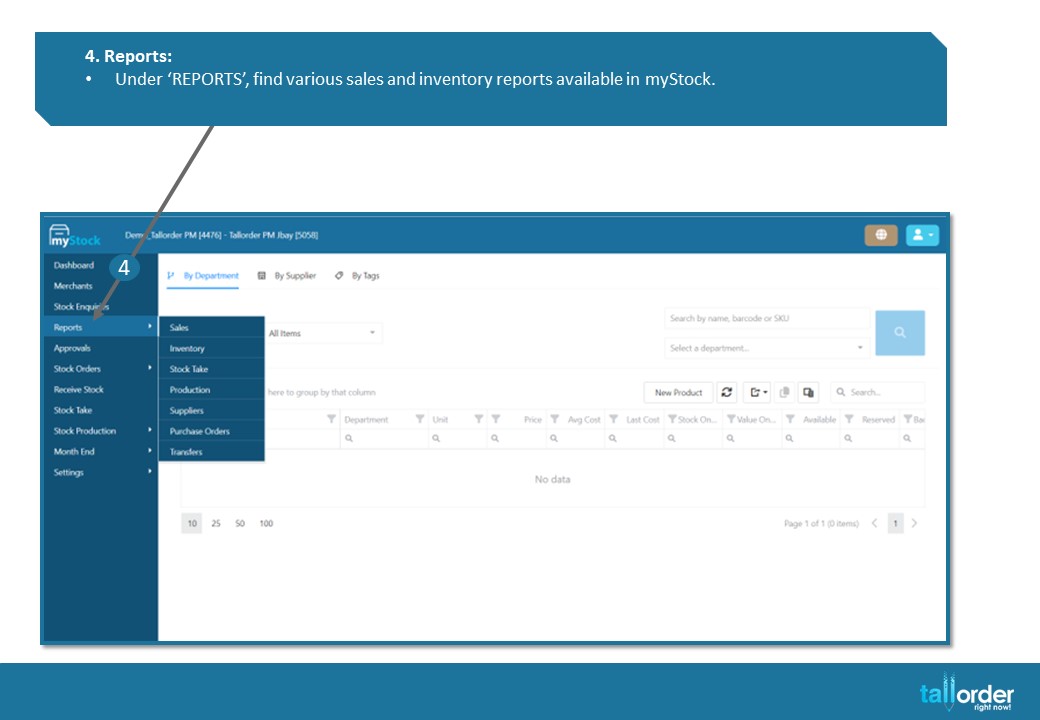
- Reports:
- Under ‘REPORTS’, find various sales and inventory reports available in myStock.

- Approvals:
- Here you will find all Stock Actions needing Approvals.
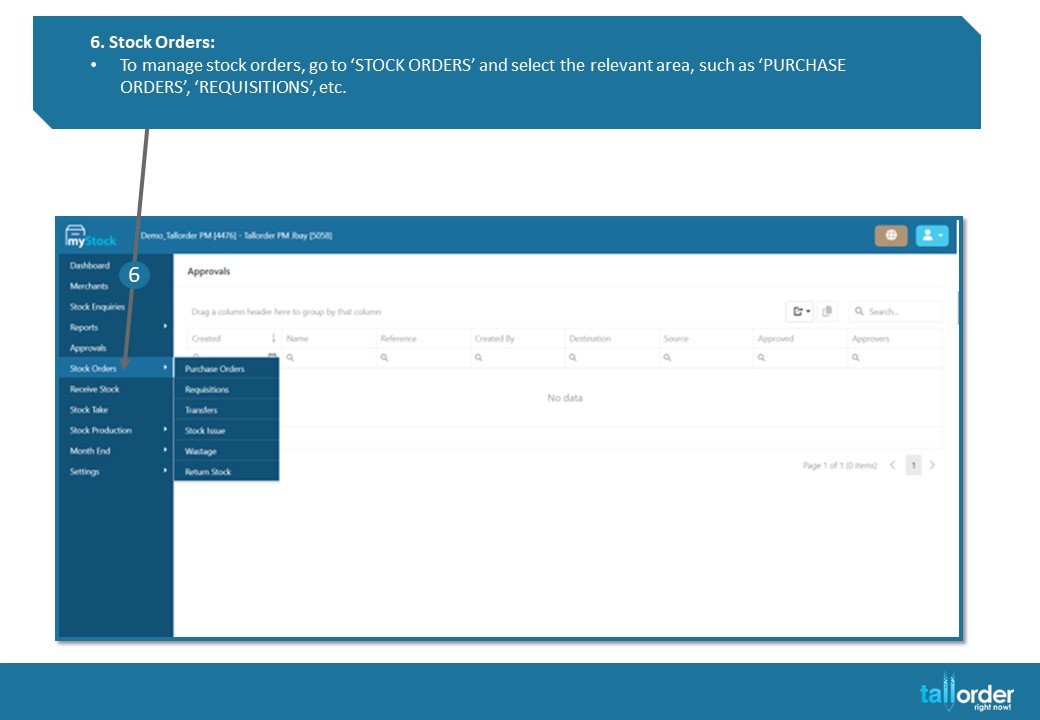
- Stock Orders:
- To manage stock orders, go to ‘STOCK ORDERS’ and select the relevant area, such as ‘PURCHASE ORDERS’, ‘REQUISITIONS’, etc.
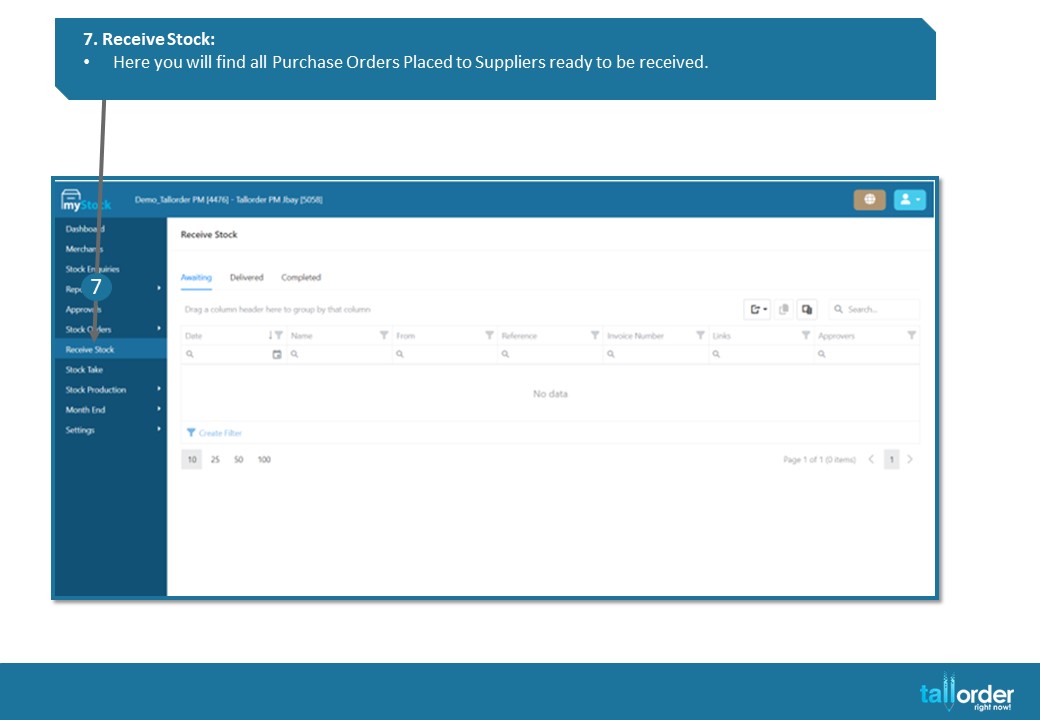
- Receive Stock:
- Here you will find all Purchase Orders Placed to Suppliers ready to be received.
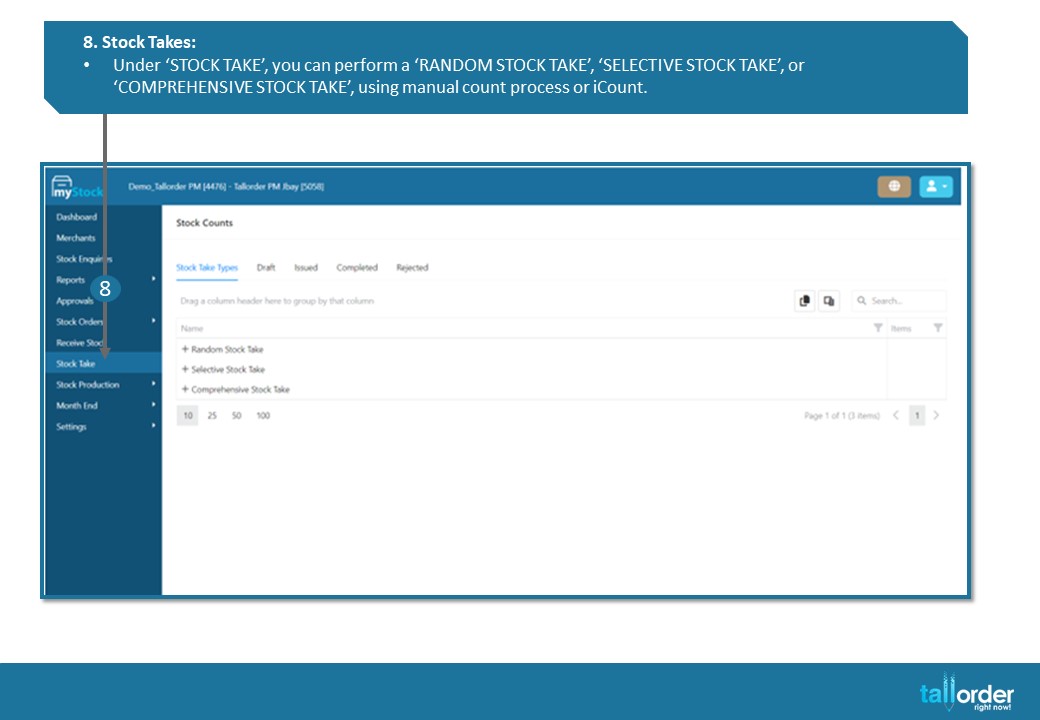
- Stock Takes:
- Under ‘STOCK TAKE’, you can perform a ‘RANDOM STOCK TAKE’, ‘SELECTIVE STOCK TAKE’, or ‘COMPREHENSIVE STOCK TAKE’, using manual count process or iCount.

- Stock Production:
- Navigate to ‘STOCK PRODUCTION’ to manage production orders and acceptance of items produced in Batches.

- Month End:
- Under ‘MONTH END’, start the month end process by clicking ‘OPEN PROCESSING’, Review the process using ‘REVIEW’ and complete it by clicking ‘COMPLETE PROCESSING’. Check the status of the month end process under ‘STATUS’.

- Settings:
- Click on ‘SETTINGS’ to configure various settings. Setup approvals using ‘APPROVALS’, manage access control with ‘ACCESS CONTROL’, define stock locations under ‘STOCK LOCATIONS’, add suppliers via ‘SUPPLIERS’, create departments using ‘DEPARTMENTS’, and set up reasons with ‘REASONS’. Additionally, navigate to ‘MONTH END’ to configure month end settings.
This guide provides step-by-step instructions for navigating through different functionalities and features available in myStock, ensuring smooth and efficient usage of the system.
STEP-BY-STEP BREAKDOWN
- Dashboard:
- Access the Dashboard to view all stock actions in one view for the different stock locations within the selected merchant.
- Merchants:
- Click on ‘MERCHANTS’ to choose the specific merchant you want to work with.
- Stock Enquiries:
- Within the selected merchant, navigate to ‘STOCK ENQUIRIES’ to add new products or search for existing ones. Use ‘BY DEPARTMENT’, ‘BY SUPPLIER’, or ‘BY TAGS’ to narrow down your focus within stock enquiries.
- Reports:
- Under ‘REPORTS’, find various sales and inventory reports available in myStock.
- Approvals:
- Here you will find all Stock Actions needing Approvals.
- Stock Orders:
- To manage stock orders, go to ‘STOCK ORDERS’ and select the relevant area, such as ‘PURCHASE ORDERS’, ‘REQUISITIONS’, etc.
- Receive Stock:
- Here you will find all Purchase Orders Placed to Suppliers ready to be received.
- Stock Takes:
- Under ‘STOCK TAKE’, you can perform a ‘RANDOM STOCK TAKE’, ‘SELECTIVE STOCK TAKE’, or ‘COMPREHENSIVE STOCK TAKE’, using manual count process or iCount.
- Stock Production:
- Navigate to ‘STOCK PRODUCTION’ to manage production orders and acceptance of items produced in Batches.
- Month End:
- Under ‘MONTH END’, start the month end process by clicking ‘OPEN PROCESSING’, Review the process using ‘REVIEW’ and complete it by clicking ‘COMPLETE PROCESSING’. Check the status of the month end process under ‘STATUS’.
- Settings:
- Click on ‘SETTINGS’ to configure various settings. Setup approvals using ‘APPROVALS’, manage access control with ‘ACCESS CONTROL’, define stock locations under ‘STOCK LOCATIONS’, add suppliers via ‘SUPPLIERS’, create departments using ‘DEPARTMENTS’, and set up reasons with ‘REASONS’. Additionally, navigate to ‘MONTH END’ to configure month end settings.
This guide provides step-by-step instructions for navigating through different functionalities and features available in myStock, ensuring smooth and efficient usage of the system.