
How can we help you?
How to set up Approval levels

- To setup Approval levels, go to ‘SETTINGS’.
- Select ‘APPROVALS’.

- The ‘ACTION’ column displays the different areas where you can add Approval Levels.
- The ‘REQUIRED’ column displays the number of approvals required.
- The ‘APPROVERS’ column displays the employees who should approve the specific area.
- To add approval levels to an area, click on the desired area below.
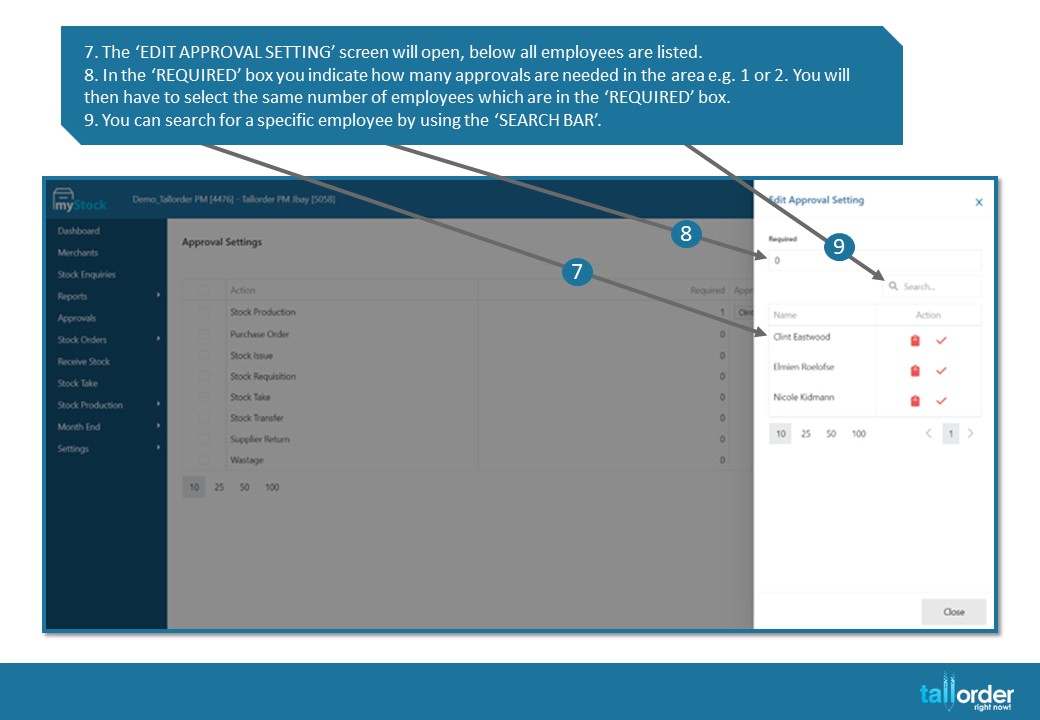
- The ‘EDIT APPROVAL SETTING’ screen will open, below all employees are listed.
- In the ‘REQUIRED’ box you indicate how many approvals are needed in the area e.g. 1 or 2. You will then have to select the same number of employees which are in the ‘REQUIRED’ box.
- You can search for a specific employee by using the ‘SEARCH BAR’.
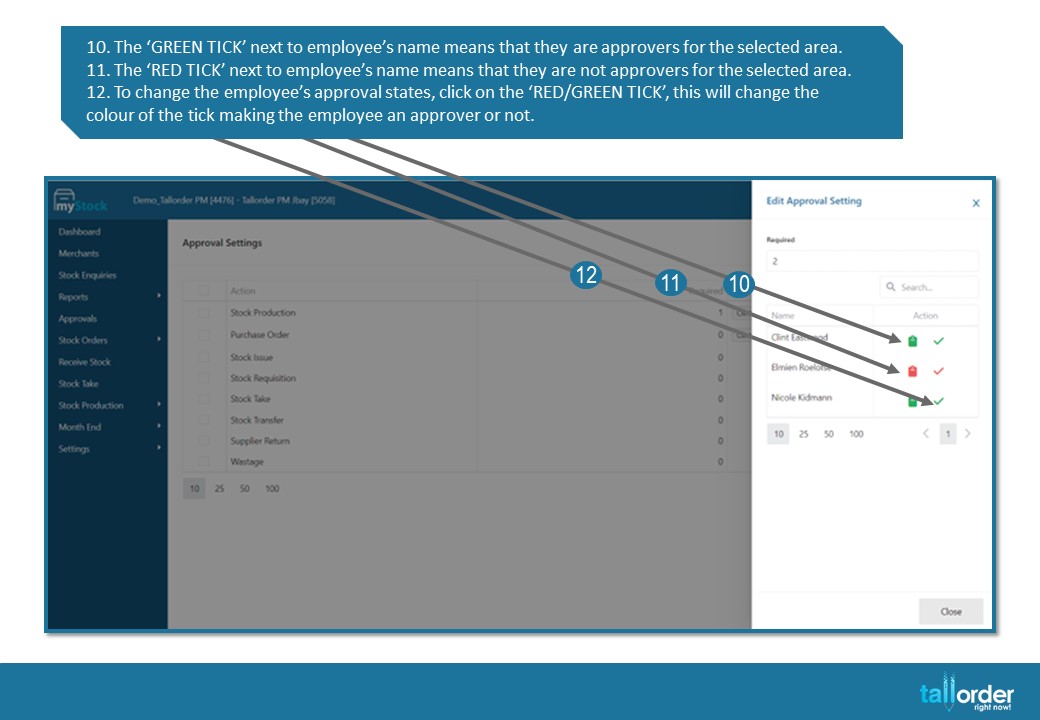
- The ‘GREEN TICK’ next to employee’s name means that they are approvers for the selected area.
- The ‘RED TICK’ next to employee’s name means that they are not approvers for the selected area.
- To change the employee’s approval states, click on the ‘RED/GREEN TICK’, this will change the colour of the tick making the employee an approver or not.

- You will now see the employee’s names added or taken off of the selected area on the ‘APPROVAL SETTINGS’ page.
STEP-BY-STEP BREAKDOWN
- To setup Approval levels, go to ‘SETTINGS’.
- Select ‘APPROVALS’.
- The ‘ACTION’ column displays the different areas where you can add Approval Levels.
- The ‘REQUIRED’ column displays the number of approvals required.
- The ‘APPROVERS’ column displays the employees who should approve the specific area.
- To add approval levels to an area, click on the desired area below.
- The ‘EDIT APPROVAL SETTING’ screen will open, below all employees are listed.
- In the ‘REQUIRED’ box you indicate how many approvals are needed in the area e.g. 1 or 2. You will then have to select the same number of employees which are in the ‘REQUIRED’ box.
- You can search for a specific employee by using the ‘SEARCH BAR’.
- The ‘GREEN TICK’ next to employee’s name means that they are approvers for the selected area.
- The ‘RED TICK’ next to employee’s name means that they are not approvers for the selected area.
- To change the employee’s approval states, click on the ‘RED/GREEN TICK’, this will change the colour of the tick making the employee an approver or not.
- You will now see the employee’s names added or taken off of the selected area on the ‘APPROVAL SETTINGS’ page.