
How can we help you?
Credit Notes Report
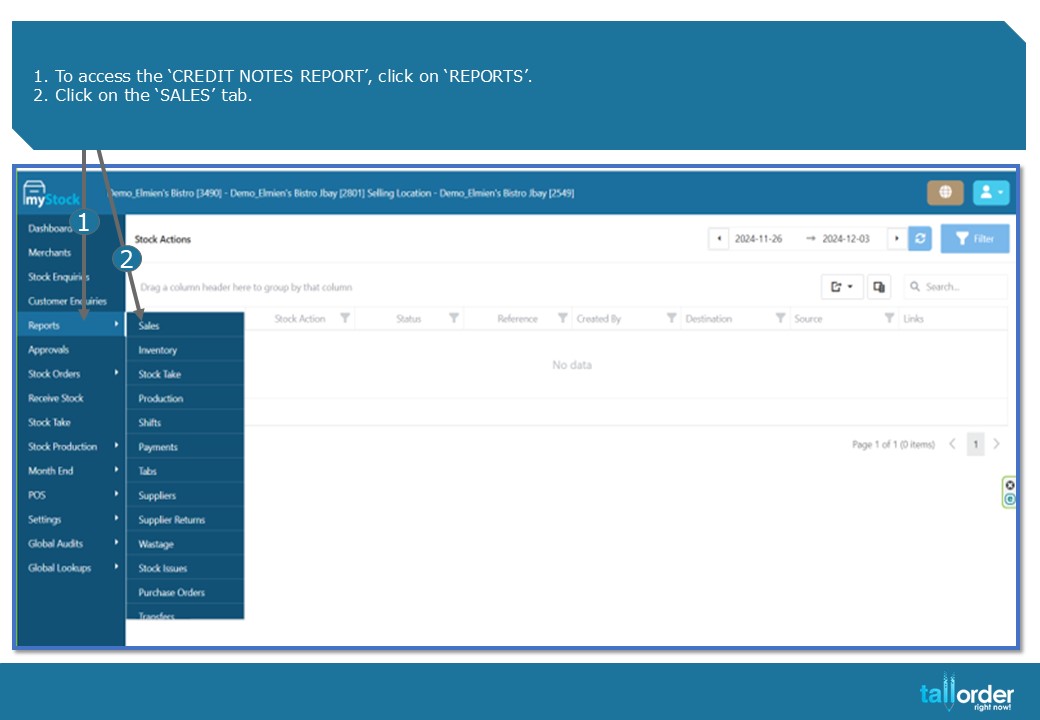
- To access the ‘CREDIT NOTES REPORT’, click on ‘REPORTS’.
- Click on the ‘SALES’ tab.
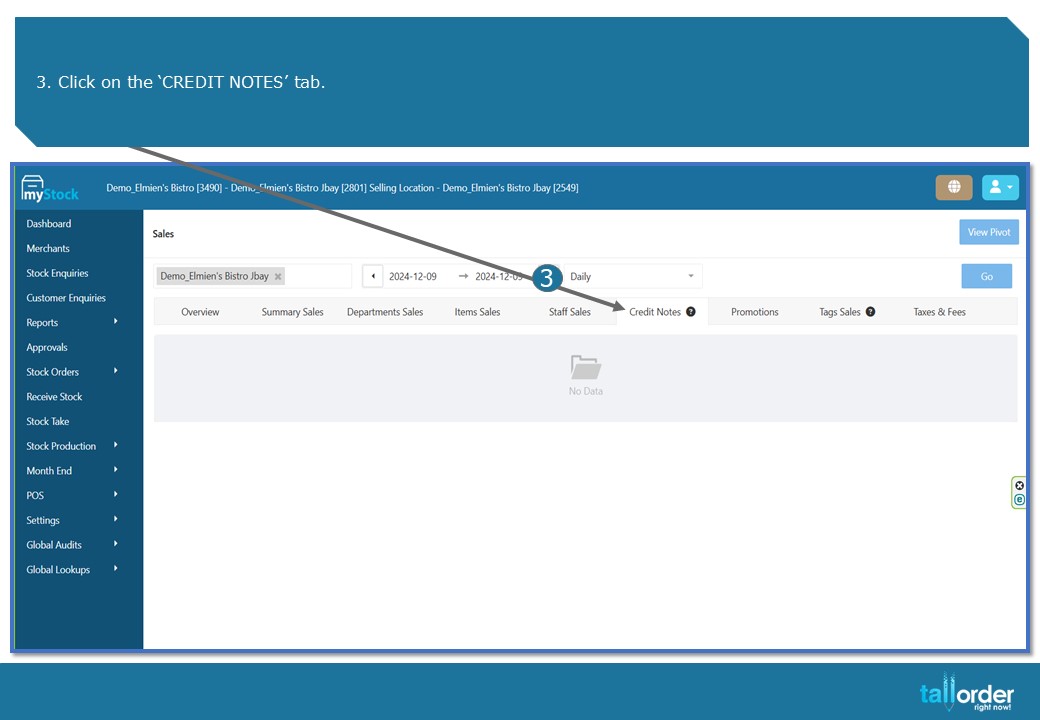
- Click on the ‘CREDIT NOTES’ tab.
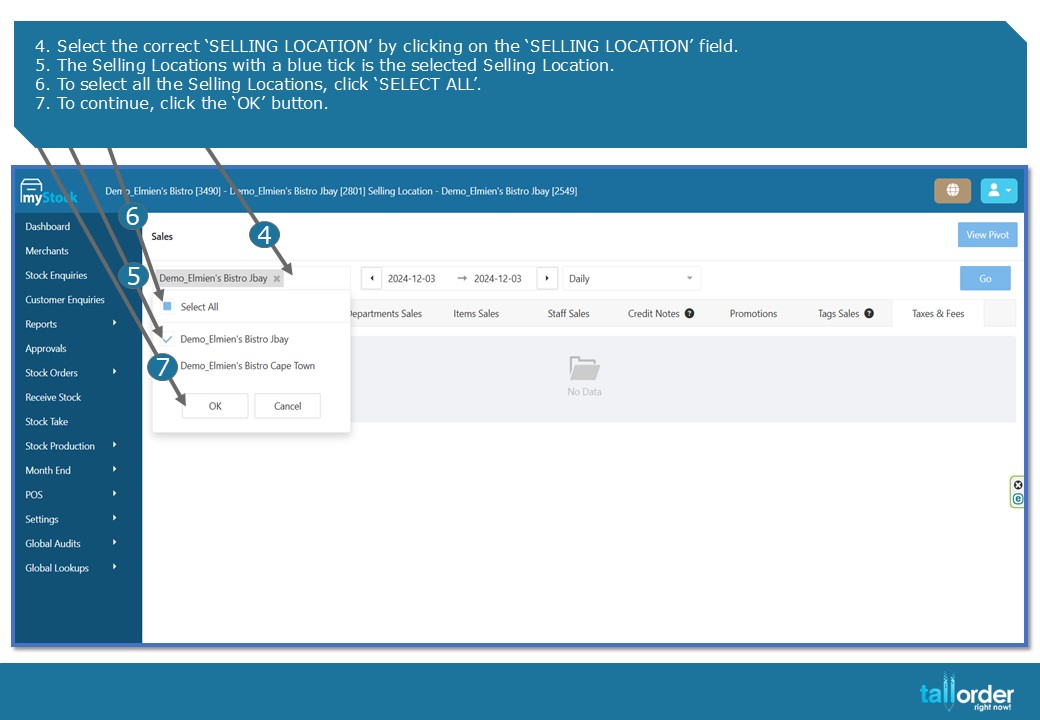
- Select the correct ‘SELLING LOCATION’ by clicking on the ‘SELLING LOCATION’ field.
- The Selling Locations with a blue tick is the selected Selling Location.
- To select all the Selling Locations, click ‘SELECT ALL’.
- To continue, click the ‘OK’ button.

- Select the ‘START AND END DATE’ for the report.
- Click ‘OK’.
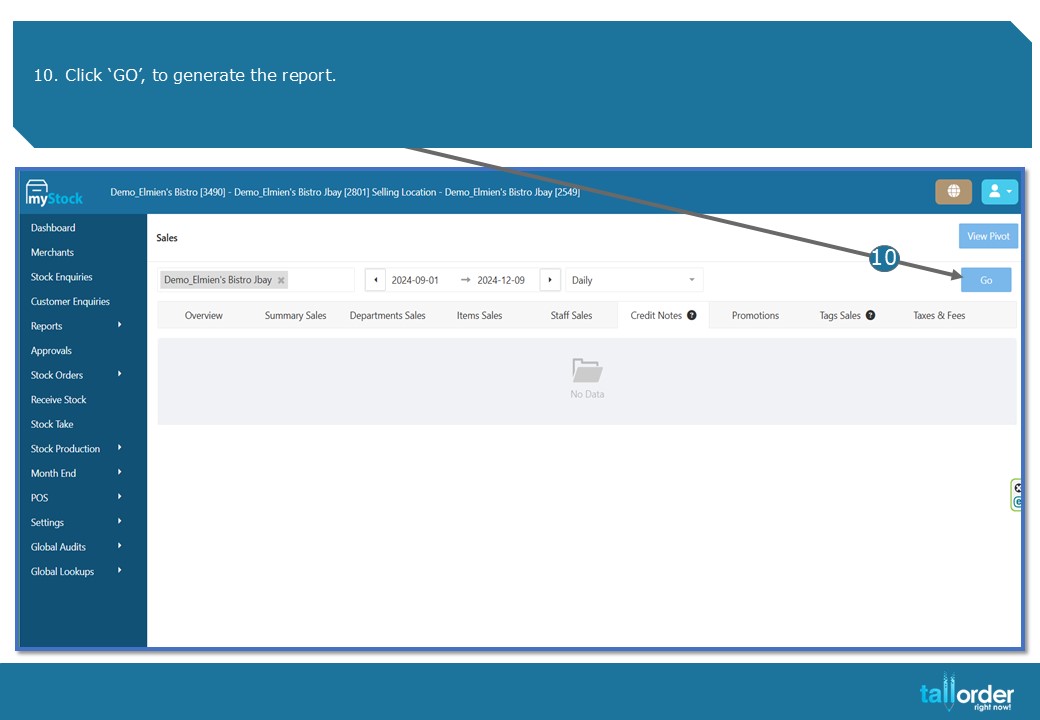
- Click ‘GO’, to generate the report.
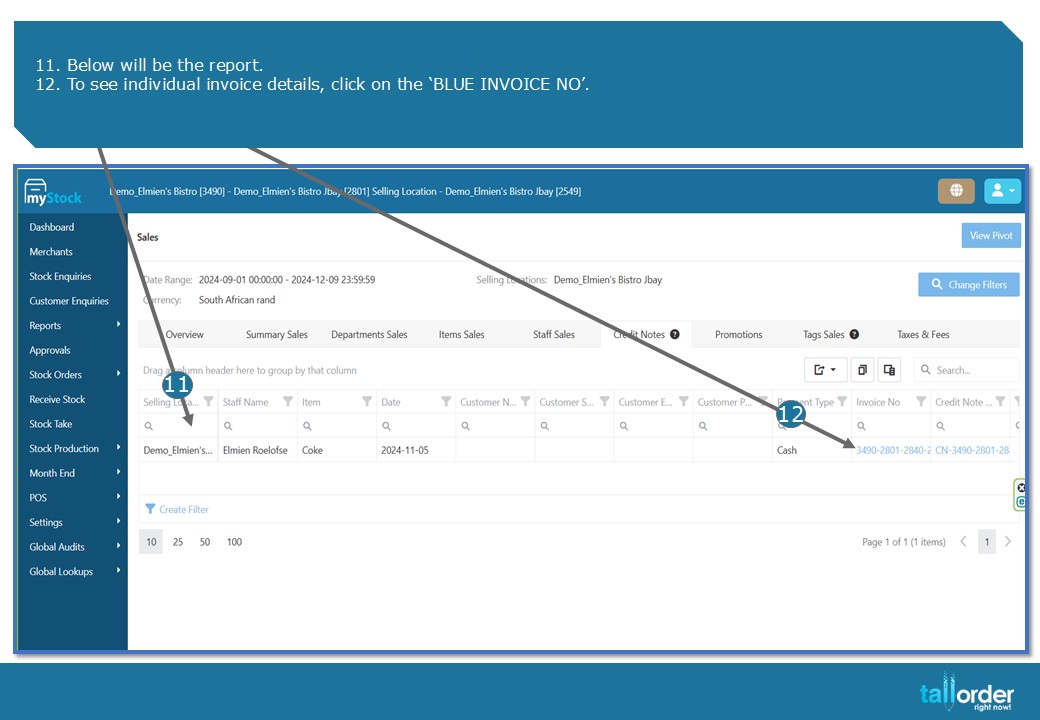
- Below will be the report.
- To see individual invoice details, click on the ‘BLUE INVOICE NO’.
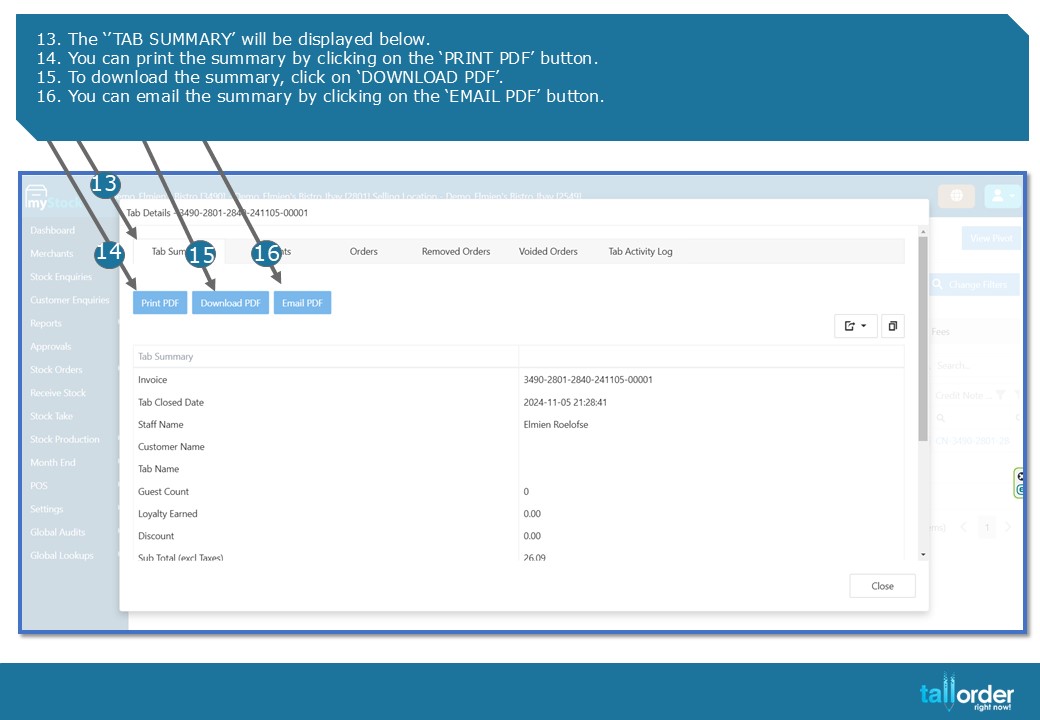
- The ‘’TAB SUMMARY’ will be displayed below.
- You can print the summary by clicking on the ‘PRINT PDF’ button.
- To download the summary, click on ‘DOWNLOAD PDF’.
- You can email the summary by clicking on the ‘EMAIL PDF’ button.
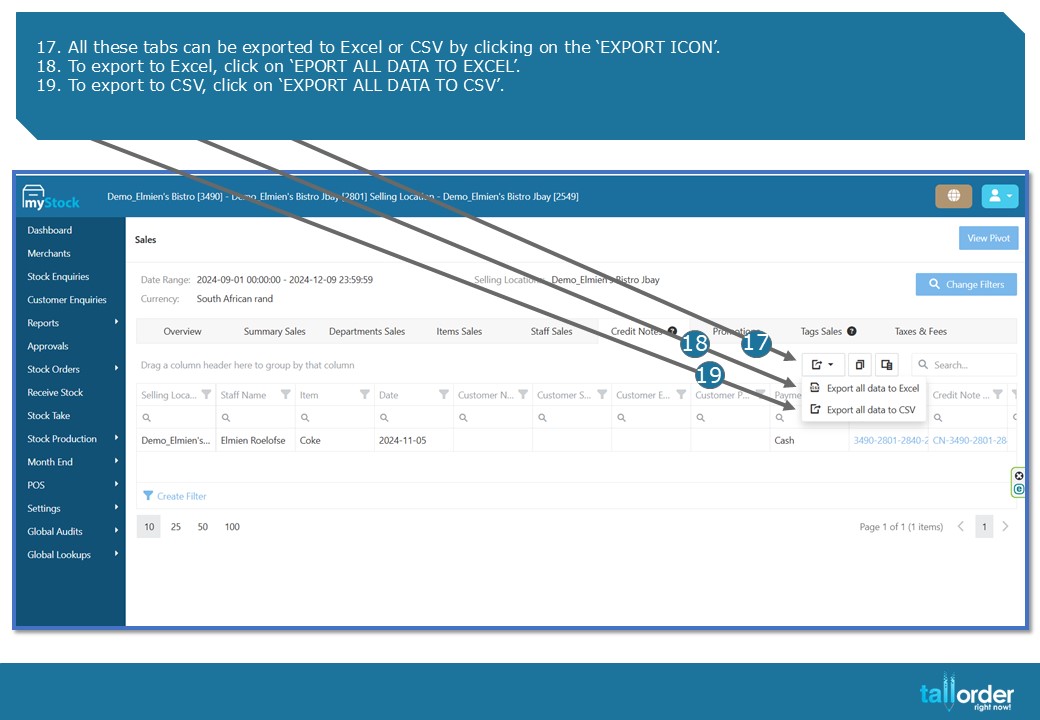
- All these tabs can be exported to Excel or CSV by clicking on the ‘EXPORT ICON’.
- To export to Excel, click on ‘EPORT ALL DATA TO EXCEL’.
- To export to CSV, click on ‘EXPORT ALL DATA TO CSV’.
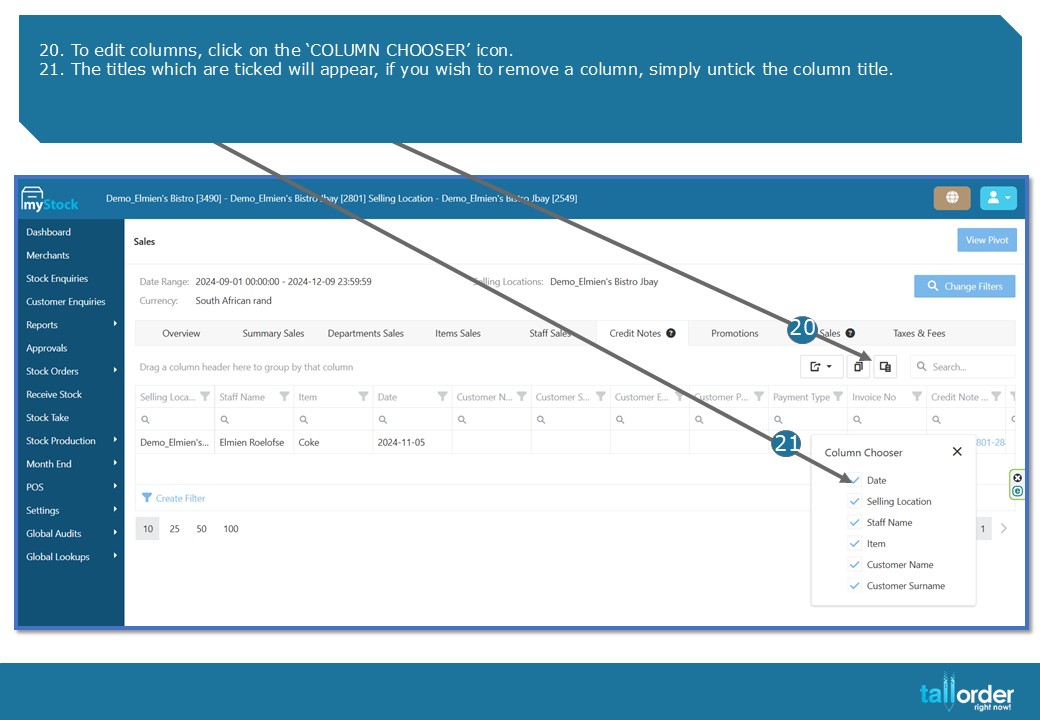
- To edit columns, click on the ‘COLUMN CHOOSER’ icon.
- The titles which are ticked will appear, if you wish to remove a column, simply untick the column title.

- To see the detail of the ‘CREDIT NOTE’, click on the ‘BLUE CREDIT NOTE’.
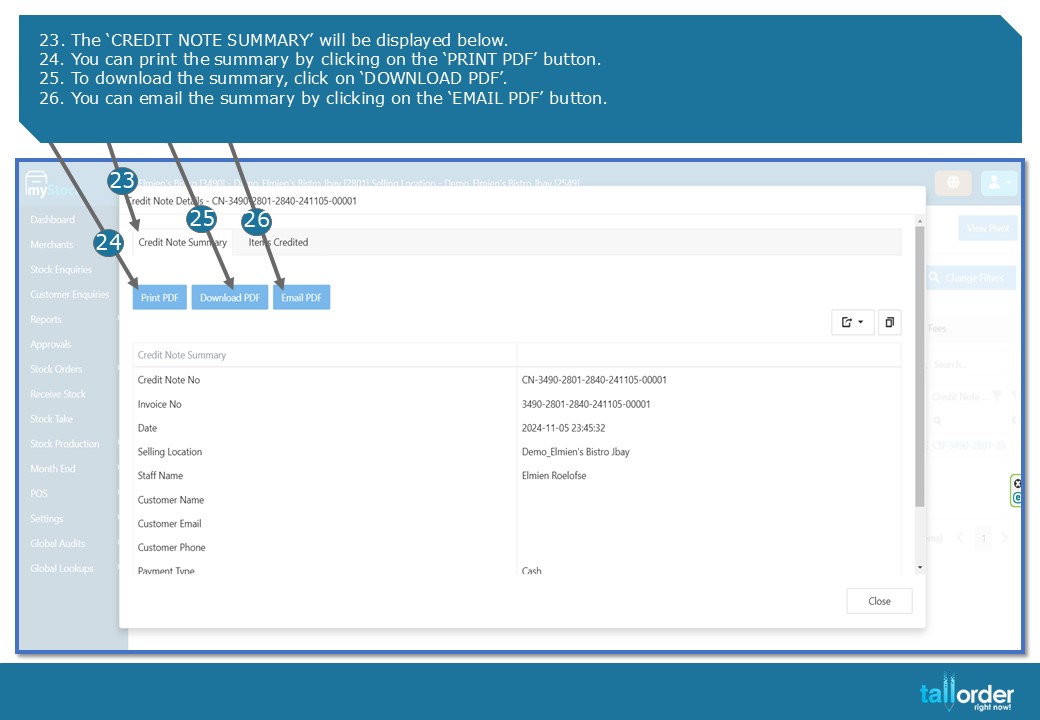
- The ‘CREDIT NOTE SUMMARY’ will be displayed below.
- You can print the summary by clicking on the ‘PRINT PDF’ button.
- To download the summary, click on ‘DOWNLOAD PDF’.
- You can email the summary by clicking on the ‘EMAIL PDF’ button.
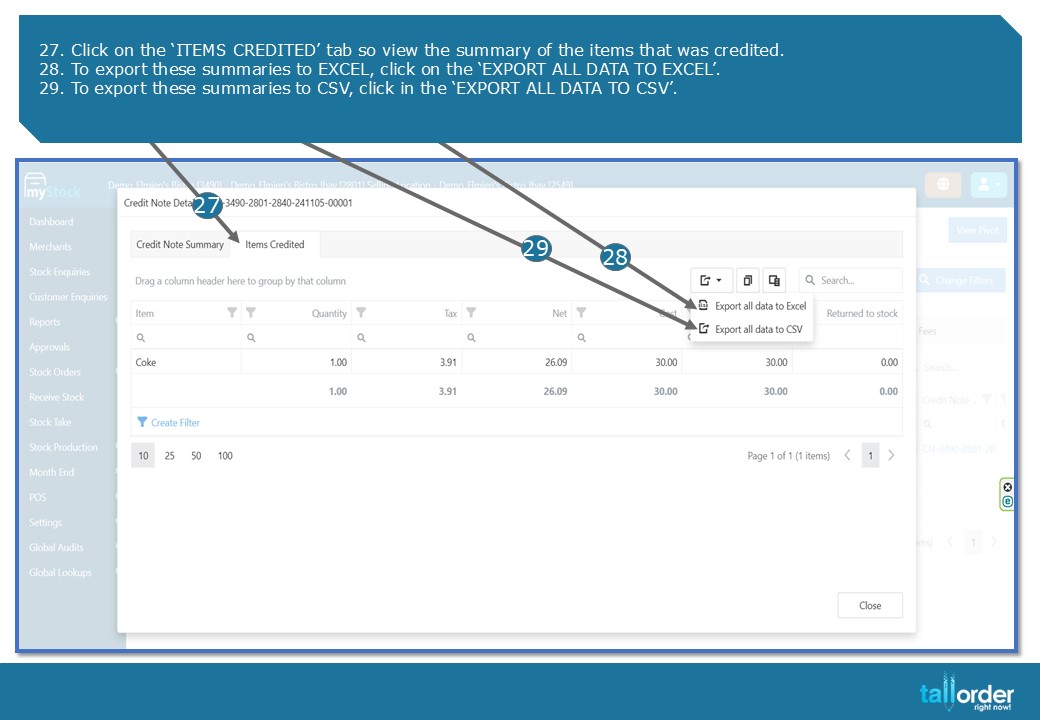
- Click on the ‘ITEMS CREDITED’ tab so view the summary of the items that was credited.
- To export these summaries to EXCEL, click on the ‘EXPORT ALL DATA TO EXCEL’.
- To export these summaries to CSV, click in the ‘EXPORT ALL DATA TO CSV’.
STEP-BY-STEP BREAKDOWN
- To access the ‘CREDIT NOTES REPORT’, click on ‘REPORTS’.
- Click on the ‘SALES’ tab.
- Click on the ‘CREDIT NOTES’ tab.
- Select the correct ‘SELLING LOCATION’ by clicking on the ‘SELLING LOCATION’ field.
- The Selling Locations with a blue tick is the selected Selling Location.
- To select all the Selling Locations, click ‘SELECT ALL’.
- To continue, click the ‘OK’ button.
- Select the ‘START AND END DATE’ for the report.
- Click ‘OK’.
- Click ‘GO’, to generate the report.
- Below will be the report.
- To see individual invoice details, click on the ‘BLUE INVOICE NO’.
- The ‘’TAB SUMMARY’ will be displayed below.
- You can print the summary by clicking on the ‘PRINT PDF’ button.
- To download the summary, click on ‘DOWNLOAD PDF’.
- You can email the summary by clicking on the ‘EMAIL PDF’ button.
- All these tabs can be exported to Excel or CSV by clicking on the ‘EXPORT ICON’.
- To export to Excel, click on ‘EPORT ALL DATA TO EXCEL’.
- To export to CSV, click on ‘EXPORT ALL DATA TO CSV’.
- To edit columns, click on the ‘COLUMN CHOOSER’ icon.
- The titles which are ticked will appear, if you wish to remove a column, simply untick the column title.
- To see the detail of the ‘CREDIT NOTE’, click on the ‘BLUE CREDIT NOTE’.
- The ‘CREDIT NOTE SUMMARY’ will be displayed below.
- You can print the summary by clicking on the ‘PRINT PDF’ button.
- To download the summary, click on ‘DOWNLOAD PDF’.
- You can email the summary by clicking on the ‘EMAIL PDF’ button.
- Click on the ‘ITEMS CREDITED’ tab so view the summary of the items that was credited.
- To export these summaries to EXCEL, click on the ‘EXPORT ALL DATA TO EXCEL’.
- To export these summaries to CSV, click in the ‘EXPORT ALL DATA TO CSV’.