
How can we help you?
Sage Pastel Accounting Setup
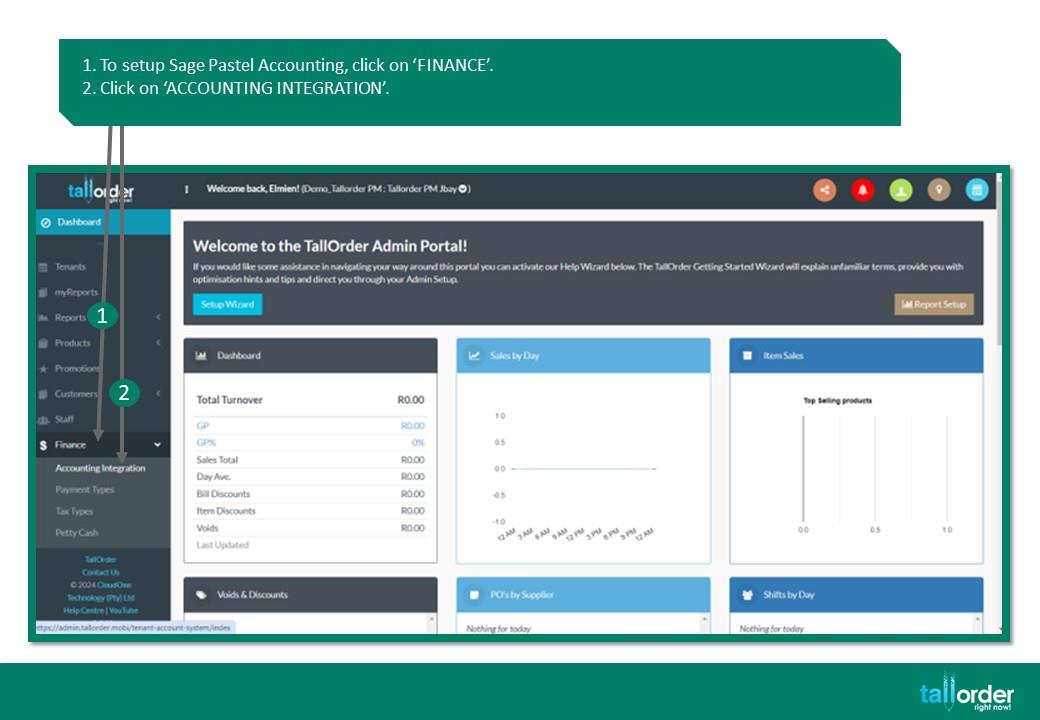
1. To setup Sage Pastel Accounting, click on ‘FINANCE’.
2. Click on ‘ACCOUNTING INTEGRATION’.
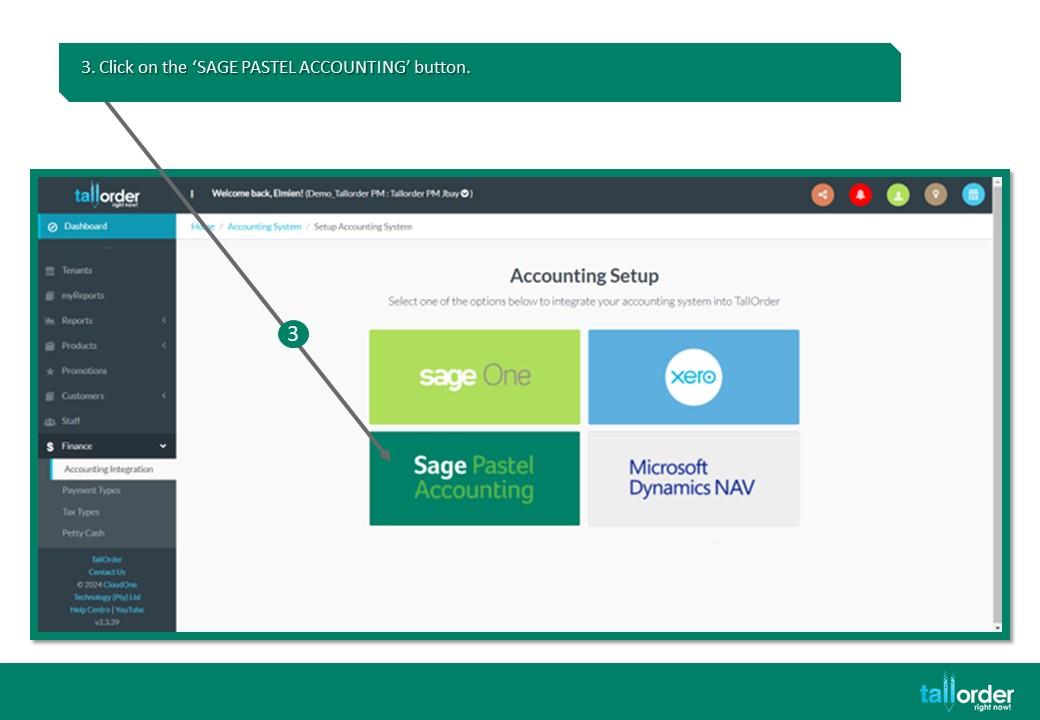
3. Click on the ‘SAGE PASTEL ACCOUNTING’ button.
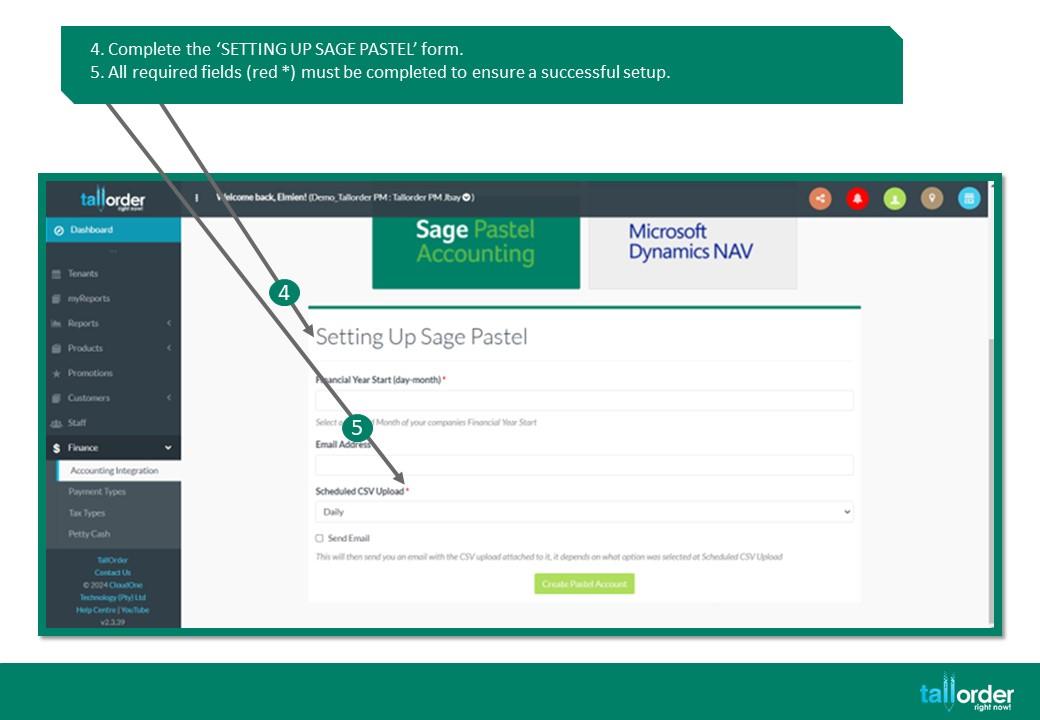
4. Complete the ‘SETTING UP SAGE PASTEL’ form.
5. All required fields (red *) must be completed to ensure a successful setup.
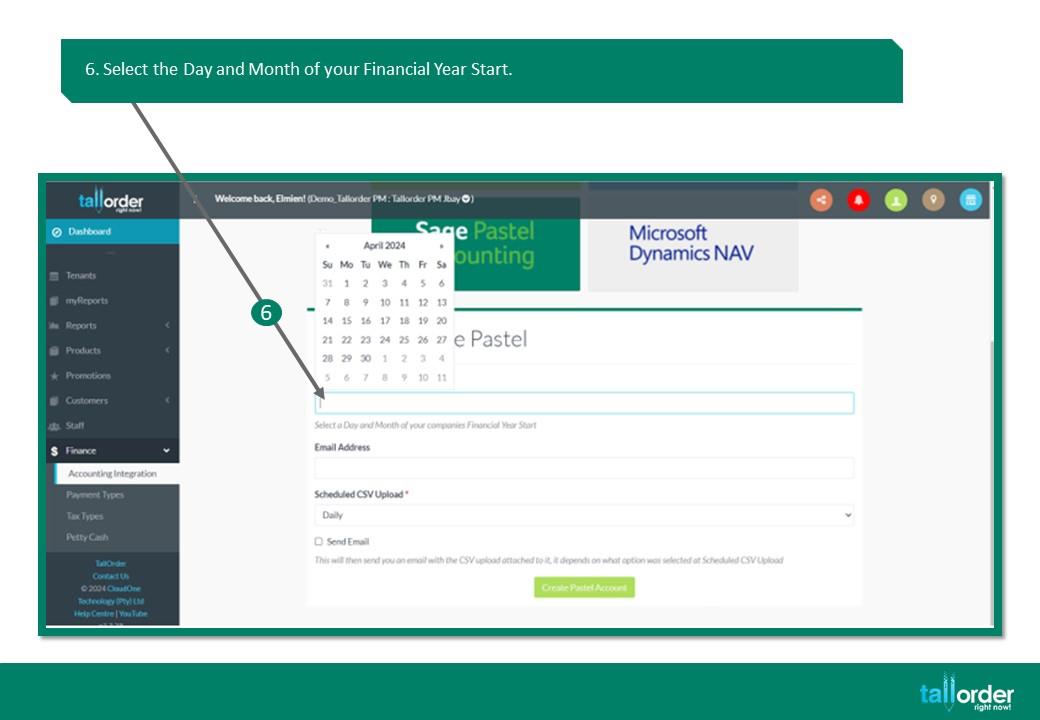
6. Select the Day and Month of your Financial Year Start.
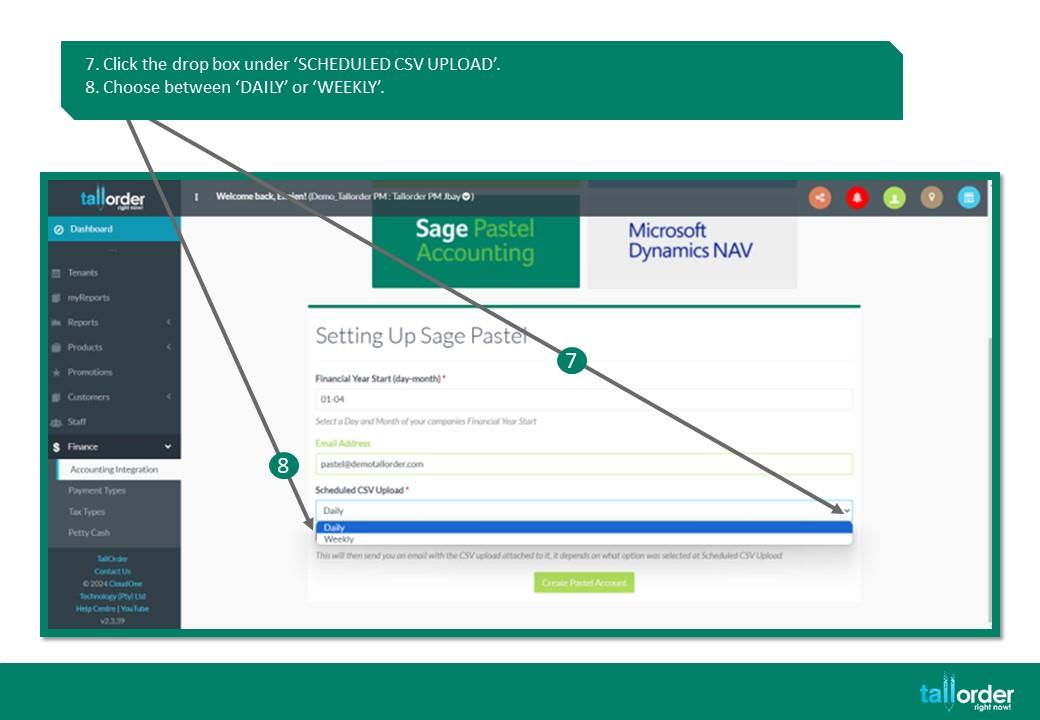
7. Click the drop box under ‘SCHEDULED CSV UPLOAD’.
8. Choose between ‘DAILY’ or ‘WEEKLY’.
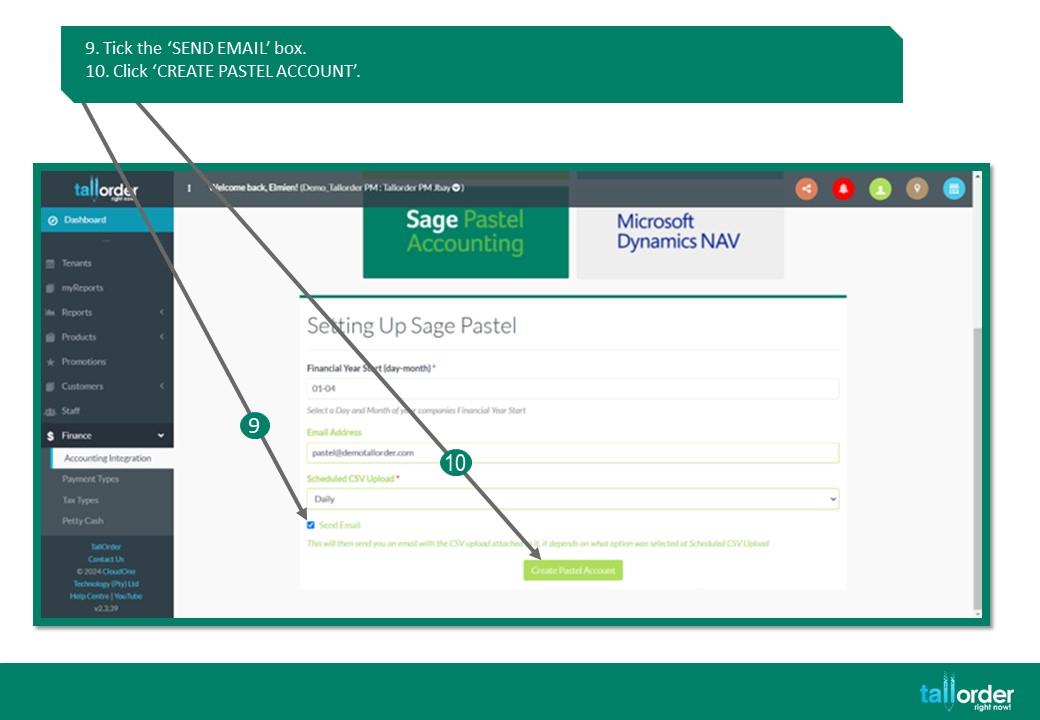
9. Tick the ‘SEND EMAIL’ box.
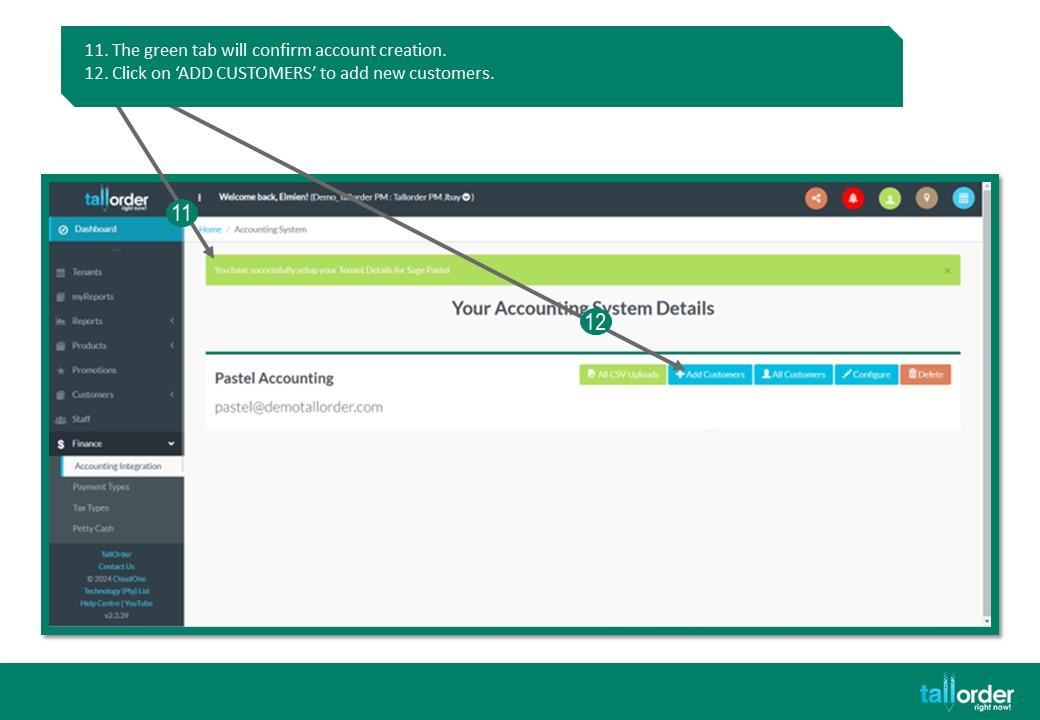
11. The green tab will confirm account creation.
12. Click on ‘ADD CUSTOMERS’ to add new customers.
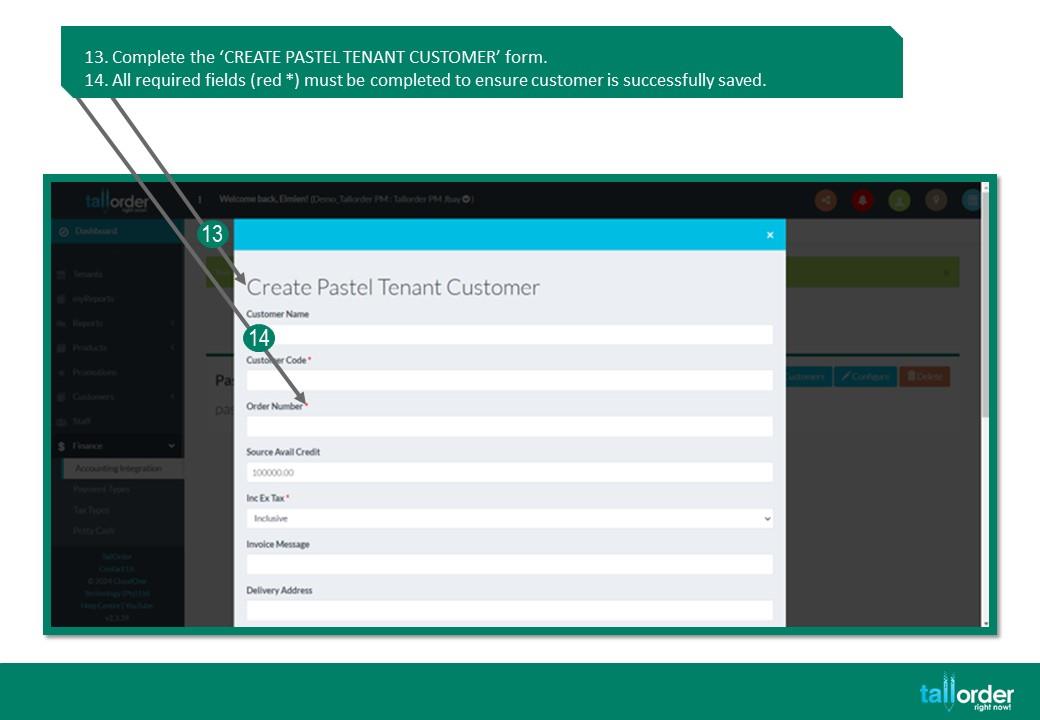
13. Complete the ‘CREATE PASTEL TENANT CUSTOMER’ form.
14. All required fields (red *) must be completed to ensure customer is successfully saved.
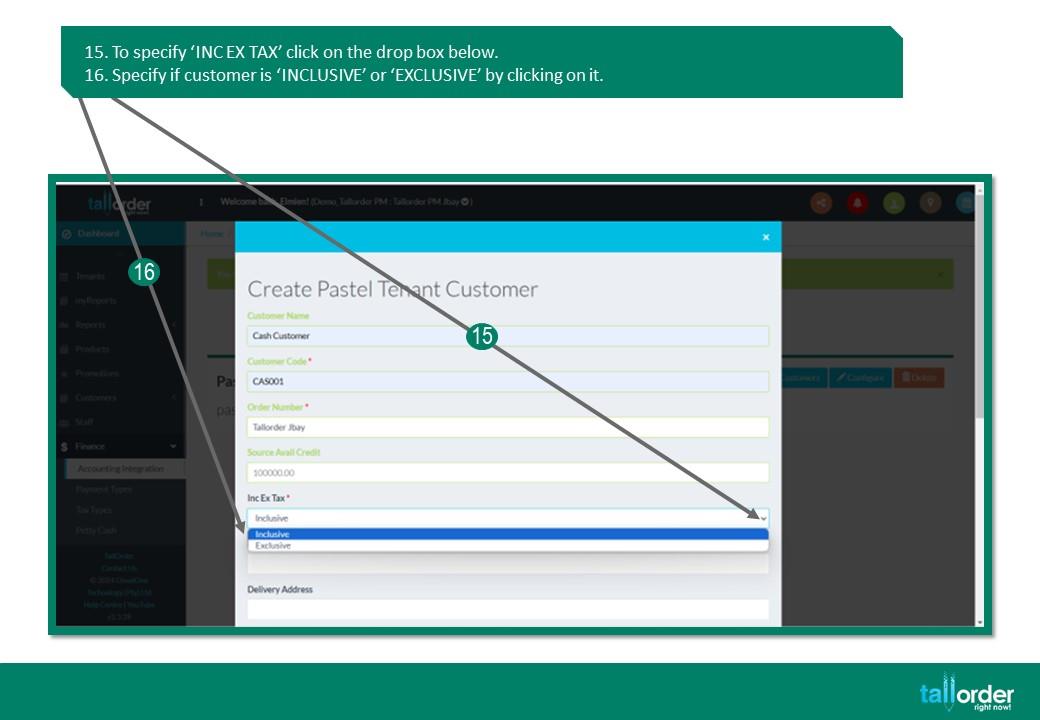
15. To specify ‘INC EX TAX’ click on the drop box below.
16. Specify if customer is ‘INCLUSIVE’ or ‘EXCLUSIVE’ by clicking on it.
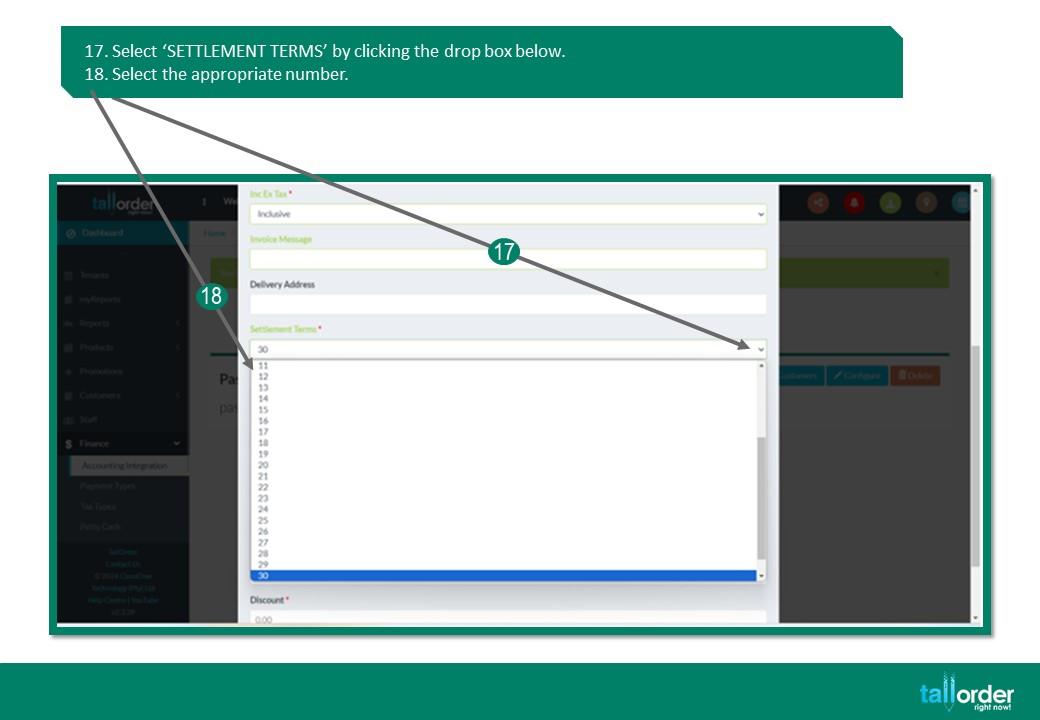
17. Select ‘SETTLEMENT TERMS’ by clicking the drop box below.
18. Select the appropriate number.

19. After completing the form click ‘CREATE’.
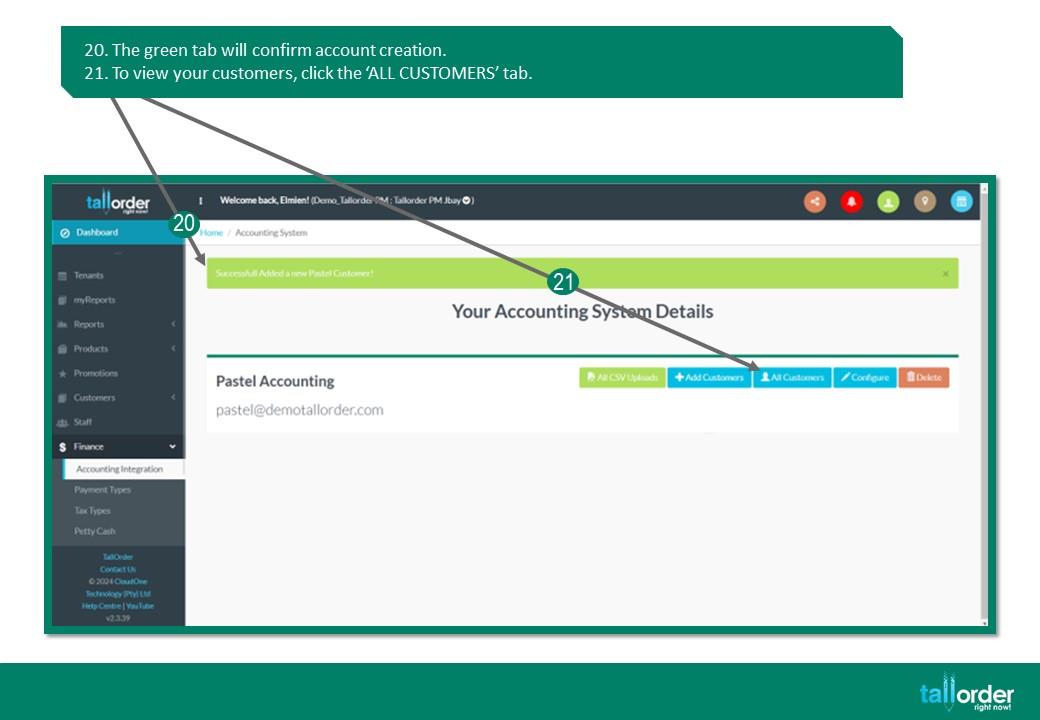
20. The green tab will confirm account creation.
21. To view your customers, click the ‘ALL CUSTOMERS’ tab.
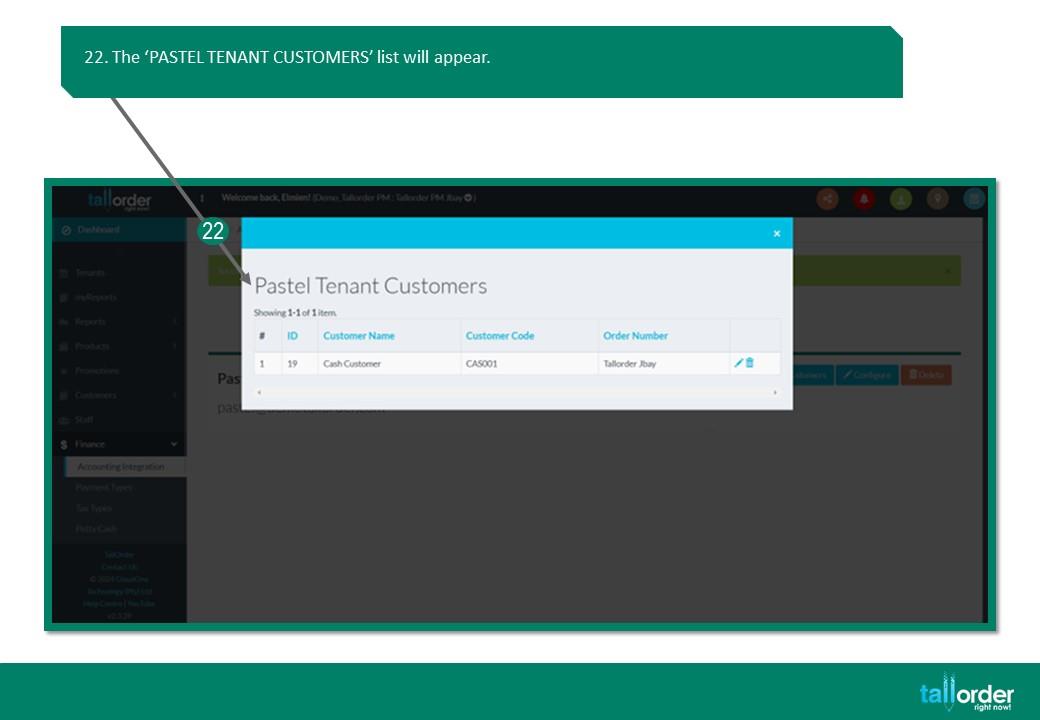
22. The ‘PASTEL TENANT CUSTOMERS’ list will appear.

23. Alternatively, click on ‘CUSTOMERS’.
24. Click on ‘CUSTOMERS’ in the drop box.
25. Your customers will be listed below.

26. To set up the products in TallOrder for Pastel, click on ‘PRODUCTS’.
27. Then click on ‘PRODUCTS’ in the drop box below.
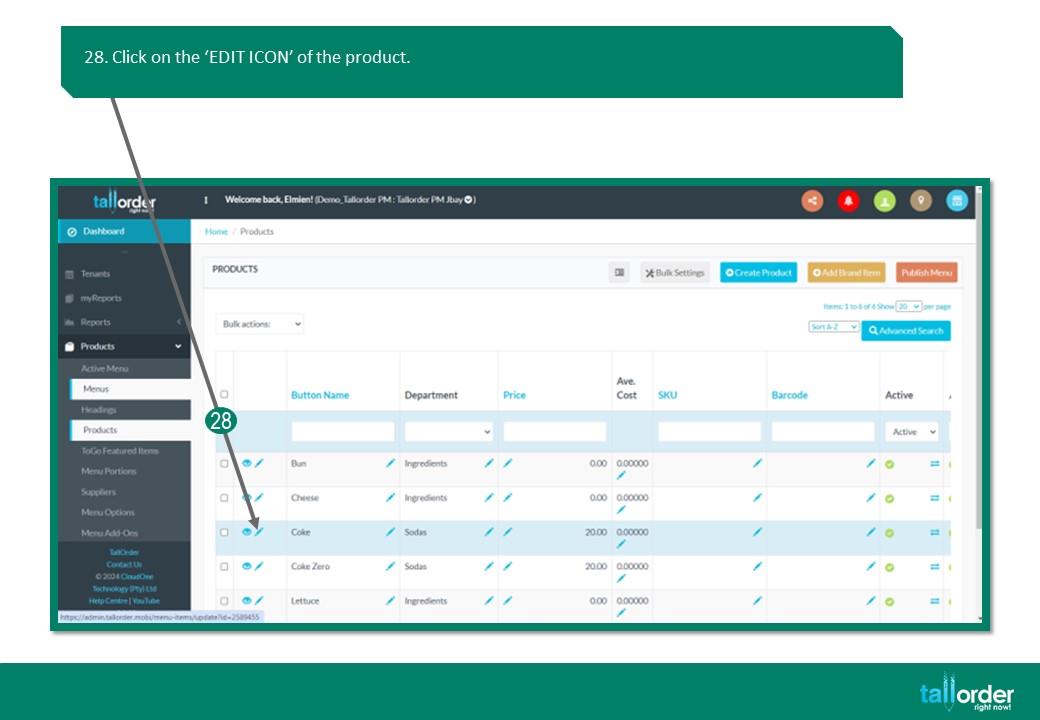
28. Click on the ‘EDIT ICON’ of the product.

29. Enter the ‘SKU’ code.
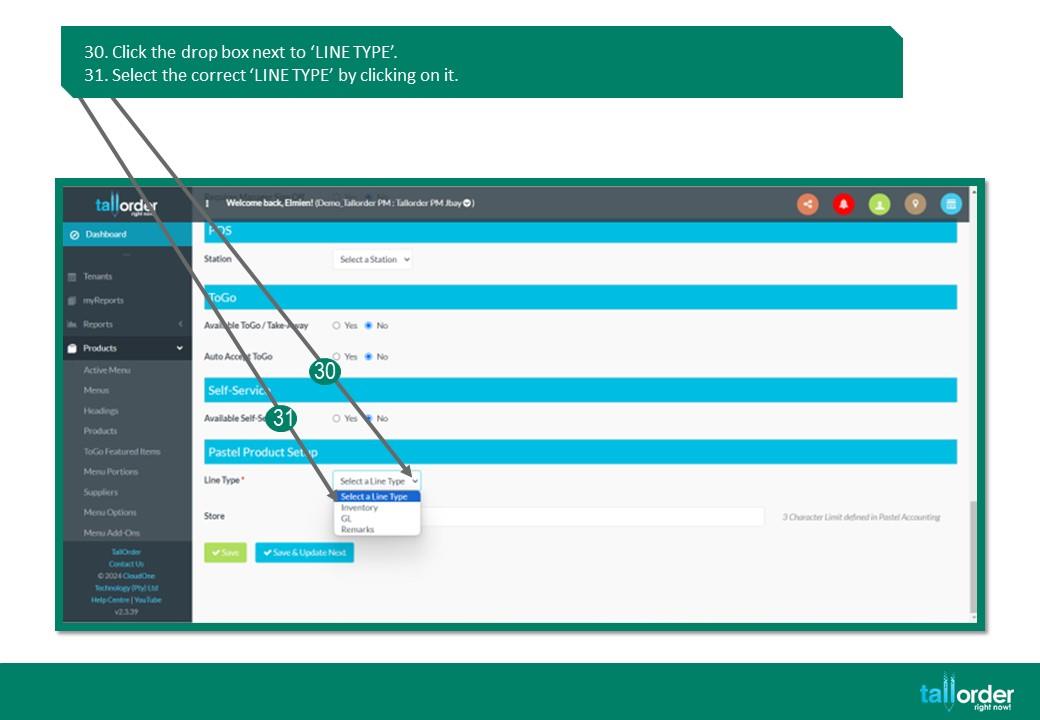
30. Click the drop box next to ‘LINE TYPE’.
31. Select the correct ‘LINE TYPE’ by clicking on it.
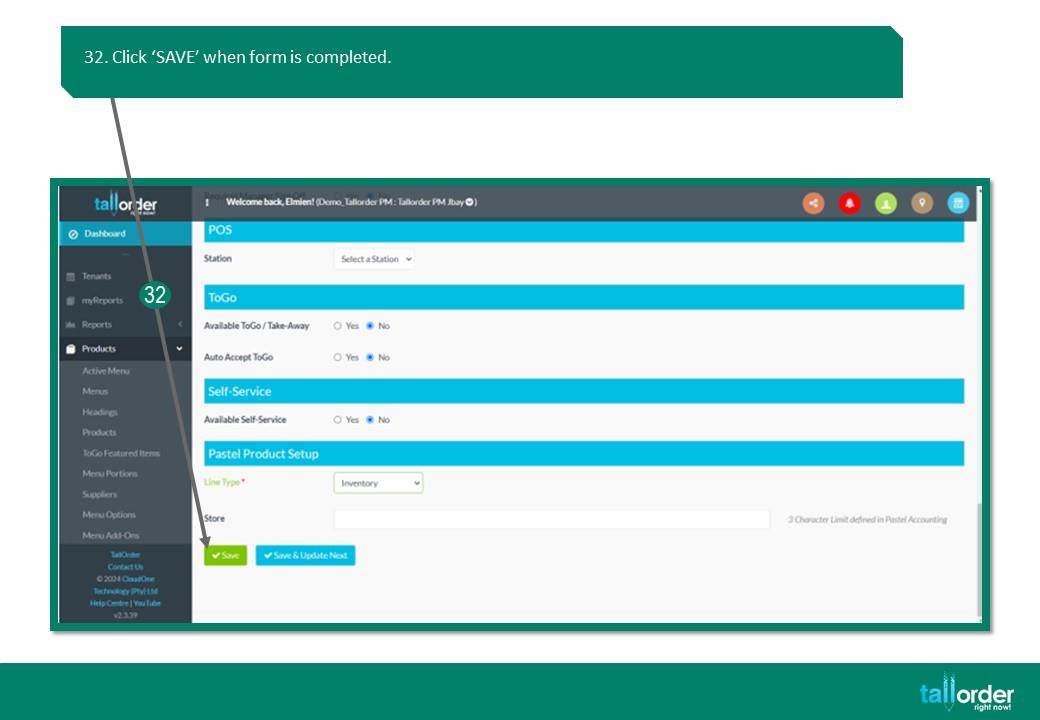
32. Click ‘SAVE’ when form is completed.
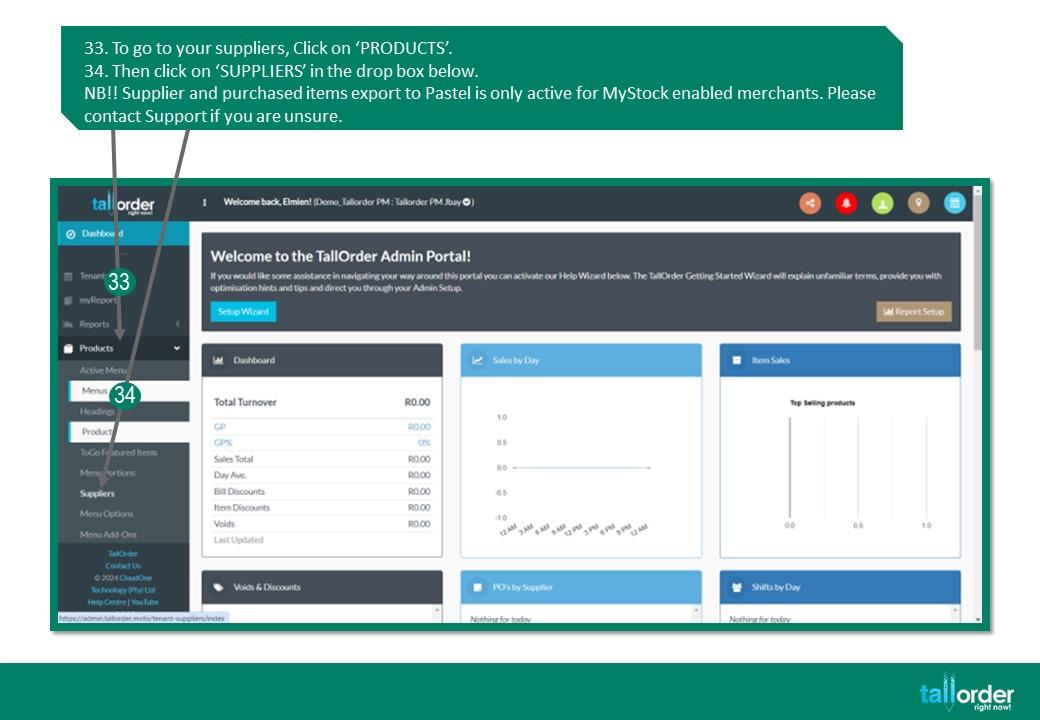
33. To go to your suppliers, Click on ‘PRODUCTS’.
34. Then click on ‘SUPPLIERS’ in the drop box below.
NB!! Supplier and purchased items export to Pastel is only active for myStock enabled merchants. Please contact Support if you are unsure.

35. Click on the ‘EDIT ICON’ of the suppliers.
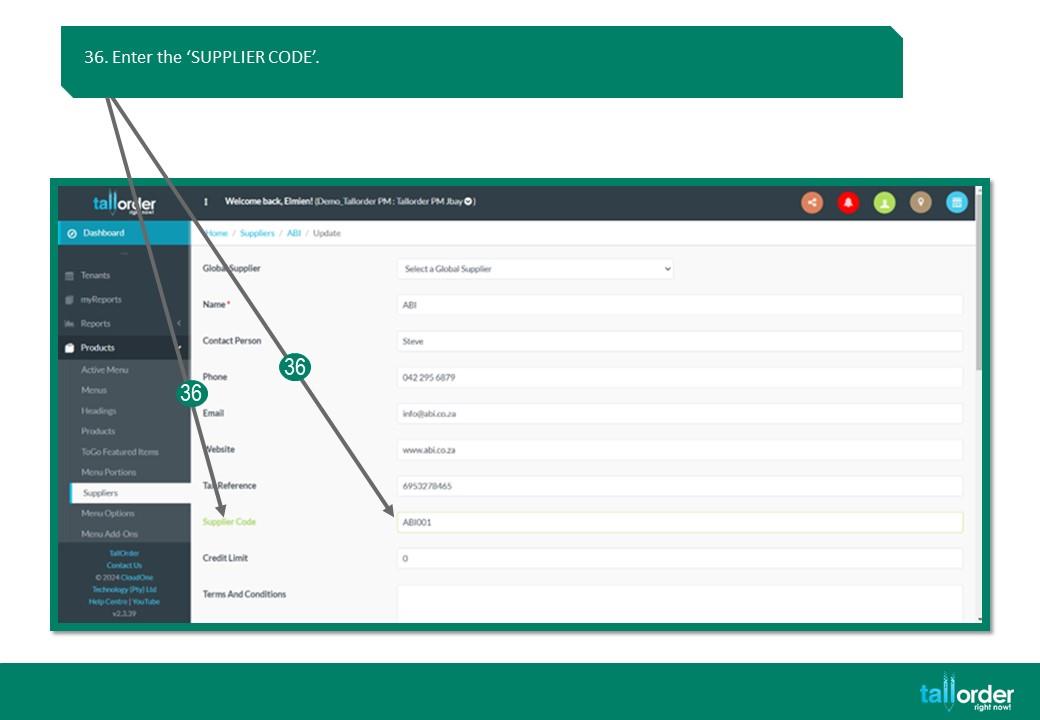
36. Enter the ‘SUPPLIER CODE’.
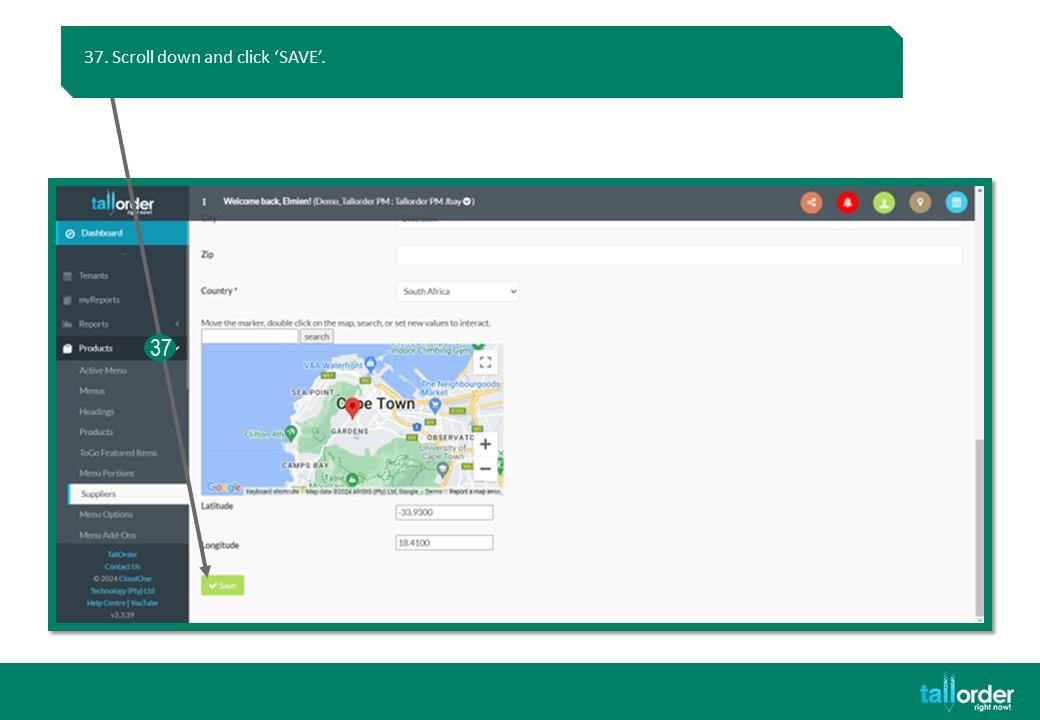
37. Scroll down and click ‘SAVE’.
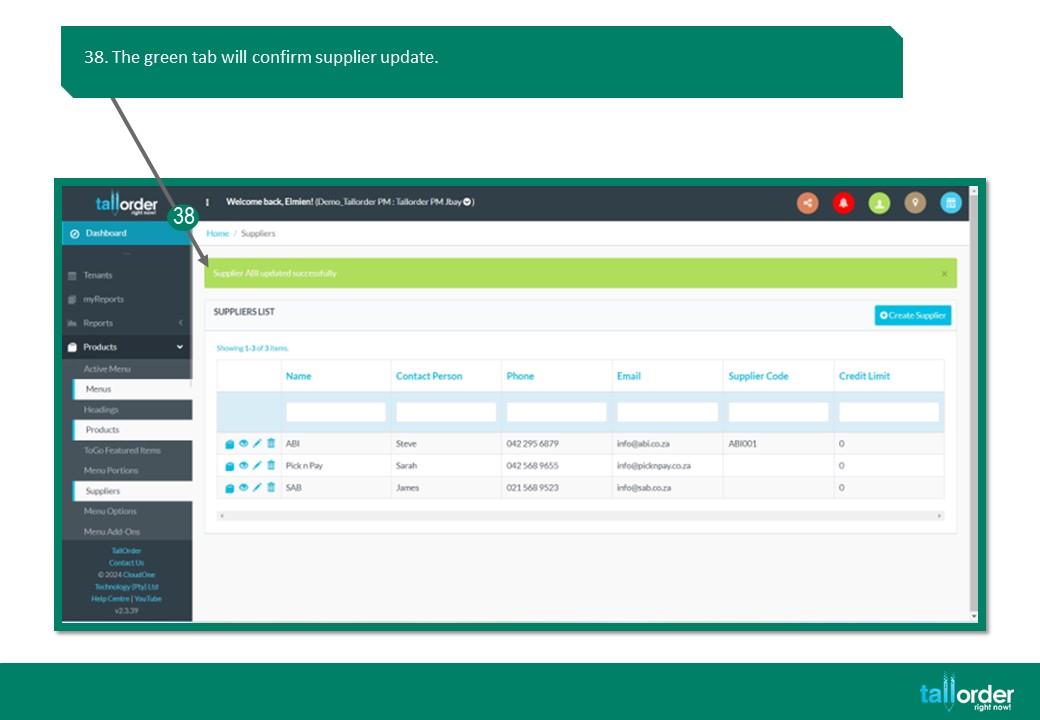
38. The green tab will confirm supplier update
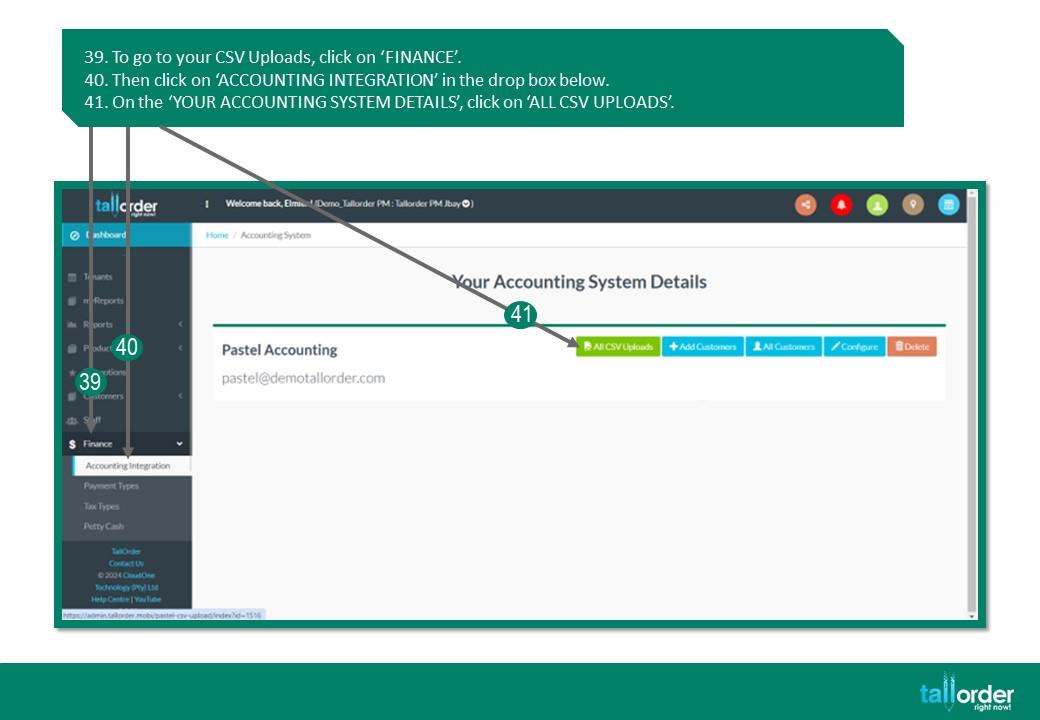
39. To go to your CSV Uploads, click on ‘FINANCE’.
40. Then click on ‘ACCOUNTING INTEGRATION’ in the drop box below.
41. On the ‘YOUR ACCOUNTING SYSTEM DETAILS’, click on ‘ALL CSV UPLOADS’.
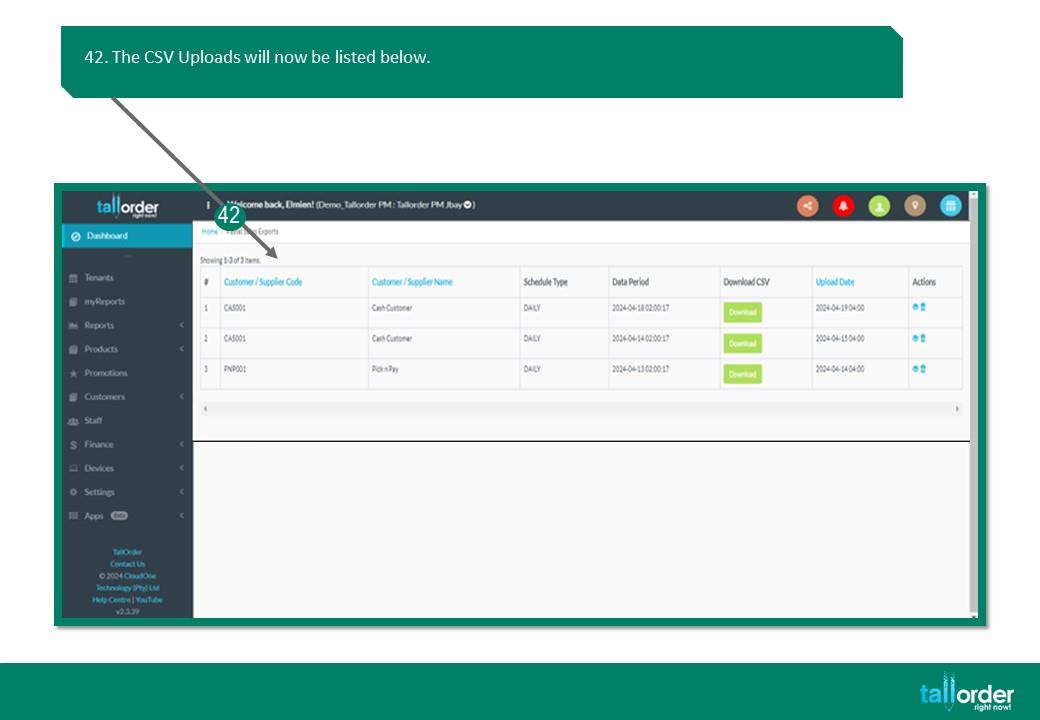
42. The CSV Uploads will now be listed below.
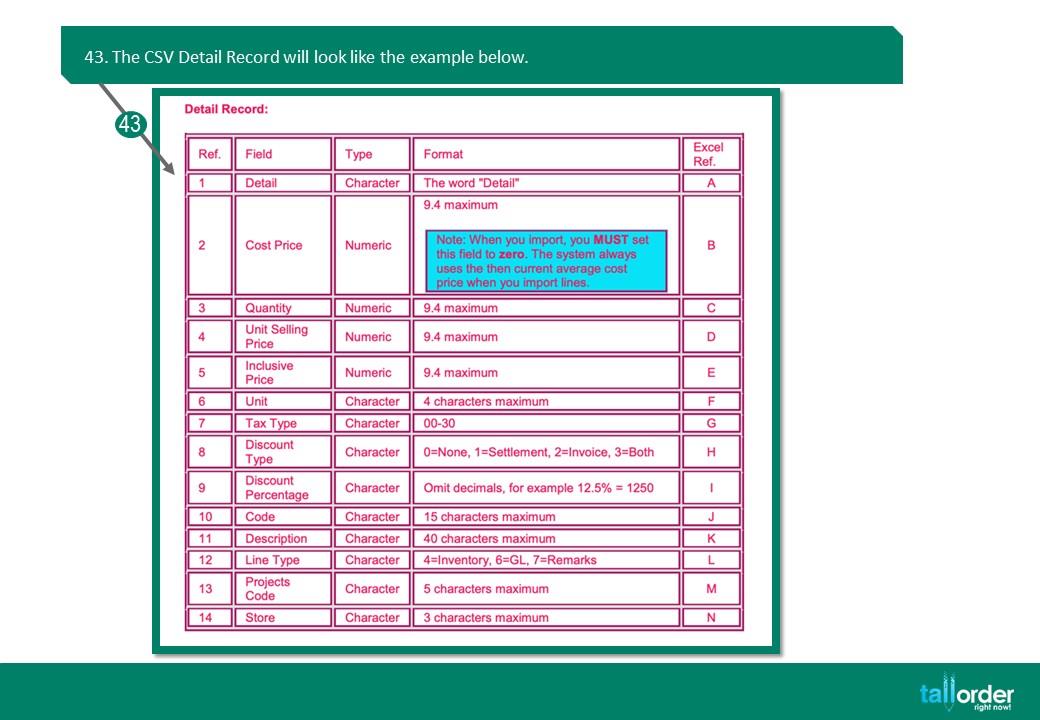
43. The CSV Detail Record will look like the example below.

44. IMPORTANT NOTE: Create a Task for Tallorder Support with the following details to select your default customer for transactions linked to card or cash transactions only. Email to support@cloudone.mobi using the template below.
STEP-BY-STEP BREAKDOWN
1. To setup Sage Pastel Accounting, click on ‘FINANCE’.
2. Click on ‘ACCOUNTING INTEGRATION’.
3. Click on the ‘SAGE PASTEL ACCOUNTING’ button.
4. Complete the ‘SETTING UP SAGE PASTEL’ form.
5. All required fields (red *) must be completed to ensure a successful setup.
6. Select the Day and Month of your Financial Year Start.
7. Click the drop box under ‘SCHEDULED CSV UPLOAD’.
8. Choose between ‘DAILY’ or ‘WEEKLY’.
9. Tick the ‘SEND EMAIL’ box.
10. Click ‘CREATE PASTEL ACCOUNT’.
11. The green tab will confirm account creation.
12. Click on ‘ADD CUSTOMERS’ to add new customers.
13. Complete the ‘CREATE PASTEL TENANT CUSTOMER’ form.
14. All required fields (red *) must be completed to ensure customer is successfully saved.
15. To specify ‘INC EX TAX’ click on the drop box below.
16. Specify if customer is ‘INCLUSIVE’ or ‘EXCLUSIVE’ by clicking on it.
17. Select ‘SETTLEMENT TERMS’ by clicking the drop box below.
18. Select the appropriate number.
19. After completing the form click ‘CREATE’.
20. The green tab will confirm account creation.
21. To view your customers, click the ‘ALL CUSTOMERS’ tab.
22. The ‘PASTEL TENANT CUSTOMERS’ list will appear.
23. Alternatively, click on ‘CUSTOMERS’.
24. Click on ‘CUSTOMERS’ in the drop box.
25. Your customers will be listed below.
26. To set up the products in TallOrder for Pastel, click on ‘PRODUCTS’.
27. Then click on ‘PRODUCTS’ in the drop box below.
28. Click on the ‘EDIT ICON’ of the product.
29. Enter the ‘SKU’ code.
30. Click the drop box next to ‘LINE TYPE’.
31. Select the correct ‘LINE TYPE’ by clicking on it.
32. Click ‘SAVE’ when form is completed.
33. To go to your suppliers, Click on ‘PRODUCTS’.
34. Then click on ‘SUPPLIERS’ in the drop box below.
NB!! Supplier and purchased items export to Pastel is only active for myStock enabled merchants.
Please contact Support if you are unsure.
35. Click on the ‘EDIT ICON’ of the suppliers.
36. Enter the ‘SUPPLIER CODE’.
37. Scroll down and click ‘SAVE’.
38. The green tab will confirm supplier update
39. To go to your CSV Uploads, click on ‘FINANCE’.
40. Then click on ‘ACCOUNTING INTEGRATION’ in the drop box below.
41. On the ‘YOUR ACCOUNTING SYSTEM DETAILS’, click on ‘ALL CSV UPLOADS’.
42. The CSV Uploads will now be listed below.
43. The CSV Detail Record will look like the example below.
44. IMPORTANT NOTE: Create a Task for Tallorder Support with the following details to select your default customer for transactions linked to card or cash transactions only. Email to support@cloudone.mobi using the template below.