
How can we help you?
Promotions Report
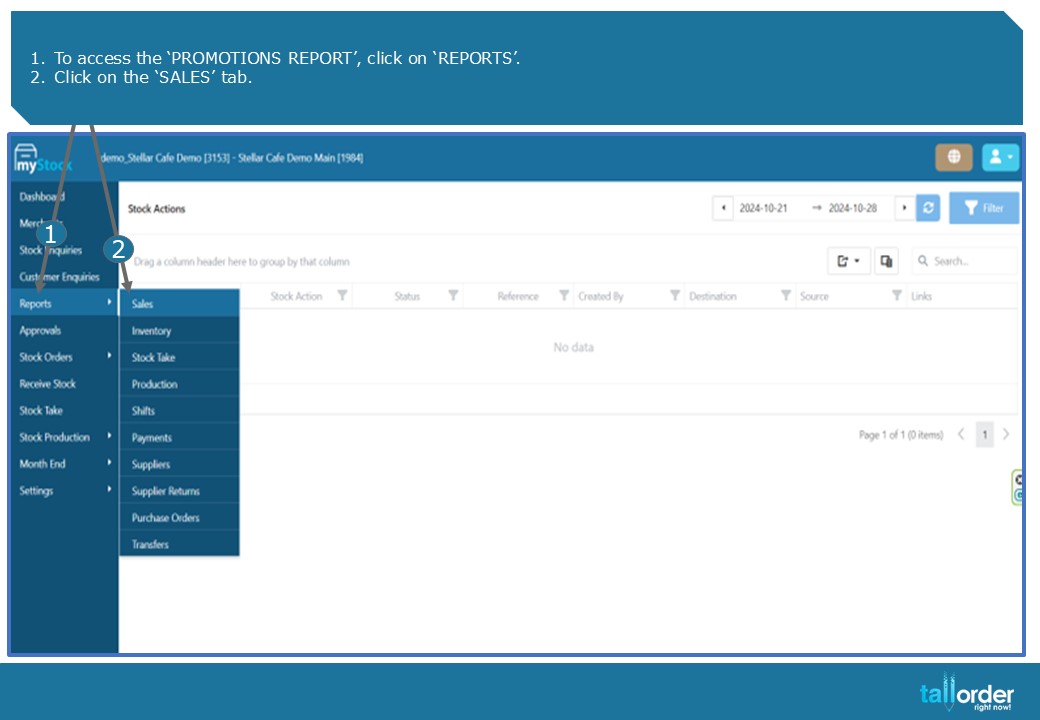
1.To access the ‘PROMOTIONS REPORT’, click on ‘REPORTS’.
2.Click on the ‘SALES’ tab.
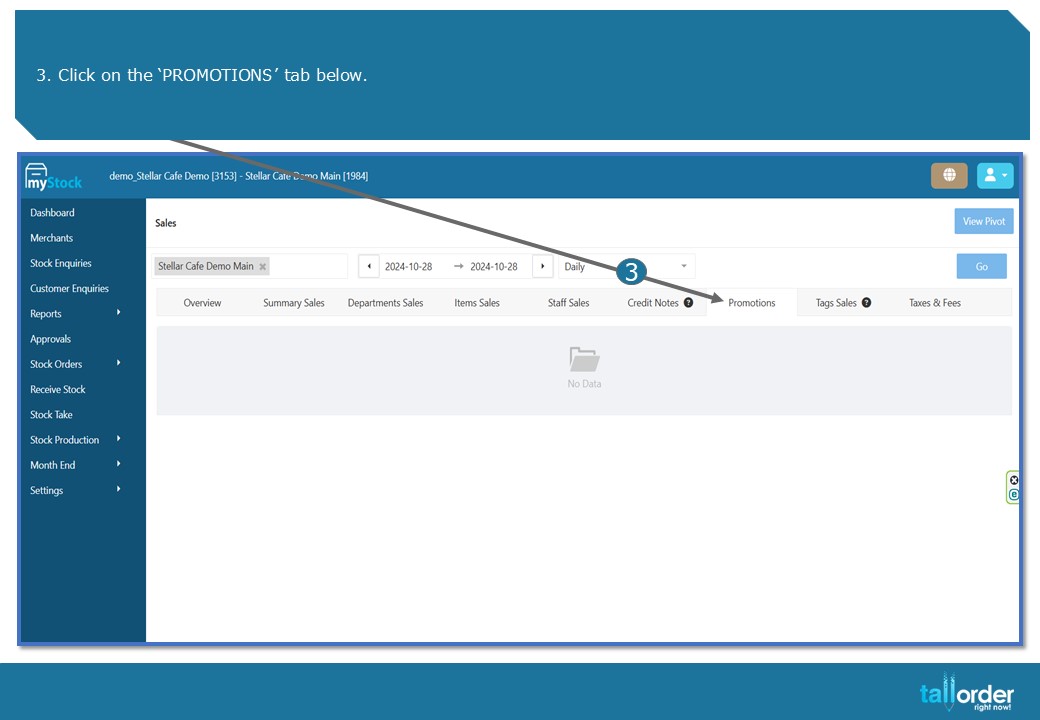
- Click on the ‘PROMOTIONS’ tab below.
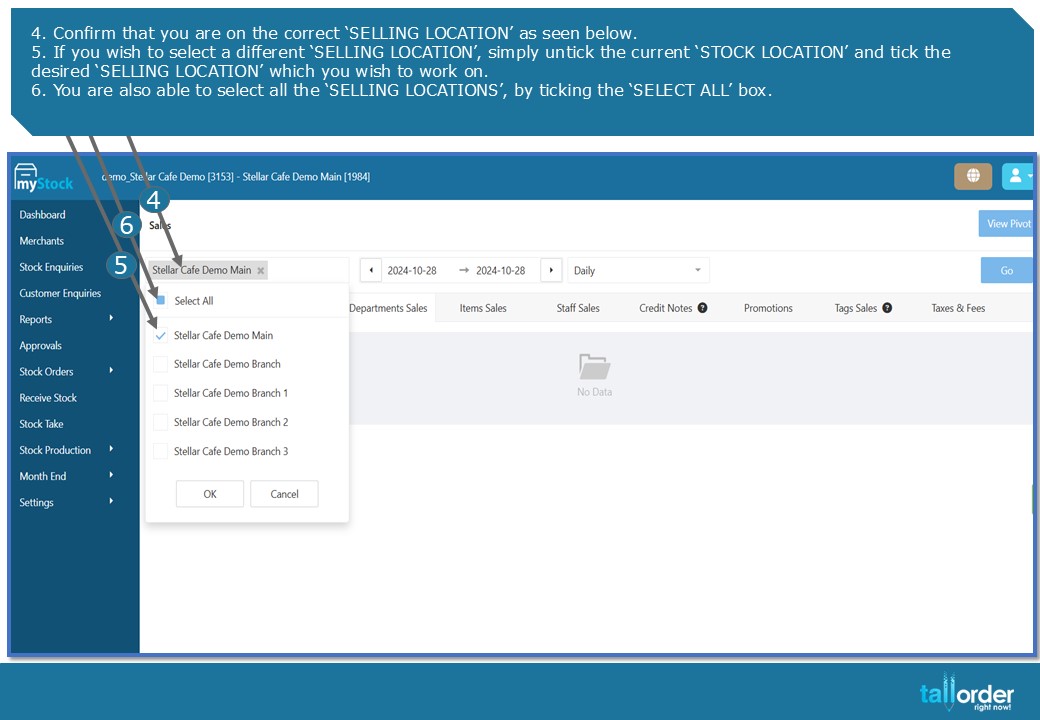
- Confirm that you are on the correct ‘SELLING LOCATION’ as seen below.
- If you wish to select a different ‘SELLING LOCATION’, simply untick the current ‘STOCK LOCATION’ and tick the desired ‘SELLING LOCATION’ which you wish to work on.
- You are also able to select all the ‘SELLING LOCATIONS’, by ticking the ‘SELECT ALL’ box.
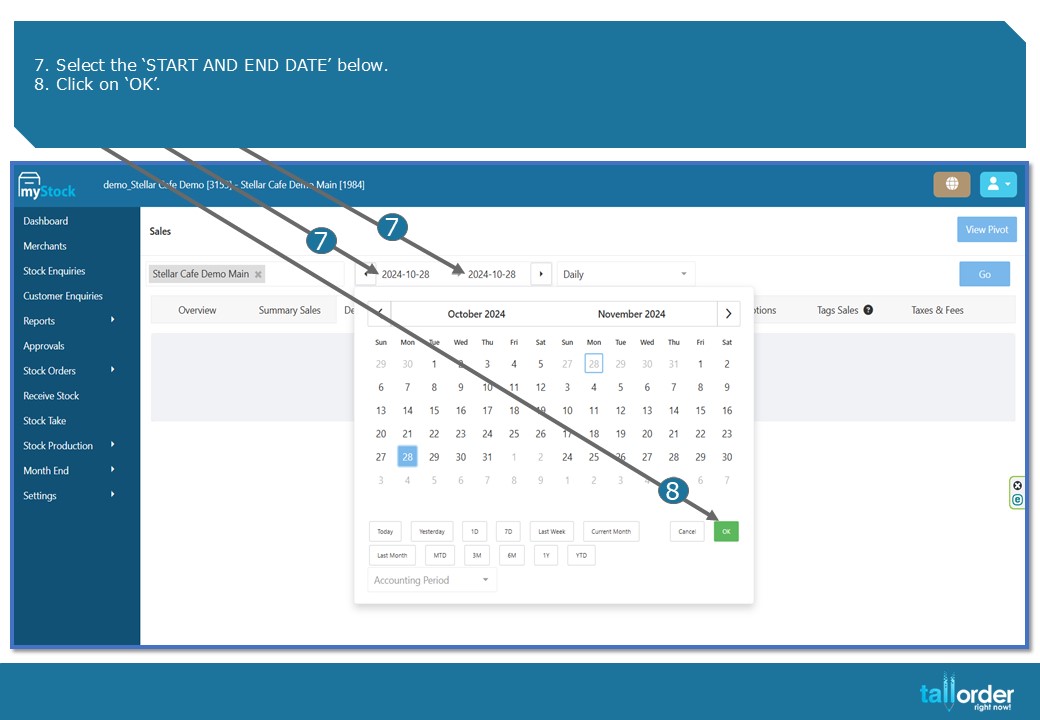
- Select the ‘START AND END DATE’ below.
- Click on ‘OK’.
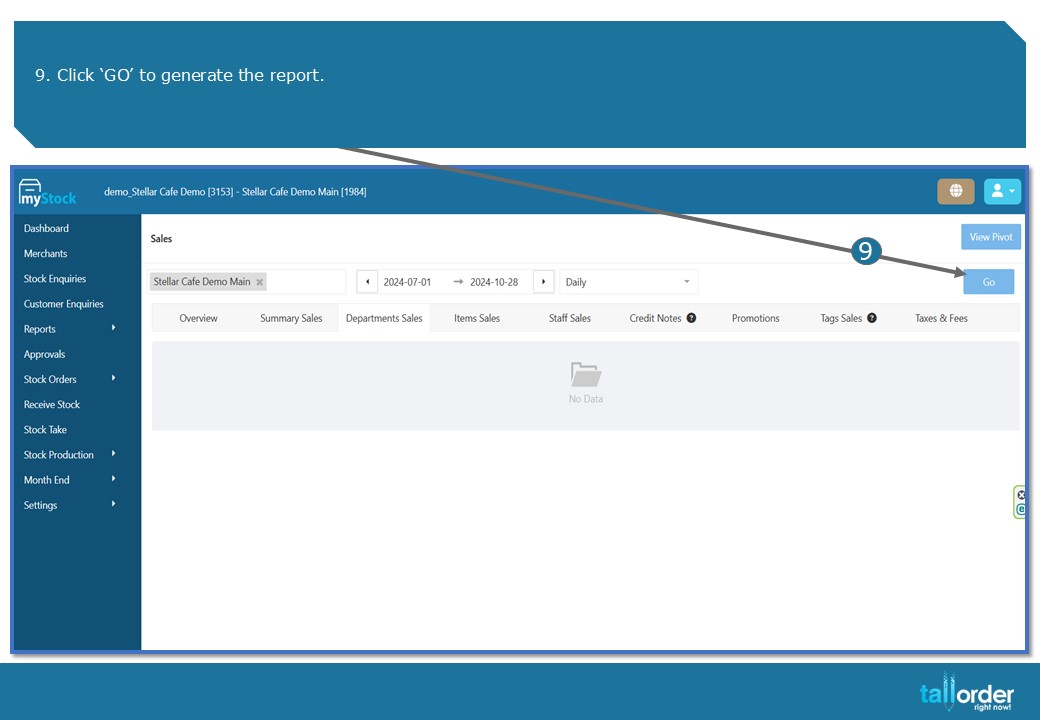
9. Click ‘GO’ to generate the report.
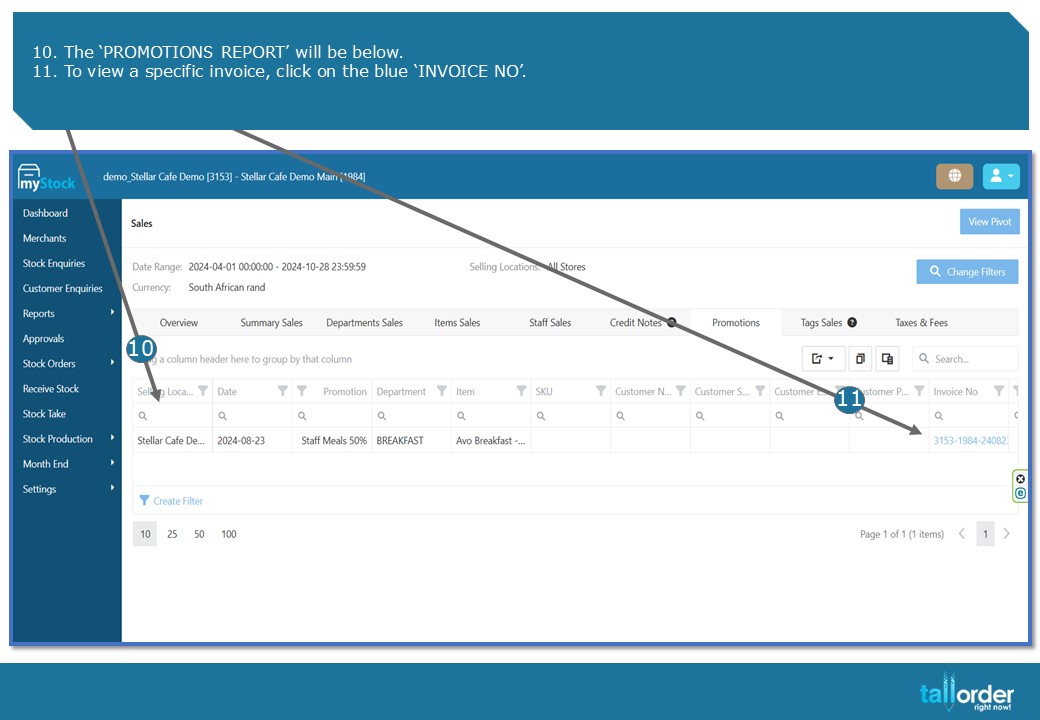
- The ‘PROMOTIONS REPORT’ will be below.
- To view a specific invoice, click on the blue ‘INVOICE NO’.
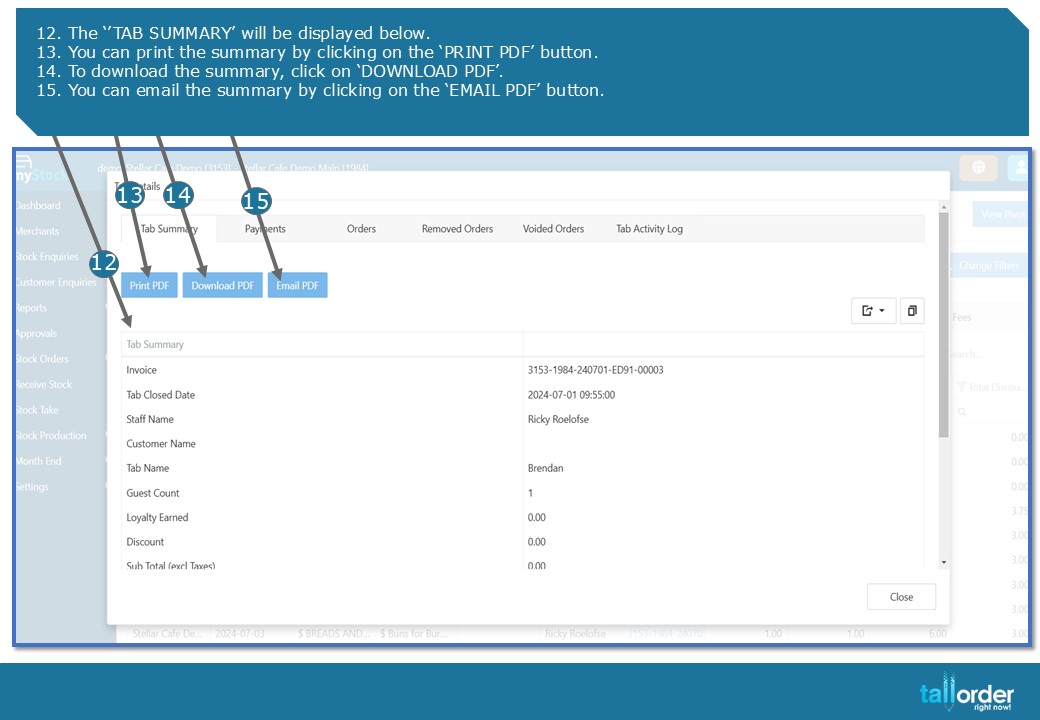
- The ‘’TAB SUMMARY’ will be displayed below.
- You can print the summary by clicking on the ‘PRINT PDF’ button.
- To download the summary, click on ‘DOWNLOAD PDF’.
- You can email the summary by clicking on the ‘EMAIL PDF’ button.
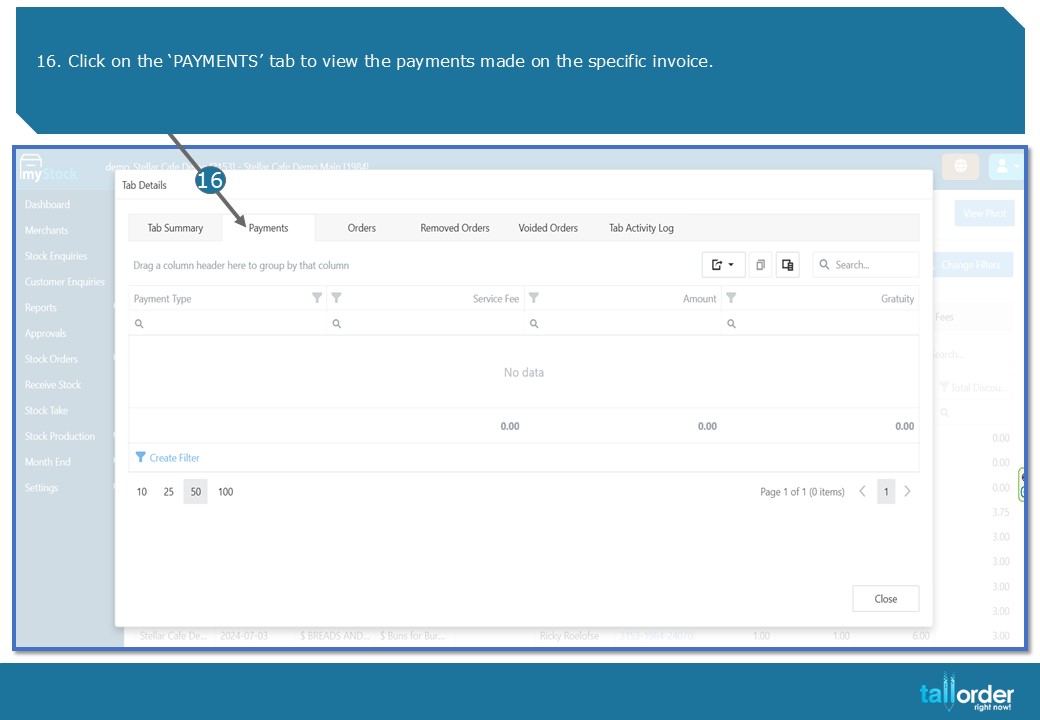
16. Click on the ‘PAYMENTS’ tab to view the payments made on the specific invoice.
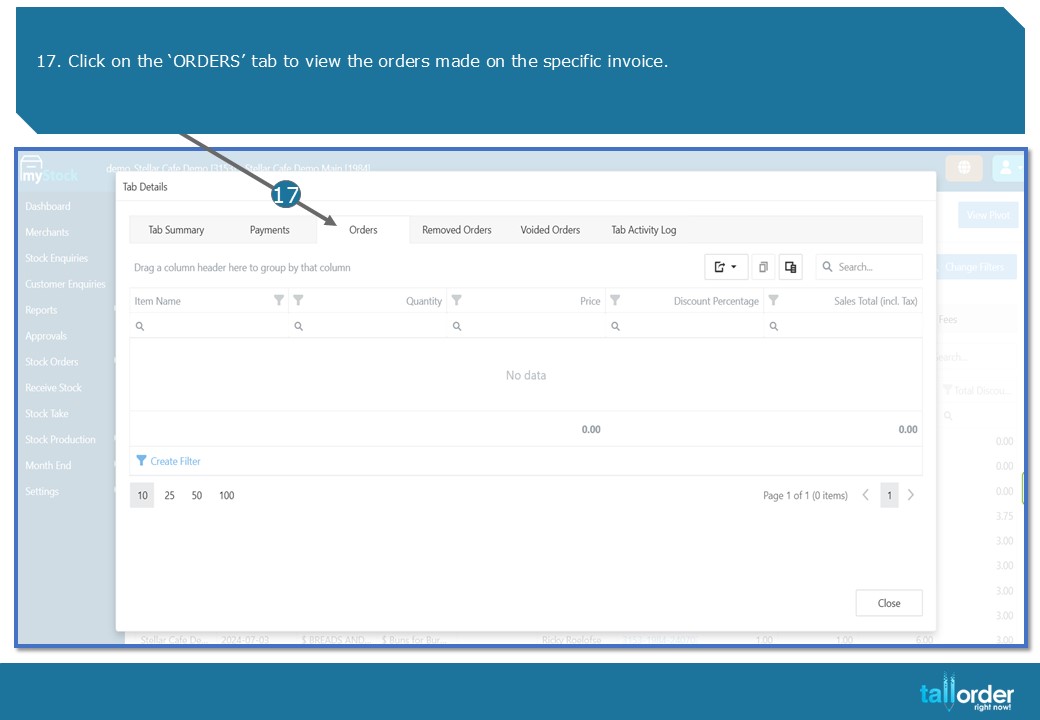
- Click on the ‘ORDERS’ tab to view the orders made on the specific invoice.
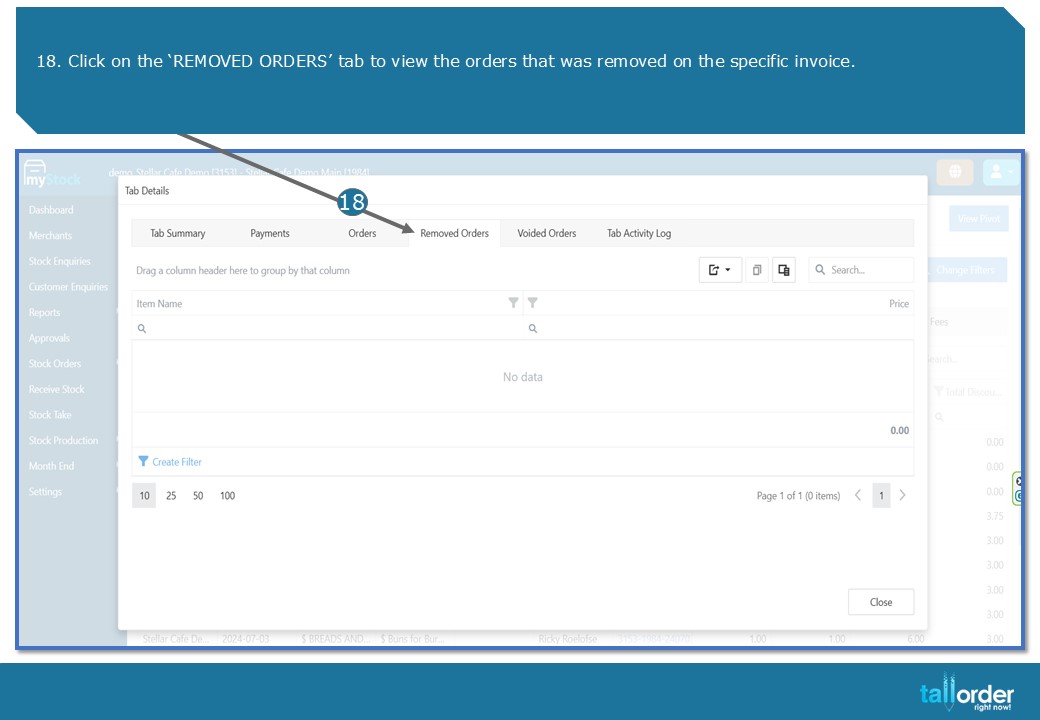
- Click on the ‘REMOVED ORDERS’ tab to view the orders that was removed on the specific invoice.
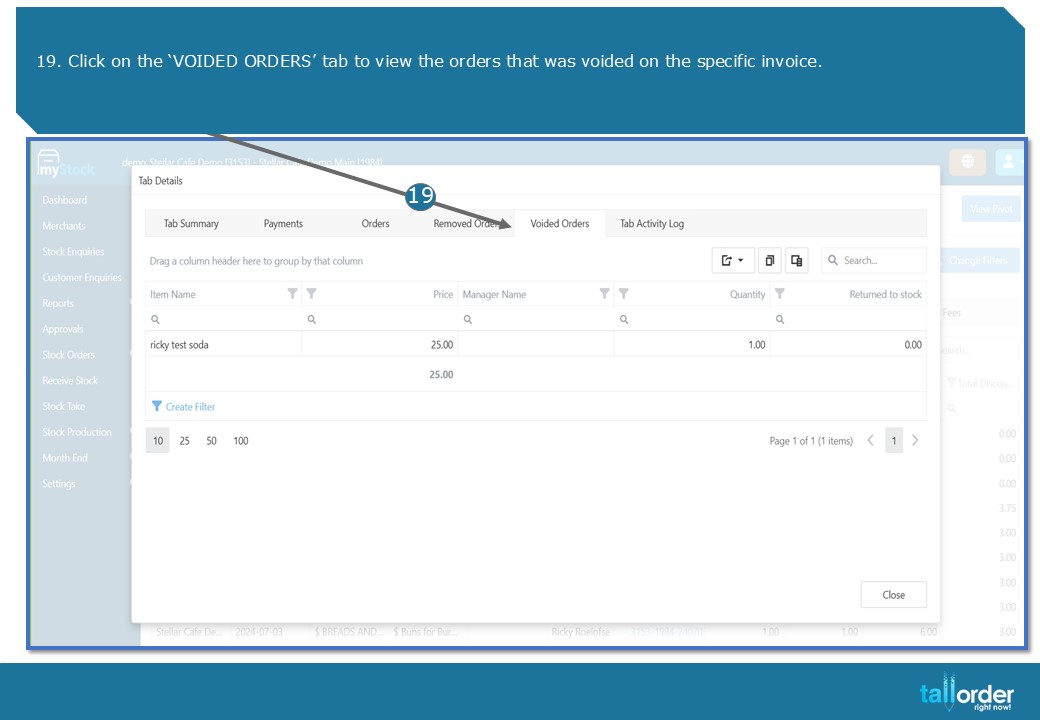
- Click on the ‘VOIDED ORDERS’ tab to view the orders that was voided on the specific invoice.
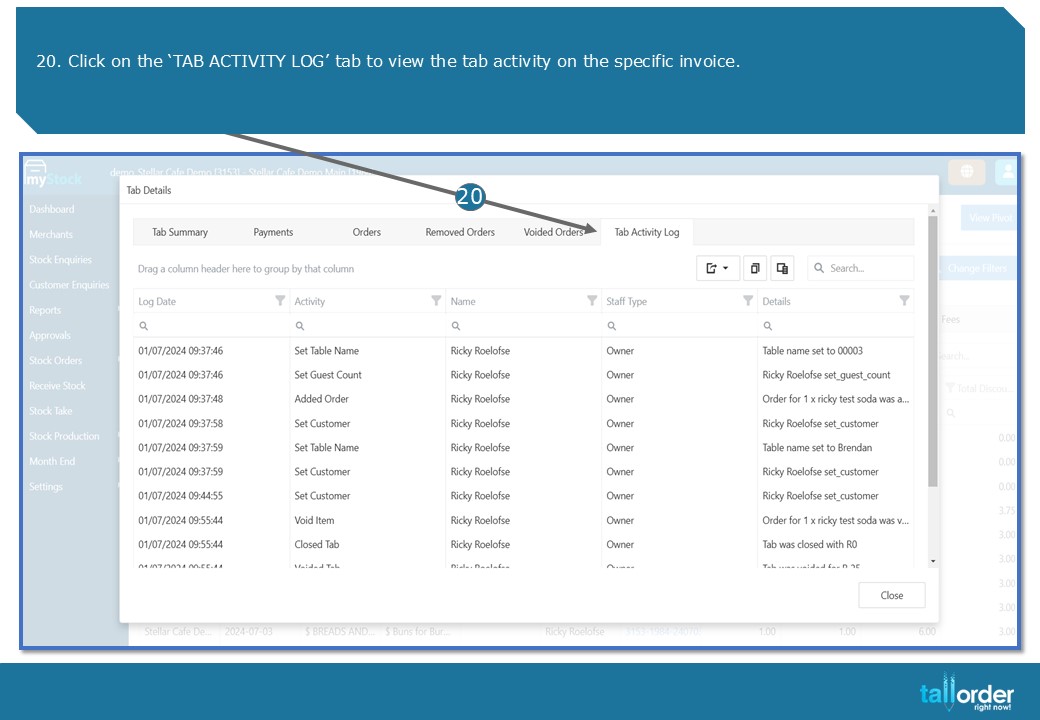
- Click on the ‘TAB ACTIVITY LOG’ tab to view the tab activity on the specific invoice.
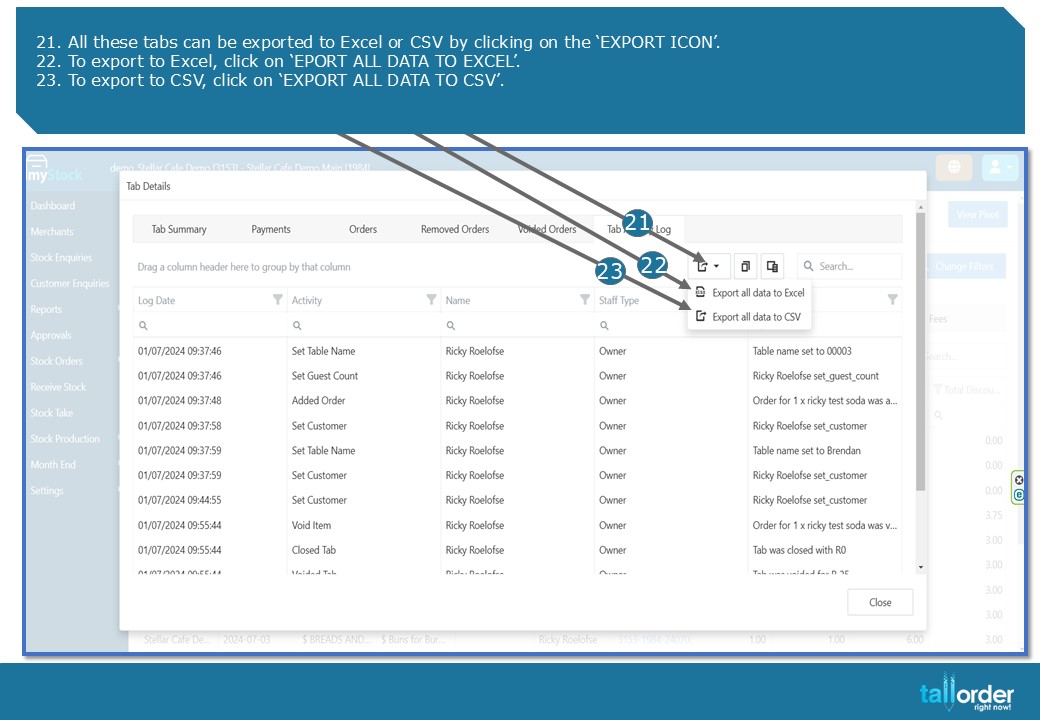
- All these tabs can be exported to Excel or CSV by clicking on the ‘EXPORT ICON’.
- To export to Excel, click on ‘EPORT ALL DATA TO EXCEL’.
- To export to CSV, click on ‘EXPORT ALL DATA TO CSV’.
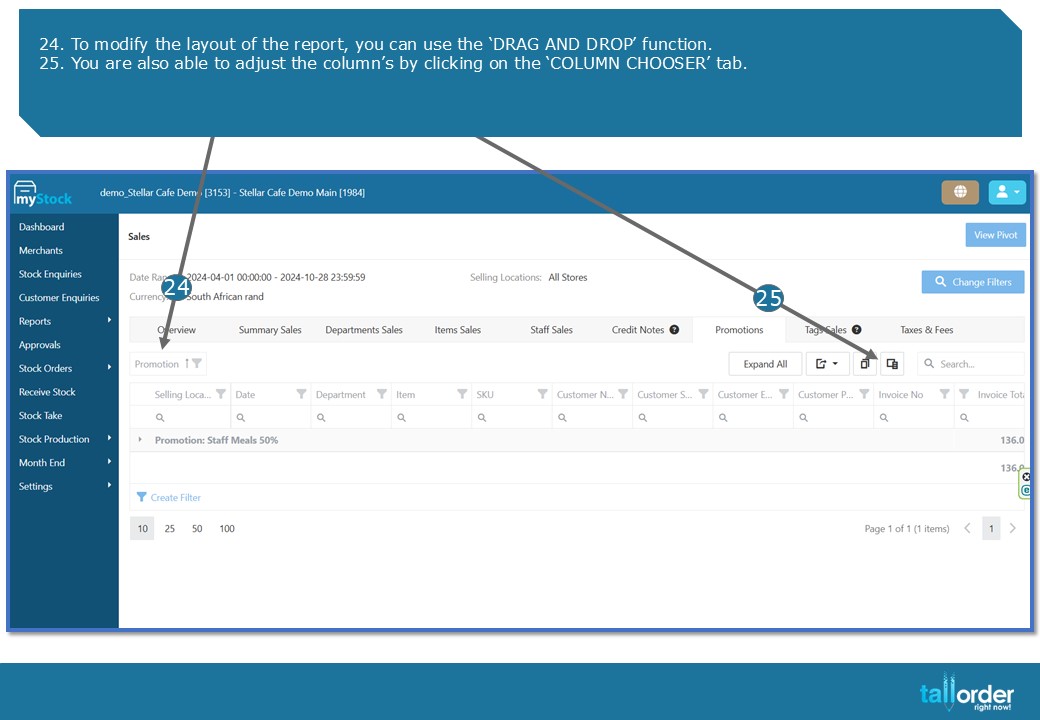
- To modify the layout of the report, you can use the ‘DRAG AND DROP’ function.
- You are also able to adjust the column’s by clicking on the ‘COLUMN CHOOSER’ tab.
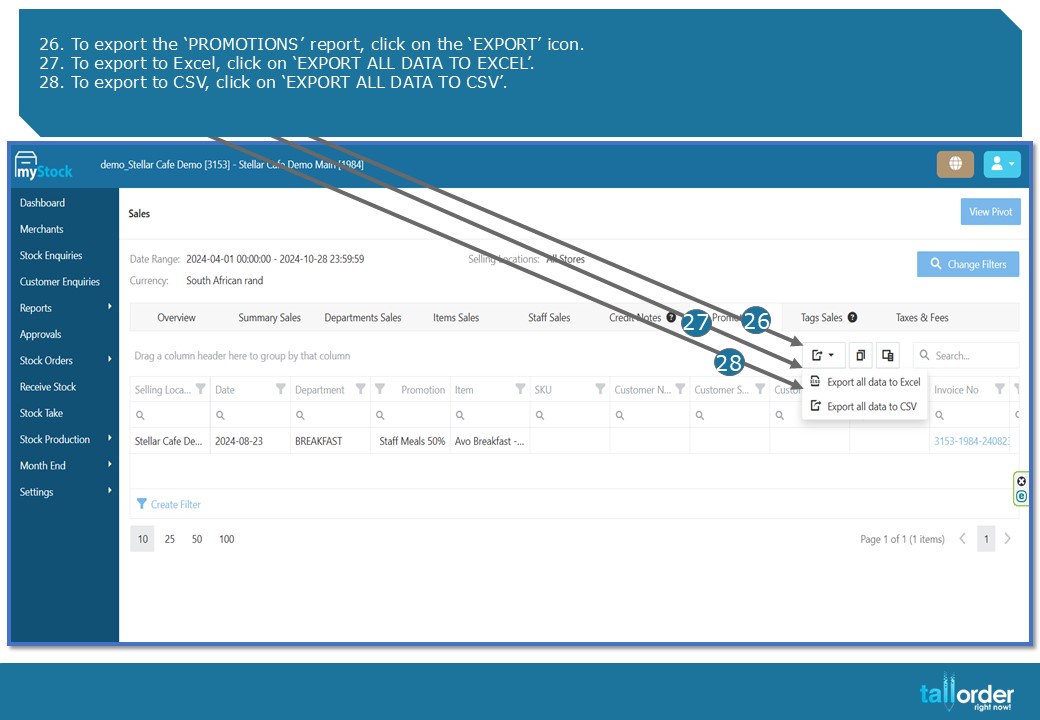
- To export the ‘PROMOTIONS’ report, click on the ‘EXPORT’ icon.
- To export to Excel, click on ‘EXPORT ALL DATA TO EXCEL’.
- To export to CSV, click on ‘EXPORT ALL DATA TO CSV’.
STEP-BY-STEP BREAKDOWN
- To access the ‘PROMOTIONSREPORT’, click on ‘REPORTS’.
- Click on the ‘SALES’ tab.
- Click on the ‘PROMOTIONS tab below.
- Confirm that you are on the correct ‘STOCK LOCATION’ as seen below.
- If you wish to select a different ‘SELLING LOCATION’, simply untick the current ‘SELLING LOCATION’ and tick the desired ‘SELLING LOCATION’ which you wish to work on.
- You are also able to select all the ‘SELLING LOCATIONS’, by ticking the ‘SELECT ALL’ box.
- Select the ‘START AND END DATE’ below.
- Click on ‘OK’.
- Click ‘GO’ to generate the report.
- The ‘PROMOTIONS REPORT’ will be below.
- To view a specific invoice, click on the blue ‘INVOICE NO’.
- The ‘’TAB SUMMARY’ will be displayed below.
- You can print the summary by clicking on the ‘PRINT PDF’ button.
- To download the summary, click on ‘DOWNLOAD PDF’.
- You can email the summary by clicking on the ‘EMAIL PDF’ button.
- Click on the ‘PAYMENTS’ tab to view the payments made on the specific invoice.
- Click on the ‘ORDERS’ tab to view the orders made on the specific invoice.
- Click on the ‘REMOVED ORDERS’ tab to view the orders that was removed on the specific invoice.
- Click on the ‘VOIDED ORDERS’ tab to view the orders that was voided on the specific invoice.
- Click on the ‘TAB ACTIVITY LOG’ tab to view the tab activity on the specific invoice.
- All these tabs can be exported to Excel or CSV by clicking on the ‘EXPORT ICON’.
- To export to Excel, click on ‘EPORT ALL DATA TO EXCEL’.
- To export to CSV, click on ‘EXPORT ALL DATA TO CSV’.
- To modify the layout of the report, you can use the ‘DRAG AND DROP’ function.
- You are also able to adjust the column’s by clicking on the ‘COLUMN CHOOSER’ tab.
- To export the ‘PROMOTIONS report, click on the ‘EXPORT’ icon.
- To export to Excel, click on ‘EXPORT ALL DATA TO EXCEL’.
- To export to CSV, click on ‘EXPORT ALL DATA TO CSV’.
- To customize the report further, you can use the ‘DRAG AND DROP’ function, as seen below.