
How can we help you?
How to set up Access control and why

- To setup Access Control go down to ‘SETTINGS’.
- Select ‘ACCESS CONTROL’

- The ‘ACTION’ column displays the 25 different areas where you can apply Access Control.
- The ‘STAFF’ column displays the employees who have access to the specific area.
- To add access control to an area, click on the desired area below.
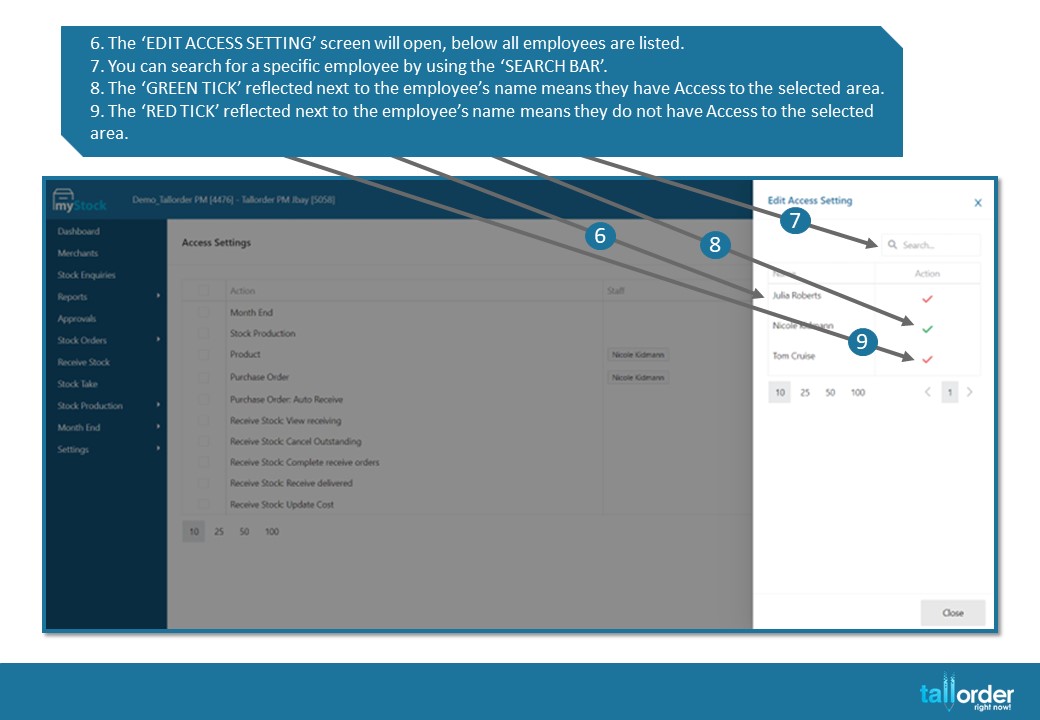
- The ‘EDIT ACCESS SETTING’ screen will open, below all employees are listed.
- You can search for a specific employee by using the ‘SEARCH BAR’.
- The ‘GREEN TICK’ reflected next to the employee’s name means they have Access to the selected area.
- The ‘RED TICK’ reflected next to the employee’s name means they do not have Access to the selected area.
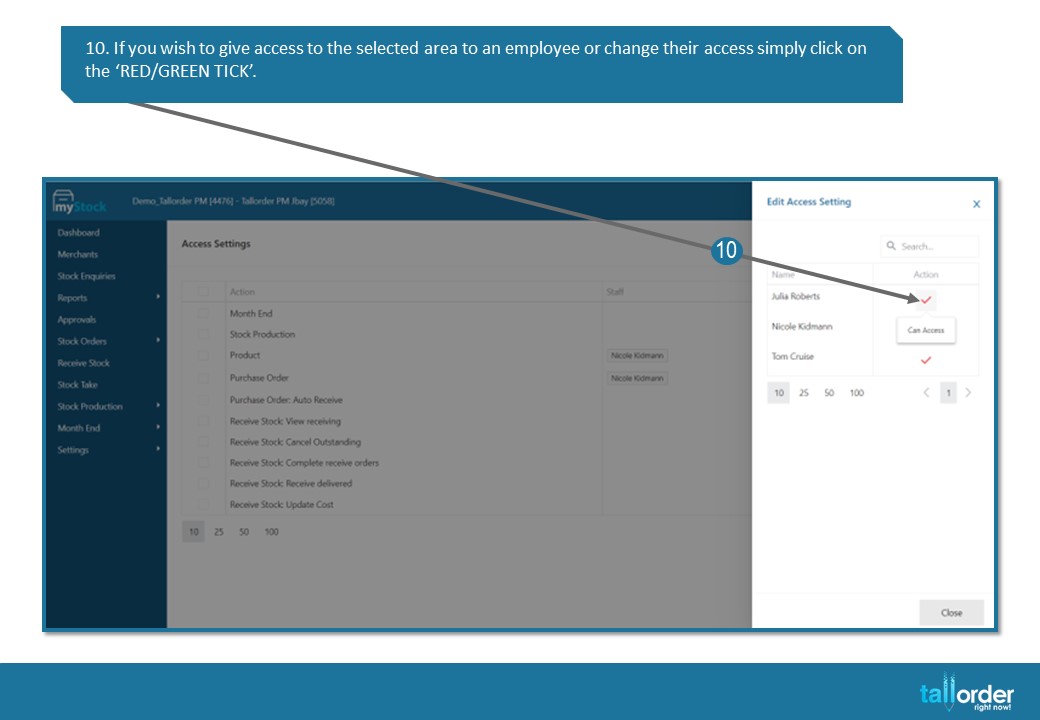
- If you wish to give access to the selected area to an employee or change their access simply click on the ‘RED/GREEN TICK’.
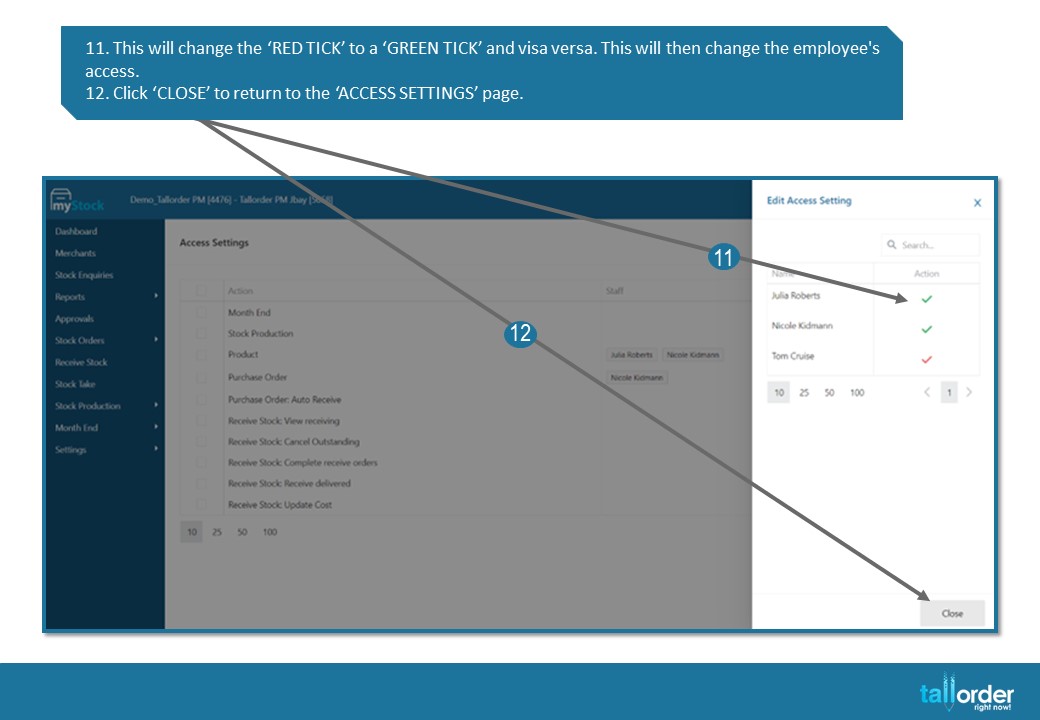
- This will change the ‘RED TICK’ to a ‘GREEN TICK’ and visa versa. This will then change the employee’s access.
- Click ‘CLOSE’ to return to the ‘ACCESS SETTINGS’ page.
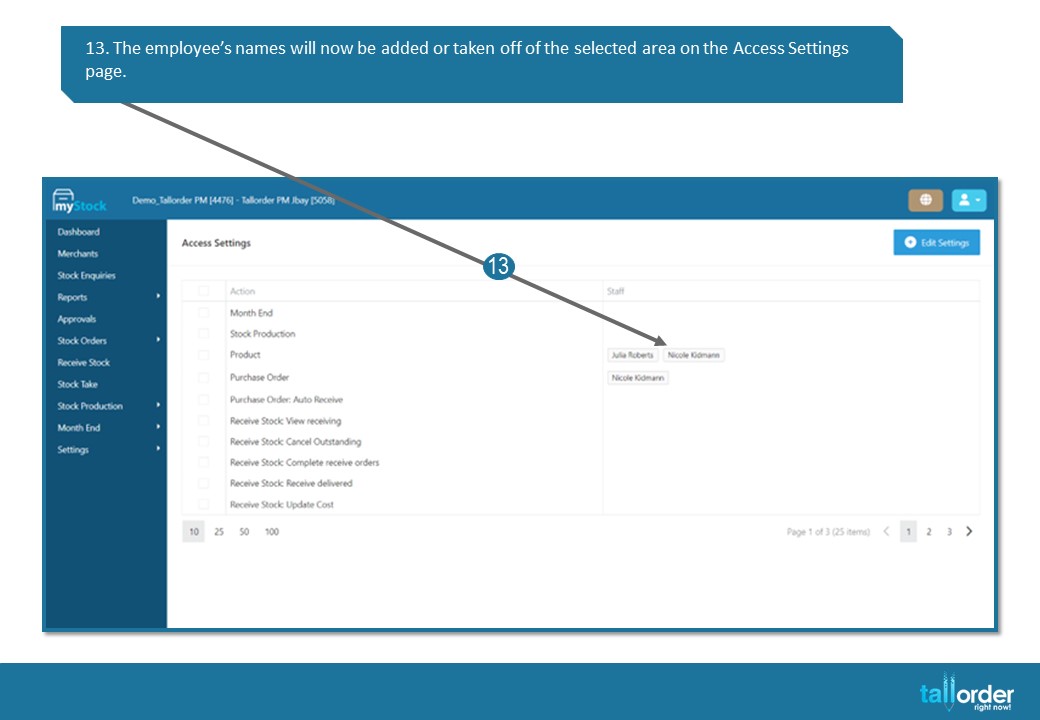
- The employee’s names will now be added or taken off of the selected area on the Access Settings page.

- By clicking in the ‘BOX’ next to the areas, this will highlight the area.
STEP-BY-STEP BREAKDOWN
- To setup Access Control go down to ‘SETTINGS’.
- Select ‘ACCESS CONTROL’
- The ‘ACTION’ column displays the 25 different areas where you can apply Access Control.
- The ‘STAFF’ column displays the employees who have access to the specific area.
- To add access control to an area, click on the desired area below.
- The ‘EDIT ACCESS SETTING’ screen will open, below all employees are listed.
- You can search for a specific employee by using the ‘SEARCH BAR’.
- The ‘GREEN TICK’ reflected next to the employee’s name means they have Access to the selected area.
- The ‘RED TICK’ reflected next to the employee’s name means they do not have Access to the selected area.
- If you wish to give access to the selected area to an employee or change their access simply click on the ‘RED/GREEN TICK’.
- This will change the ‘RED TICK’ to a ‘GREEN TICK’ and visa versa. This will then change the employee’s access.
- Click ‘CLOSE’ to return to the ‘ACCESS SETTINGS’ page.
- The employee’s names will now be added or taken off of the selected area on the Access Settings page.
- By clicking in the ‘BOX’ next to the areas, this will highlight the area.