
How can we help you?
How to set up departments
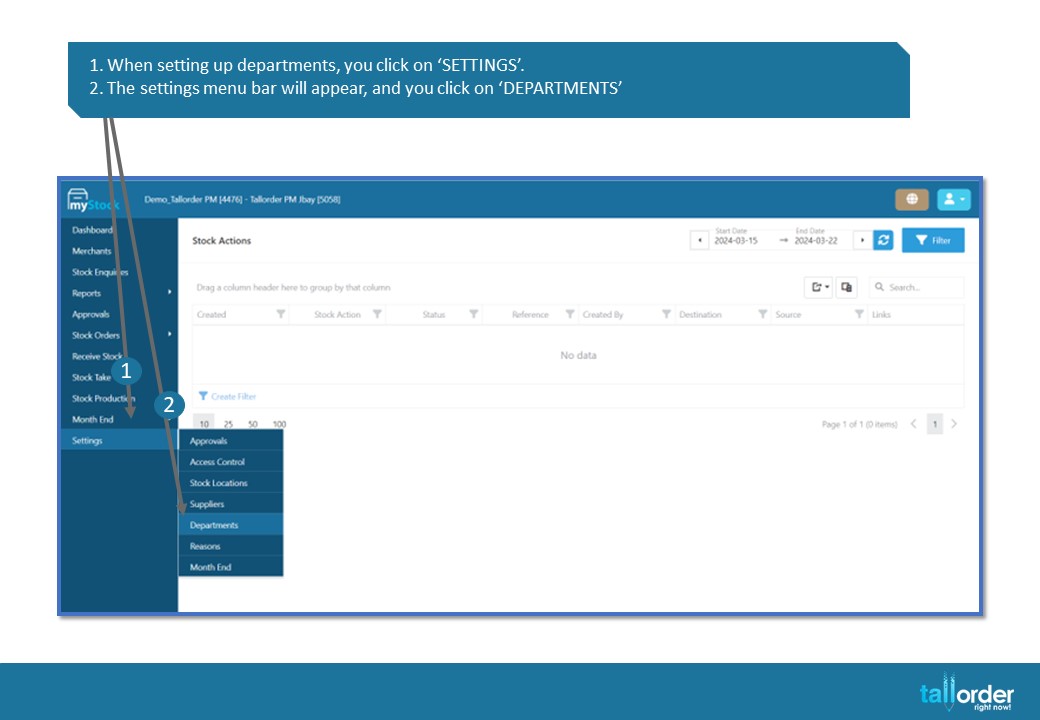
- When setting up departments, you click on ‘SETTINGS’.
- The settings menu bar will appear, and you click on ‘DEPARTMENTS’

- You will now be directed to your departments list, where all departments which have been created are displayed.
- Click on ‘NEW DEPARTMENT’.
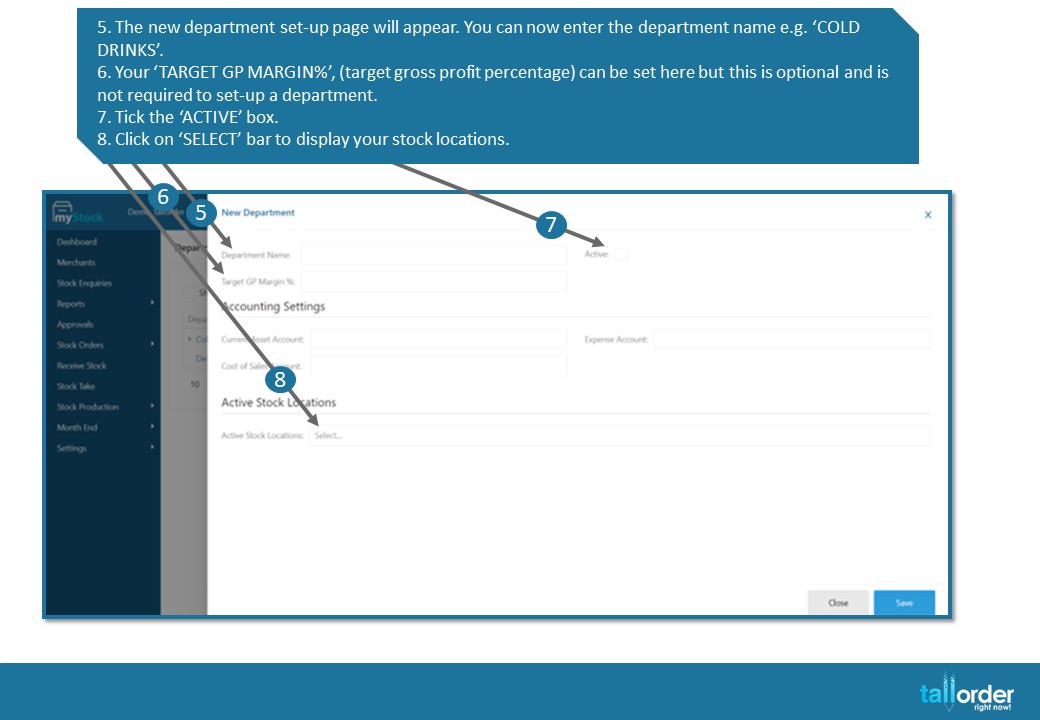
- The new department set-up page will appear. You can now enter the department name e.g. ‘COLD DRINKS’.
- Your ‘TARGET GP MARGIN%’, (target gross profit percentage) can be set here but this is optional and is not required to set-up a department.
- Tick the ‘ACTIVE’ box.
- Click on ‘SELECT’ bar to display your stock locations.
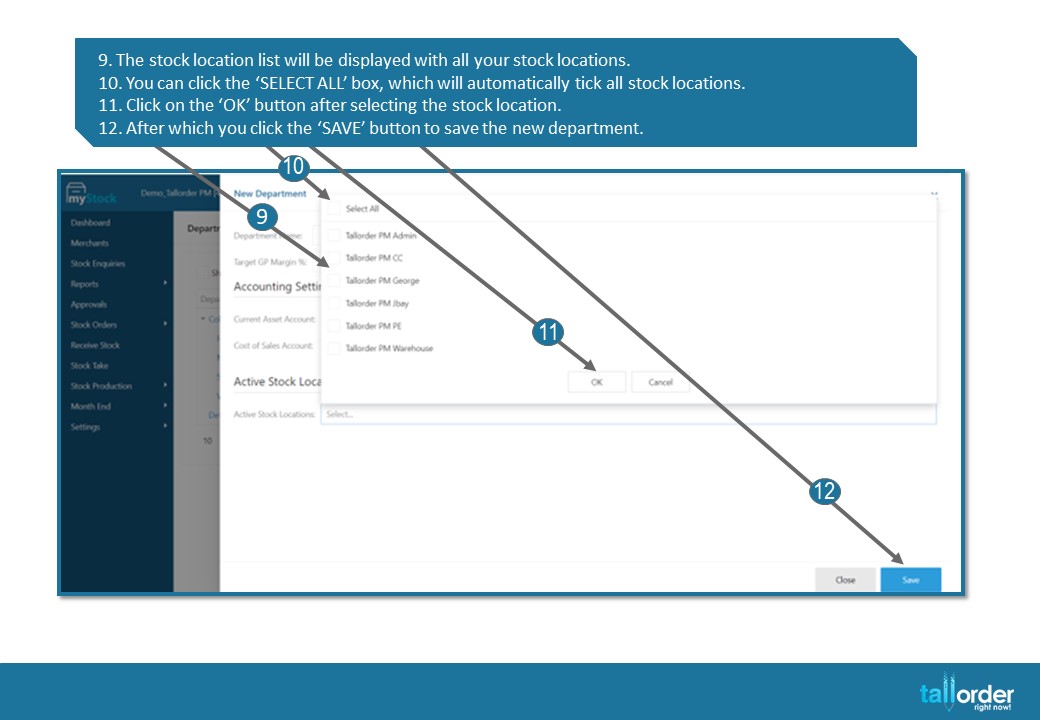
- The stock location list will be displayed with all your stock locations.
- You can click the ‘SELECT ALL’ box, which will automatically tick all stock locations.
- Click on the ‘OK’ button after selecting the stock location.
- After which you click the ‘SAVE’ button to save the new department.
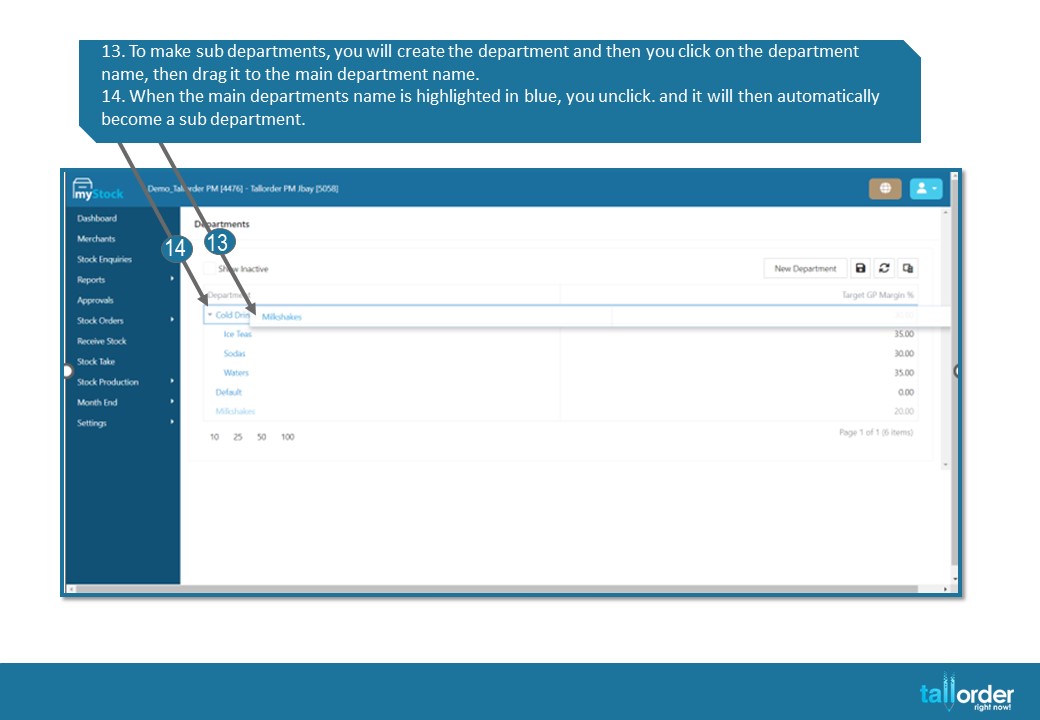
- To make sub departments, you will create the department and then you click on the department name, then drag it to the main department name.
- When the main department’s name is highlighted in blue, you unclick. and it will then automatically become a sub department.
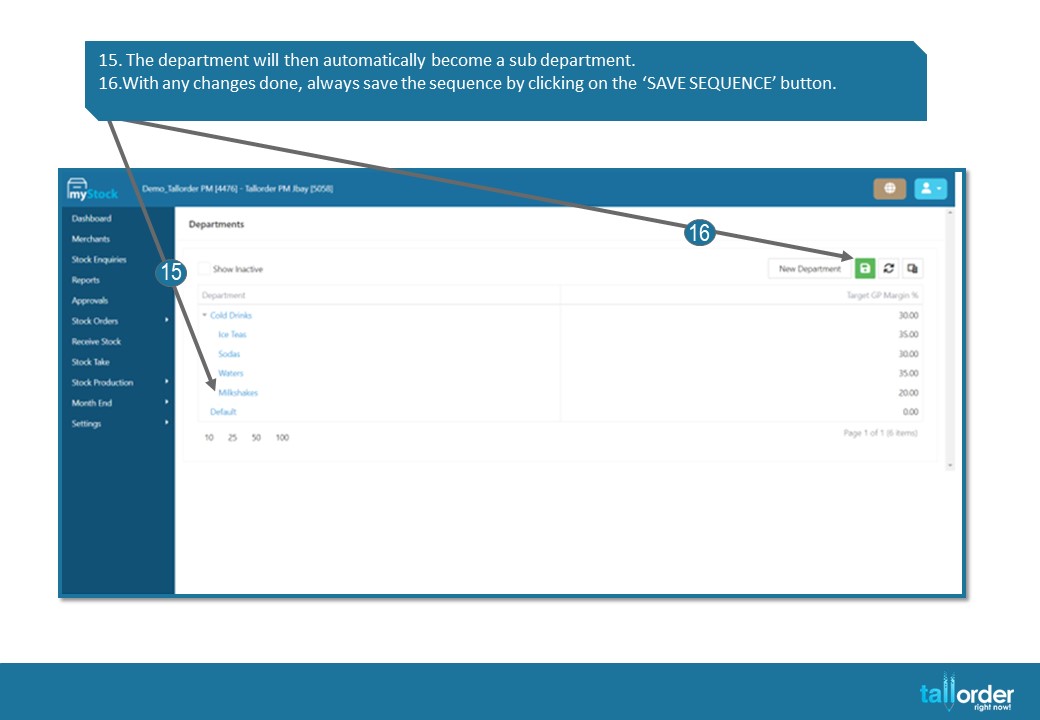
- The department will then automatically become a sub department.
- With any changes made, always save the sequence by clicking on the ‘SAVE SEQUENCE’ button.
STEP-BY-STEP BREAKDOWN
- When setting up departments, you click on ‘SETTINGS’.
- The settings menu bar will appear, and you click on ‘DEPARTMENTS’
- You will now be directed to your departments list, where all departments which have been created are displayed.
- Click on ‘NEW DEPARTMENT’.
- The new department set-up page will appear. You can now enter the department name e.g. ‘COLD DRINKS’.
- Your ‘TARGET GP MARGIN%’, (target gross profit percentage) can be set here but this is optional and is not required to set-up a department.
- Tick the ‘ACTIVE’ box.
- Click on ‘SELECT’ bar to display your stock locations.
- The stock location list will be displayed with all your stock locations.
- You can click the ‘SELECT ALL’ box, which will automatically tick all stock locations.
- Click on the ‘OK’ button after selecting the stock location.
- After which you click the ‘SAVE’ button to save the new department.
- To make sub departments, you will create the department and then you click on the department name, then drag it to the main department name.
- When the main department’s name is highlighted in blue, you unclick. and it will then automatically become a sub department.
- The department will then automatically become a sub department.
- With any changes made, always save the sequence by clicking on the ‘SAVE SEQUENCE’ button.