
How can we help you?
Summary Sales Report
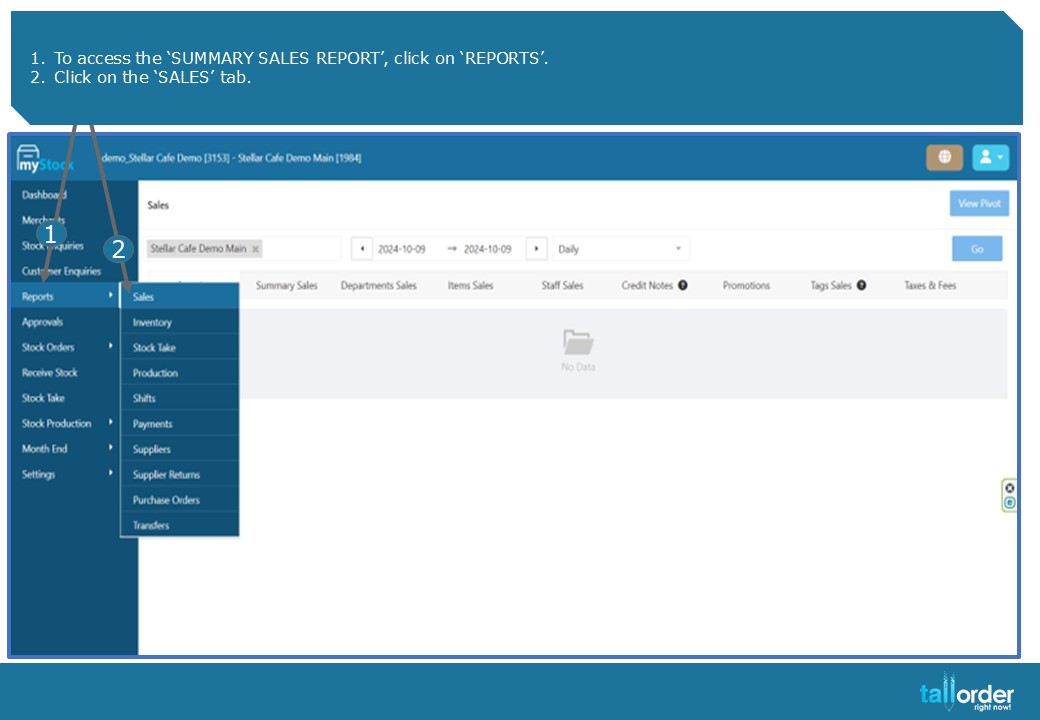 1.To access the ‘SUMMARY SALES REPORT’, click on ‘REPORTS’.
2.Click on the ‘SALES’ tab.
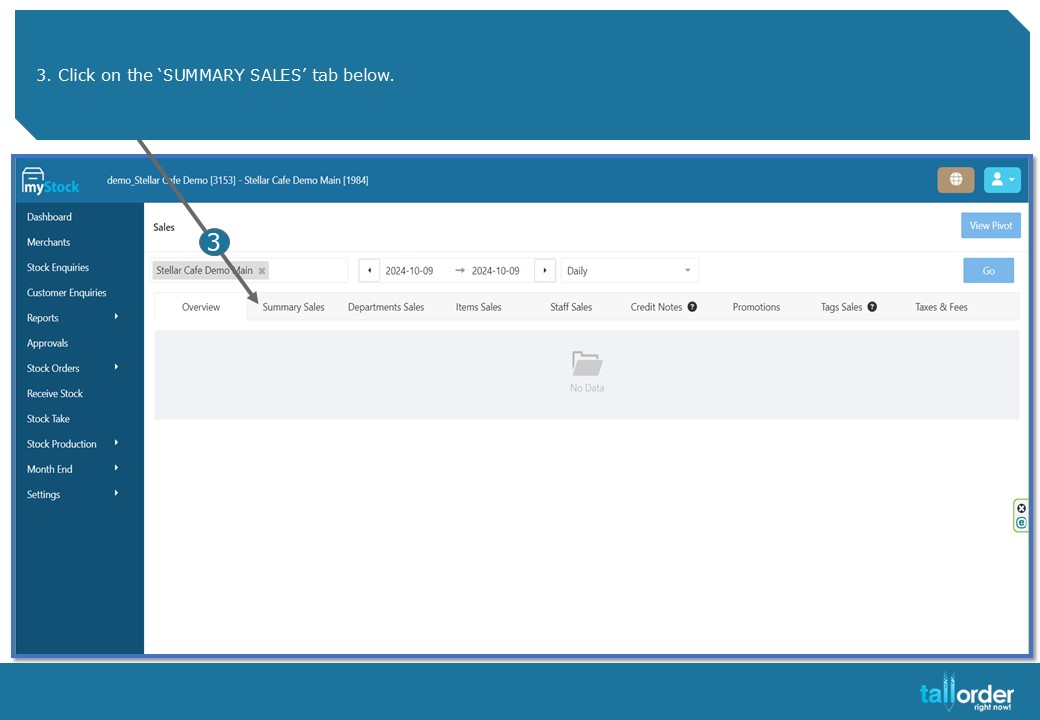
- Click on the ‘SUMMARY SALES’ tab below.
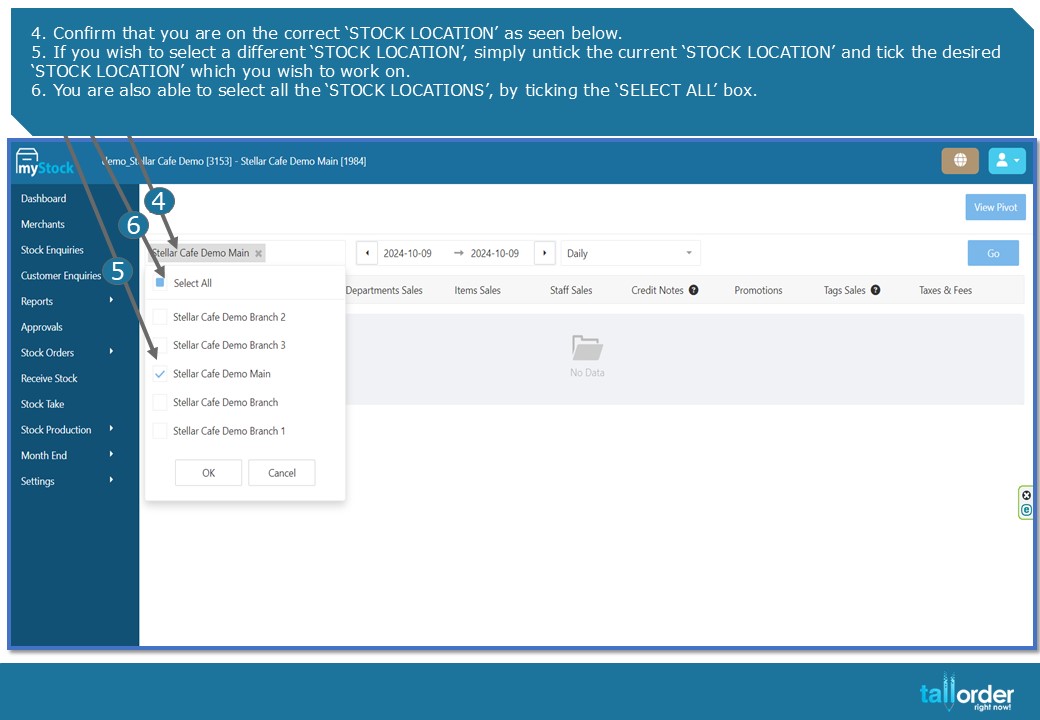
- Confirm that you are on the correct ‘STOCK LOCATION’ as seen below.
- If you wish to select a different ‘STOCK LOCATION’, simply untick the current ‘STOCK LOCATION’ and tick the desired ‘STOCK LOCATION’ which you wish to work on.
- You are also able to select all the ‘STOCK LOCATIONS’, by ticking the ‘SELECT ALL’ box.
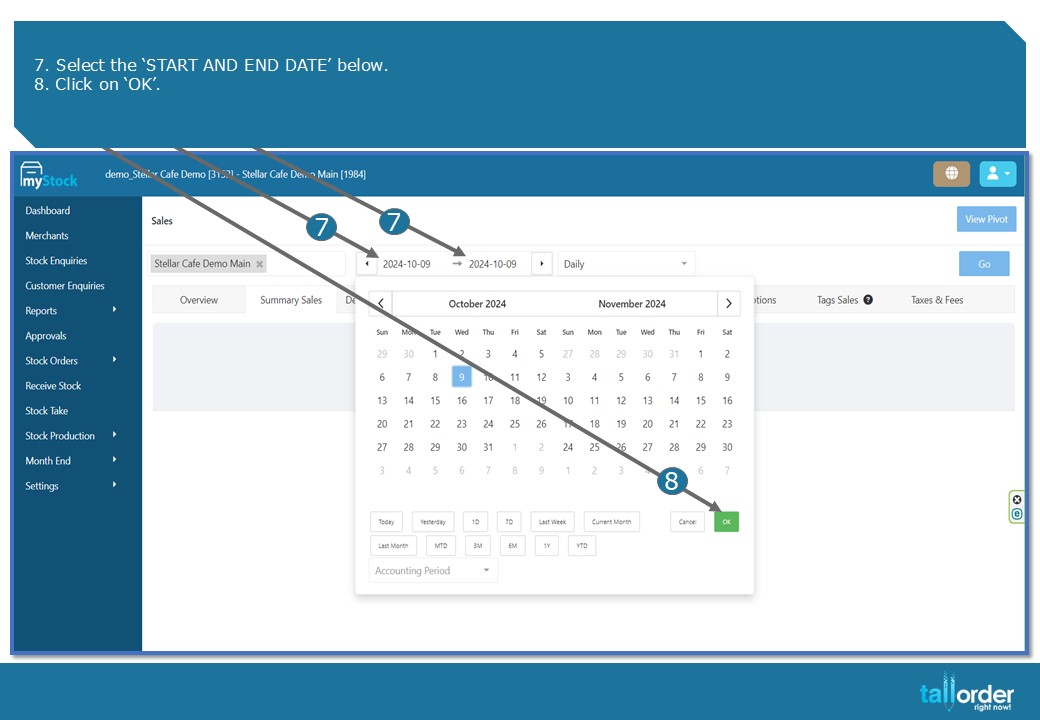
- Select the ‘START AND END DATE’ below.
- Click on ‘OK’.
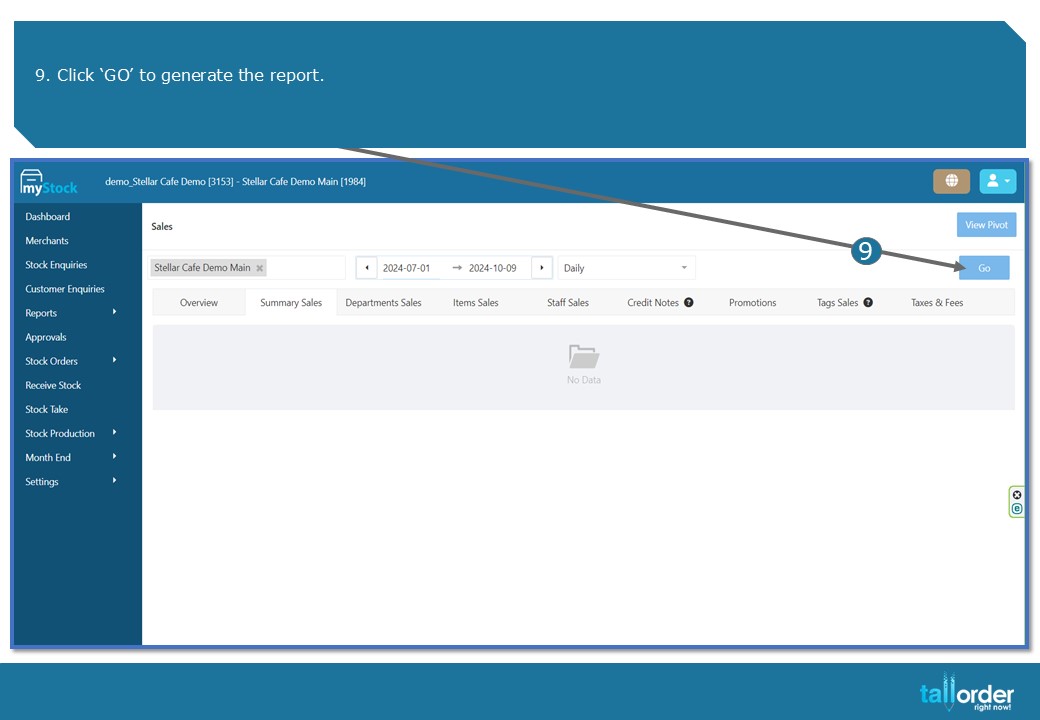
- Click ‘GO’ to generate the report.
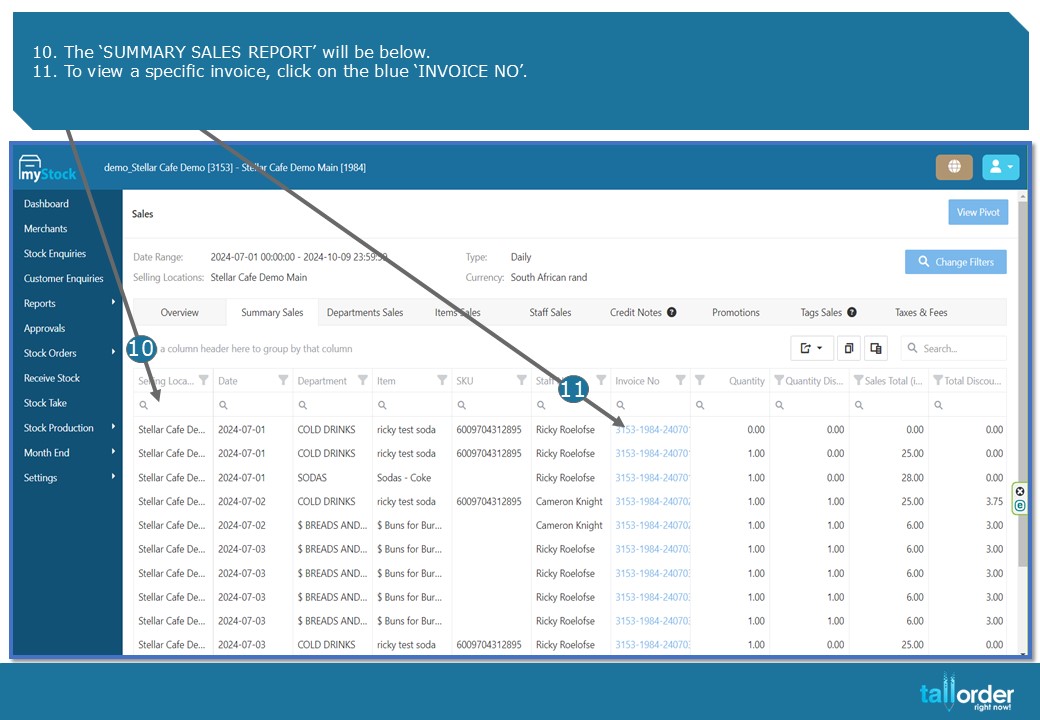
- The ‘SUMMARY SALES REPORT’ will be below.
- To view a specific invoice, click on the blue ‘INVOICE NO’.
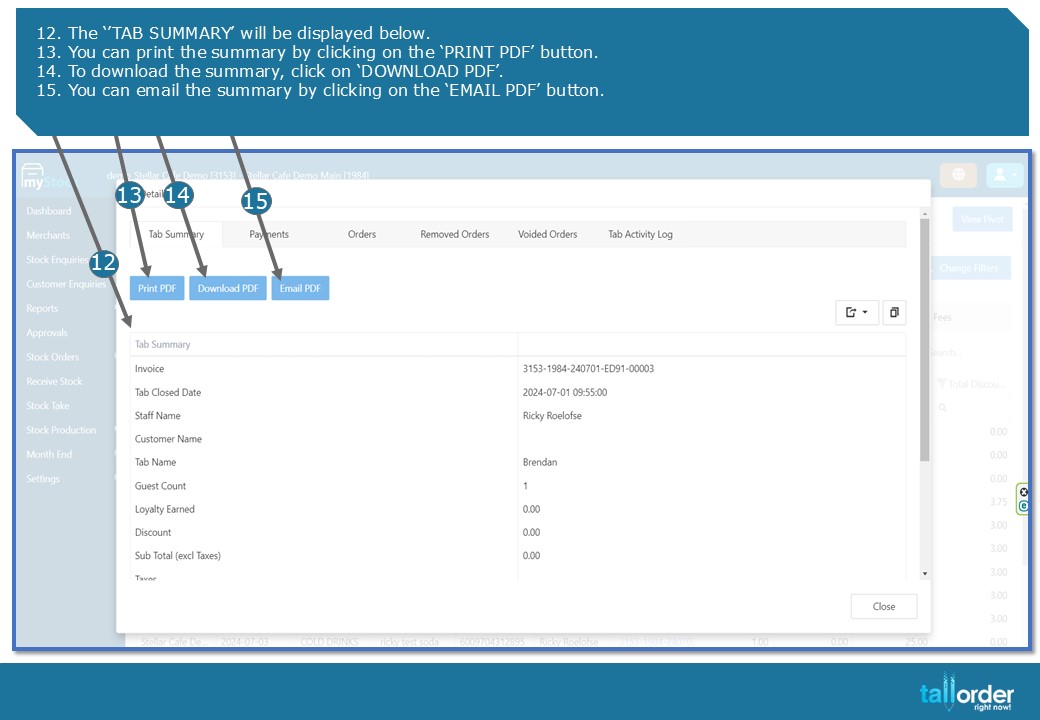
- The ‘’TAB SUMMARY’ will be displayed below.
- You can print the summary by clicking on the ‘PRINT PDF’ button.
- To download the summary, click on ‘DOWNLOAD PDF’.
- You can email the summary by clicking on the ‘EMAIL PDF’ button.
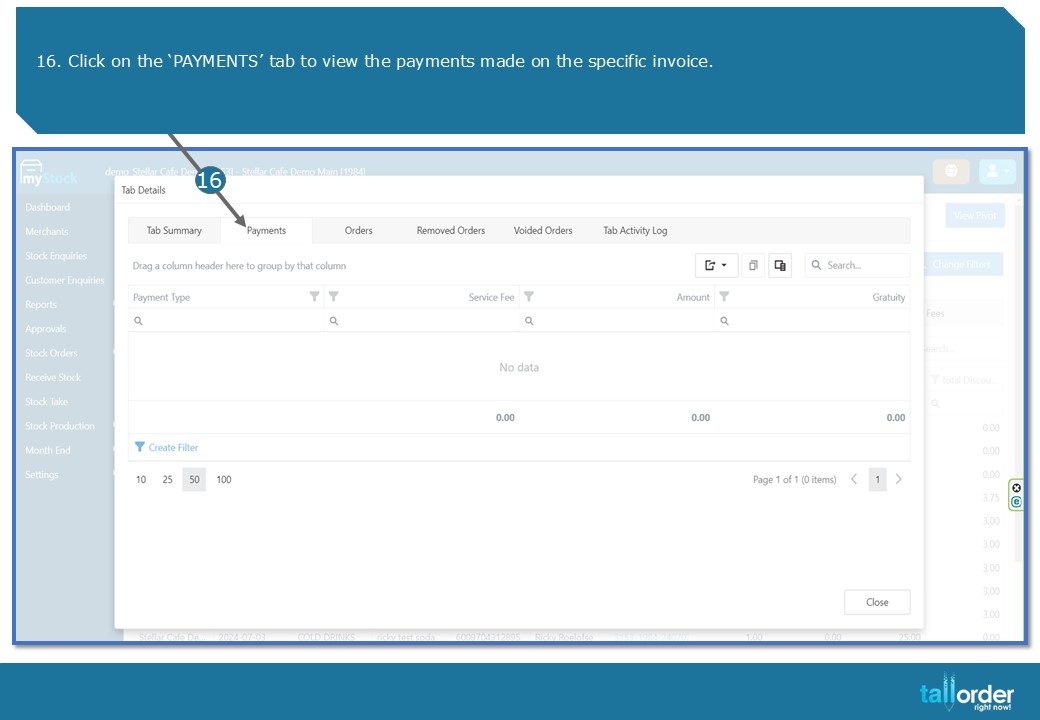
16. Click on the ‘PAYMENTS’ tab to view the payments made on the specific invoice.
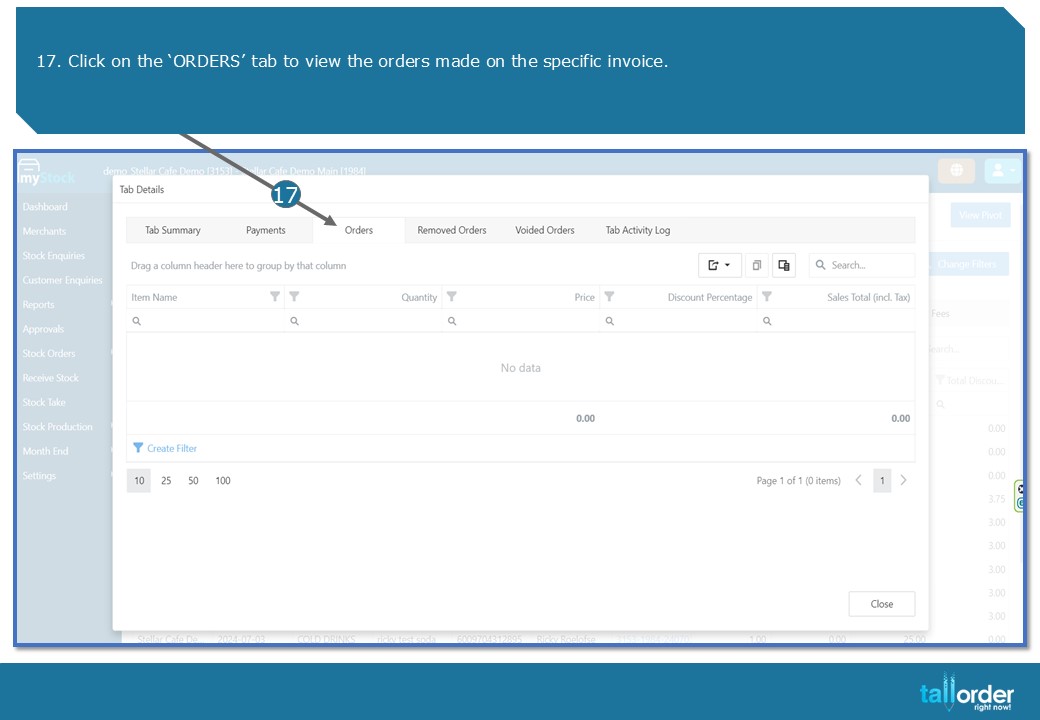
- Click on the ‘ORDERS’ tab to view the orders made on the specific invoice.

- Click on the ‘REMOVED ORDERS’ tab to view the orders that was removed on the specific invoice.

19. Click on the ‘VOIDED ORDERS’ tab to view the orders that was voided on the specific invoice.

- Click on the ‘TAB ACTIVITY LOG’ tab to view the tab activity on the specific invoice.
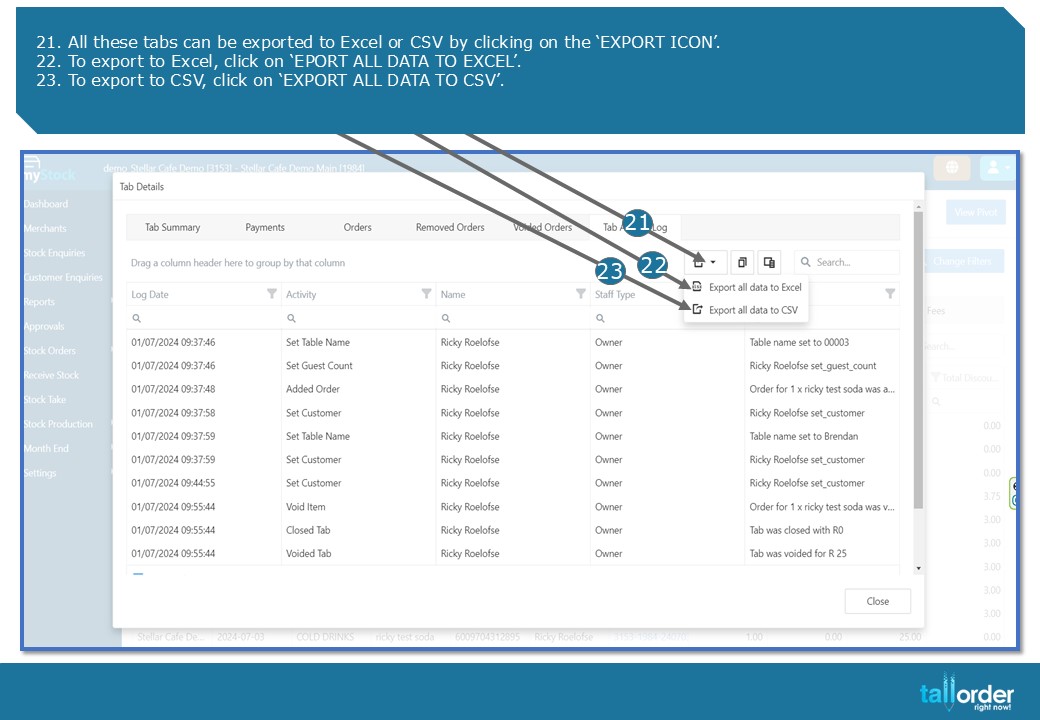
- All these tabs can be exported to Excel or CSV by clicking on the ‘EXPORT ICON’.
- To export to Excel, click on ‘EPORT ALL DATA TO EXCEL’.
- To export to CSV, click on ‘EXPORT ALL DATA TO CSV’.
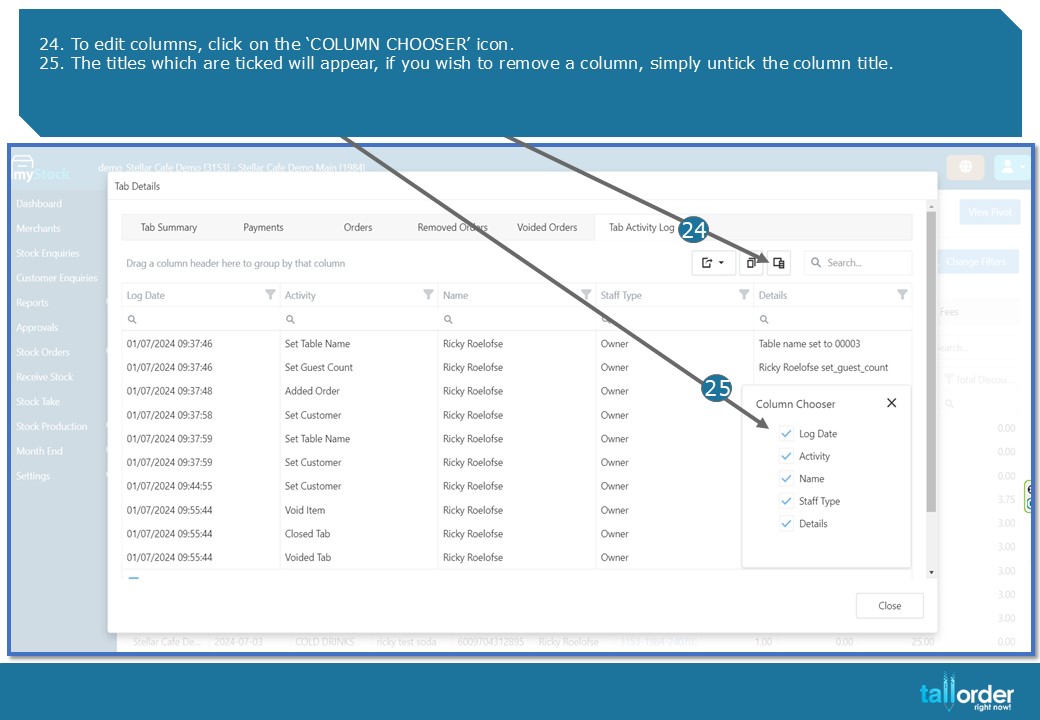
- To edit columns, click on the ‘COLUMN CHOOSER’ icon.
- The titles which are ticked will appear, if you wish to remove a column, simply untick the column title.

- To export the ‘SUMMARY SALES’ report, click on the ‘EXPORT’ icon.
- To export to Excel, click on ‘EXPORT ALL DATA TO EXCEL’.
- To export to CSV, click on ‘EXPORT ALL DATA TO CSV’.
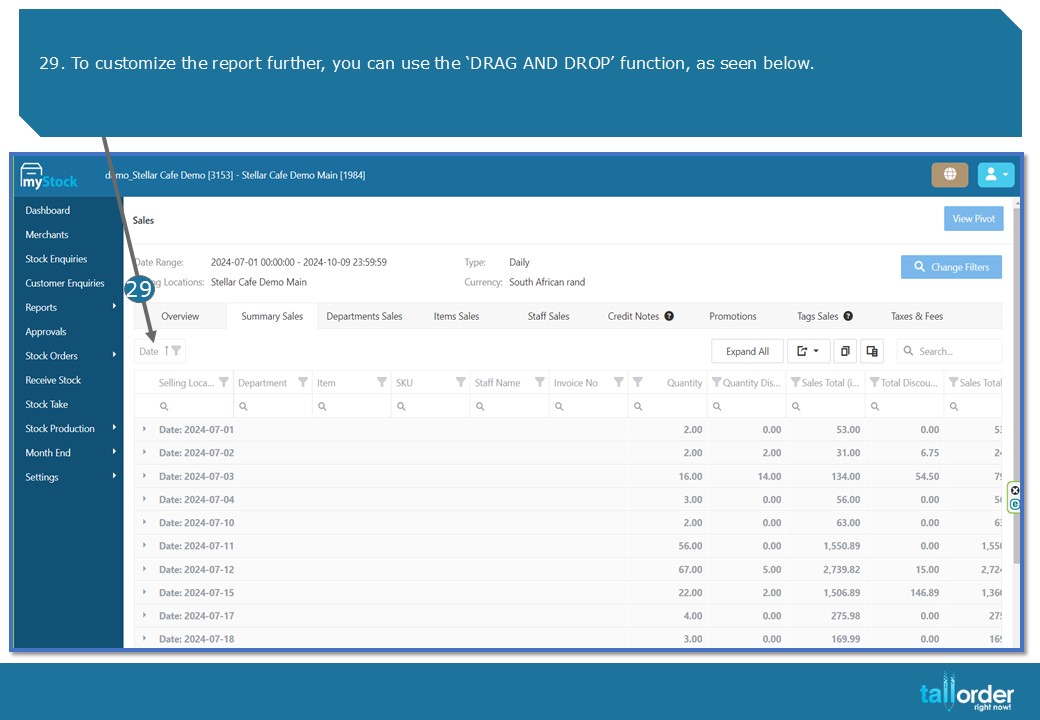
29. To customize the report further, you can use the ‘DRAG AND DROP’ function, as seen below.
STEP-BY-STEP BREAKDOWN
- To access the ‘SUMMARY SALES REPORT’, click on ‘REPORTS’.
- Click on the ‘SALES’ tab.
- Click on the ‘SUMMARY SALES’ tab below.
- Confirm that you are on the correct ‘STOCK LOCATION’ as seen below.
- If you wish to select a different ‘STOCK LOCATION’, simply untick the current ‘STOCK LOCATION’ and tick the desired ‘STOCK LOCATION’ which you wish to work on.
- You are also able to select all the ‘STOCK LOCATIONS’, by ticking the ‘SELECT ALL’ box.
- Select the ‘START AND END DATE’ below.
- Click on ‘OK’.
- Click ‘GO’ to generate the report.
- The ‘SUMMARY SALES REPORT’ will be below.
- To view a specific invoice, click on the blue ‘INVOICE NO’.
- The ‘’TAB SUMMARY’ will be displayed below.
- You can print the summary by clicking on the ‘PRINT PDF’ button.
- To download the summary, click on ‘DOWNLOAD PDF’.
- You can email the summary by clicking on the ‘EMAIL PDF’ button.
- Click on the ‘PAYMENTS’ tab to view the payments made on the specific invoice.
- Click on the ‘ORDERS’ tab to view the orders made on the specific invoice.
- Click on the ‘REMOVED ORDERS’ tab to view the orders that was removed on the specific invoice.
- Click on the ‘VOIDED ORDERS’ tab to view the orders that was voided on the specific invoice.
- Click on the ‘TAB ACTIVITY LOG’ tab to view the tab activity on the specific invoice.
- All these tabs can be exported to Excel or CSV by clicking on the ‘EXPORT ICON’.
- To export to Excel, click on ‘EPORT ALL DATA TO EXCEL’.
- To export to CSV, click on ‘EXPORT ALL DATA TO CSV’.
- To edit columns, click on the ‘COLUMN CHOOSER’ icon.
- The titles which are ticked will appear, if you wish to remove a column, simply untick the column title.
- To export the ‘SUMMARY SALES’ report, click on the ‘EXPORT’ icon.
- To export to Excel, click on ‘EXPORT ALL DATA TO EXCEL’.
- To export to CSV, click on ‘EXPORT ALL DATA TO CSV’.
- To customize the report further, you can use the ‘DRAG AND DROP’ function, as seen below.